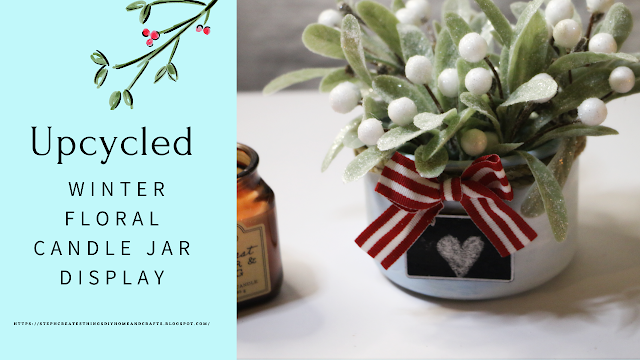
Upcycled Winter Floral Candle Jar Display

 Create a beautiful and sustainable winter floral candle jar display by upcycling an old candle jar. Learn how to make this DIY project and add a cozy touch to your home decor.

Hi everyone! Today we're going to work on creating an upcycled winter floral candle jar display. This craft is so simple and uses a candle jar that you may already have on hand.

If you're ready, grab your materials, and we will get started with creating this simple craft.

faux winter floral inside of painted blue candle jar, with mini chalkboard and bow.

Video tutorial

Materials needed

Materials such as chalk, glass jar, acrylic paint, scissors, rope, and scissors


One candle Jar

I am reusing an old candle jar

Winter floral 

I'm using mistletoe that I purchased at the Target Dollar Spot, and it came with a bow attached 

One bow -this is optional

One mini chalkboard 

Purchased at Dollar Tree

 Acrylic All surface paint

I'm using a light blue and white

Rope/Twine

Hot glue

Paintbrush

Wire cutter

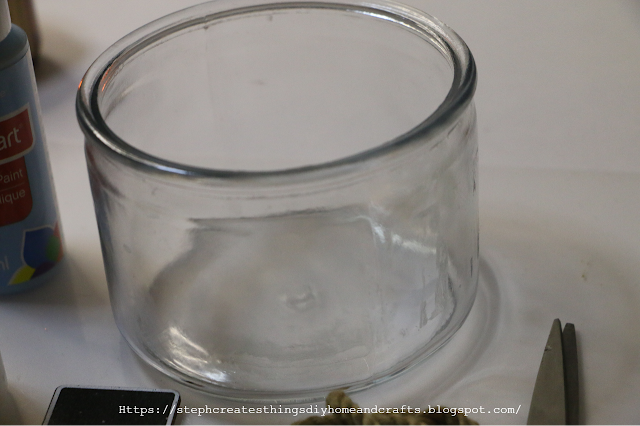
Glass candle jar


Glass candle jar

Begin by taking your candle jar, and removing all labels. I soaked my jar in warm water and with a Dawn dish soap. After soaking it for about 10 minutes, remove it from the water, and give it a scrub. 

Once you have removed all labels, make sure to completely dry your candle jar.

Painted glass candle jar
Take your white paint and apply a layer of paint over your jar. I painted around the jar, and around the top opening of my candle jar as well. Set it aside and allow it to dry, or you can take a blow dryer and help it dry a little quicker.
Acrylic paint with glass jar
Once your first layer of paint has dried, take your blue paint, and combine it with a little white paint. Apply another layer of paint over the first coat. And just repeat the process from earlier.
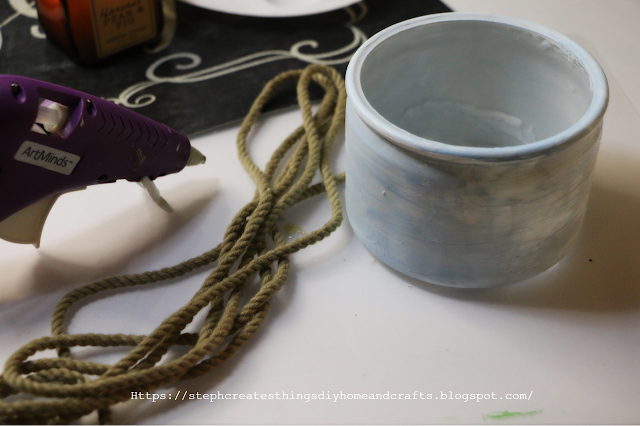
Hot glue, rope, and painted glass jar

Painted candle jar with rope wrapped around the top portion of jar

Take your rope, and begin to add your hot glue around the top portion of your jar. Place your rope over the areas where you have added your hot glue. Once you get to the end, just cut off any excess rope. Repeat this process with your rope, and add a second section.

Faux winter foliage

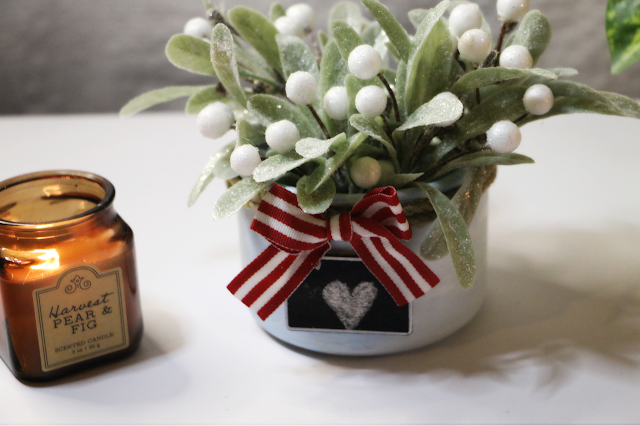
Once that is complete you can take your floral, cut it to size, and arrange the floral inside the jar. Take your bow, apply a small amount of hot glue, and add it to the front side of your jar. 

Just below your bow, you can add your mini chalkboard. Apply a small amount of glue on the back side and gently press it onto your jar. 

This is optional, but if you would like you can write, or draw on your mini chalkboard. I added a heart on my chalkboard. 

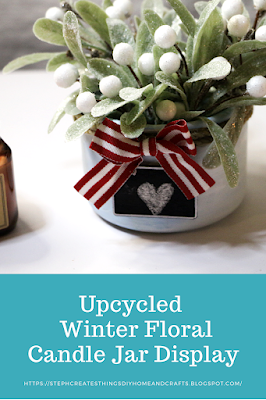
faux winter floral inside of painted blue candle jar, with mini chalkboard and bow

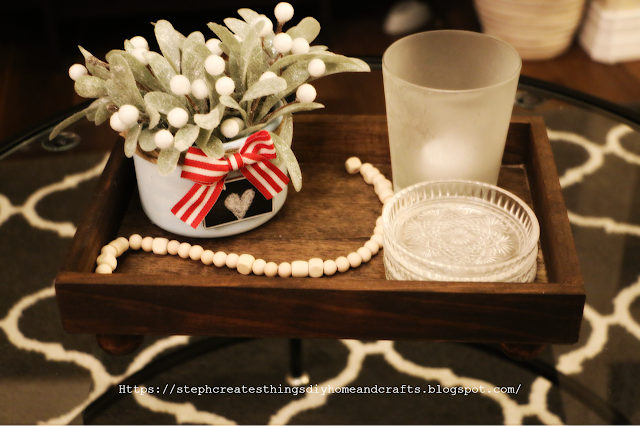
faux winter floral inside of painted blue candle jar, with mini chalkboard and bow. Displayed on wooden tray
Your upcycled winter floral candle jar is complete. Thank you so much for visiting and creating with me. I will see you soon.

You might also like

Easy DIY Wood Home Decor Design

DIY Mini Wood Ladders With Holiday Decorations

Pin/Save/Share

Pinterest pin showing faux winter floral inside of painted blue candle jar, with mini chalkboard and bow


Comments

  1. So pretty, and a lovely way to use an old candle jar. Thanks for sharing with us at Handmade Monday :-)

    ReplyDelete
    Replies
    1. Thank you so much! I love sharing at Handmade Monday link party. :)

      Delete
  2. I love checking out blogs to find new ideas to be more creative and get the juices flowing.
    I visited you via Thinking Out Loud Thursday: What I Read in October 2023
    I linked up this week with = 27+28+29. Hope you will join us M-S SeniorSalonPitStop and W-S #WordlessWednesday. You will find both under BLOGGING.

    ReplyDelete
    Replies
    1. I appreciate that so much. I'm always happy to share my creations with all of you. :)

      Delete

Post a Comment

Thank you so much for taking the time to leave a comment. Your comments brighten my day. I hope that you know that it is appreciated. I do my best to respond to every comment. If you have a question, please feel free and ask away!

Popular posts from this blog

Easy 4th Of July Metal hanging design

 Hello everyone! How have you been? I wanted to share this super easy decoration with all of you. I created this simple metal hanging decoration for the 4th of July. I absolutely love how it turned out. I found this metal holder at my local Dollar Tree. I haven't seen it in the store before. I was excited to find this and brainstorm for my next project. As always, the material list is below. I will walk you through each step of creating your very own.  Video tutorial Materials One metal hanging holder Mod Podge  Tulle or ribbon Acrylic paint Craft foam block Foam scatter stars Faux flowers One decorative napkin Scissors Floral cutters Hot glue Three craft sticks Twine Applying paint to metal design Start by taking your paintbrush and applying your acrylic paint to your metal holder. I only used my paint on the metal surface. When applying the acrylic paint I noticed it does go on smoothly. You could prep the metal surface if you are concerned about the paint not adhering to the met

DIY Dollar Tree Floral Painted Tray

Hey everyone! Today, I want to show you how to transform a small Dollar Tree tray by adding painted floral art to give it a fresh new look. This DIY tutorial uses affordable supplies from Dollar Tree and is perfect for adding a personalized touch to your home decor. DIY Floral Painted Tray Video Tutorial Materials One small wooden tray - 5x7 inches Paintbrush Acrylic paint Mod Podge Applying paint to the tray Start by painting the main section of your tray Then, use a second paint color to cover the front and sides of the tray. For my tray, I used both white and light blue. Creating your flower vase Creating the flower vase was quite simple. I used a smaller paintbrush to create two lines opposite each other. After making the lines, I filled the middle section between them with paint. Creating your flowers I chose shades of purple, pink, blue, and yellow for my flowers. I created both smaller and medium-sized flowers using my smaller paintbrush. I created leaves using a mixture of ligh

DIY Mini Wood Lantern

  Hello everyone. I'm so excited to share this mini wood lantern craft with you all. I recently bought a box of wood tumbling blocks from Dollar Tree, and I wasn't sure what I was going to create with them. I decided since I also had some wood craft popsicle sticks on hand that I would use those with the blocks, and create a mini wood lantern. This project took around 30 minutes, but I promise you, you will just love how it all comes together with just a few materials. If you're ready, I'd love it if you created it with me!  Video tutorial Materials One pack of wood tumbling blocks  I purchased mine at my local Dollar Tree Ten wood craft popsicle sticks Paint  I'm using black paint, I also had some antique white paint on hand, but I went with black paint Hot glue Twine Faux floral, and greenery One medium-sized bead One battery-operated candle Floral snips Scissors Building the top and bottom sections of the lantern Start by taking five of your tumbling blocks. Usin

Celebrate in Style: DIY Patriotic Napkin Rings

Hey everyone! I hope you're doing well. Today, I want to share an easy DIY project. We're going to make patriotic napkin rings using just a few materials. I usually find extra craft supplies in my craft bins because I often shop craft sales at the stores. I got the wooden stars and rings from my local Hobby Lobby store. The great thing about this project is that it's easy and quick. I'll provide you with a materials list and a step-by-step tutorial. Video tutorial Celebrate in Style: DIY Patriotic Napkin Rings Materials Acrylic paint  Gem strips (I'm using the gem strips from Dollar Tree)  E6000 or hot glue  Paintbrush  Wooden stars  Wood rings size 1.89in (4.8cm) Start by painting each of your wooden rings and stars. I chose to paint my rings white. Apply the paint to each ring's outer, back, and inner surface. For the stars, I went with red, white and blue. Next, we will attach the gem strips to each ring. Before adding the gem strips, attach each star to a wo

Design your very own organizer using Dollar Tree Items

  Learn how to design and create your own personalized organizer using affordable Dollar Tree items. Get creative with materials and follow these easy DIY steps to make a unique and functional organizer for your home or office space. Hi everyone! I hope that you are doing well. Recently I took a trip to my local Dollar Tree and found these stackable plastic organizers.  Today we're going to design our very own organizer. To create your organizer you will only need a few materials. Most of my materials were purchased at my local Dollar Tree store. You will need three of the plastic organizing drawers.  Be sure to check out my YouTube channel for more DIY tutorials-- For more DIY Tutorials Click here! And I would love it if you subscribed to the channel DIY Organizer video tutorial below Materials THREE STACKABLE ORGANIZING DRAWERS 5X5X1.75 IN ASSORTED FAUX PEARL BEADS SMALL WOOD BEADS PEEL AND STICK FLORAL DECALS PEEL AND STICK DECORATIVE PAPER HOT GLUE PAINT- I'M USING ACRYLIC

How to Create an Artificial Succulent Birdhouse Decoration

  Hello everyone! I have a quick and easy DIY craft project to share with you. I wasn't sure what to do with the second birdhouse I purchased at my local Dollar Tree a while back. If you follow me, you probably know how much I love succulents, especially faux ones. So, why not design a birdhouse with a faux succulent roof? I would love it if you could create one with me. The process is simple, and I'll take you through a full materials list. Video tutorial How to Create an Artificial Succulent Birdhouse Decoration To make the birdhouse design, you will need the following materials: - One craft birdhouse (you can buy it at Dollar Tree) - Assorted faux succulents - Craft moss - Artistic paint (Espresso in this case) - Paintbrush - Hot glue Applying paint to the birdhouse Start by applying acrylic paint to your birdhouse. Use Espresso color, and add a small amount of water to thin out the paint. This will result in a stained finish without having to use stain. After applying the p

DIY Patriotic Book Stack using Dollar Tree Wooden Crate

Hey everyone! I hope you're doing well. Today, I want to share an easy DIY project with you. We'll make a patriotic book stack using a wooden crate from Dollar Tree. If you follow my blog, you probably know how much I enjoy creating these simple book stacks for different occasions. Video tutorial Create your very own Patriotic Book Stack  Here are the materials you'll need: - One wooden crate box (you can find these at Dollar Tree or any craft store) - Paintbrush - Acrylic paint in red, white, and blue - Faux floral - Twine or craft string - Sticker letters or a cutting machine to create your lettering and embellishments (I used my Cricut Machine to create the stars) Adding paint to the wooden crate  Start by painting the wooden crate box. Previously I had painted mine black, but for this project, I wanted to paint it red, white, and blue. I began by applying white paint over the black paint. Then, I added red and blue paint to two sections on the front of the box, leaving

How to Make a Charming Tea Bag Holder Using a Garden Pot and Wood Circle

  Are you a tea lover looking for a creative DIY project? Learn to create a unique tea bag holder using a garden pot, wood circle, wooden bead, and paper floral decorations. Get inspired and add a personal touch to your tea time. Today, we will make a tea bag holder using a garden ceramic pot and a wooden circle. This holder is both functional and cute. Below, I will provide a list of materials and step-by-step instructions. Video tutorial How to Make a Charming Tea Bag Holder Using a Garden Pot and Wood Circle Materials  Garden pot- I'm using a white 4inch planter pot (The one I am using is a ceramic pot)  One wood circle- I picked up a pack of 6  3'' wood circles at my local Walmart store for $1.80 Mod Podge Decorative napkin Paintbrush One medium or large wooden bead Paper flowers and leaves Adhesive Scissors White acrylic paint Letter stamps Stamp ink Preparing your decorative napkin and Mod Podge Let's begin by taking a decorative napkin and removing the second lay