
Upcycled Winter Floral Candle Jar Display

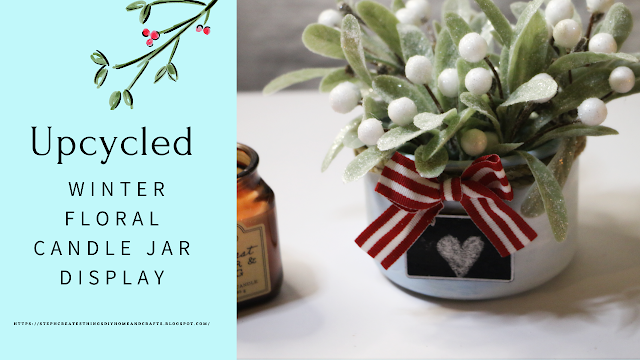
 Create a beautiful and sustainable winter floral candle jar display by upcycling an old candle jar. Learn how to make this DIY project and add a cozy touch to your home decor.

Hi everyone! Today we're going to work on creating an upcycled winter floral candle jar display. This craft is so simple and uses a candle jar that you may already have on hand.

If you're ready, grab your materials, and we will get started with creating this simple craft.

faux winter floral inside of painted blue candle jar, with mini chalkboard and bow.

Video tutorial

Materials needed

Materials such as chalk, glass jar, acrylic paint, scissors, rope, and scissors


One candle Jar

I am reusing an old candle jar

Winter floral 

I'm using mistletoe that I purchased at the Target Dollar Spot, and it came with a bow attached 

One bow -this is optional

One mini chalkboard 

Purchased at Dollar Tree

 Acrylic All surface paint

I'm using a light blue and white

Rope/Twine

Hot glue

Paintbrush

Wire cutter

Glass candle jar


Glass candle jar

Begin by taking your candle jar, and removing all labels. I soaked my jar in warm water and with a Dawn dish soap. After soaking it for about 10 minutes, remove it from the water, and give it a scrub. 

Once you have removed all labels, make sure to completely dry your candle jar.

Painted glass candle jar
Take your white paint and apply a layer of paint over your jar. I painted around the jar, and around the top opening of my candle jar as well. Set it aside and allow it to dry, or you can take a blow dryer and help it dry a little quicker.
Acrylic paint with glass jar
Once your first layer of paint has dried, take your blue paint, and combine it with a little white paint. Apply another layer of paint over the first coat. And just repeat the process from earlier.
Hot glue, rope, and painted glass jar

Painted candle jar with rope wrapped around the top portion of jar

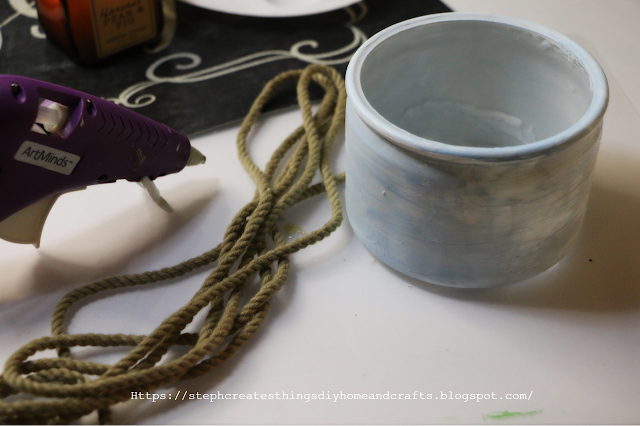
Take your rope, and begin to add your hot glue around the top portion of your jar. Place your rope over the areas where you have added your hot glue. Once you get to the end, just cut off any excess rope. Repeat this process with your rope, and add a second section.

Faux winter foliage

Once that is complete you can take your floral, cut it to size, and arrange the floral inside the jar. Take your bow, apply a small amount of hot glue, and add it to the front side of your jar. 

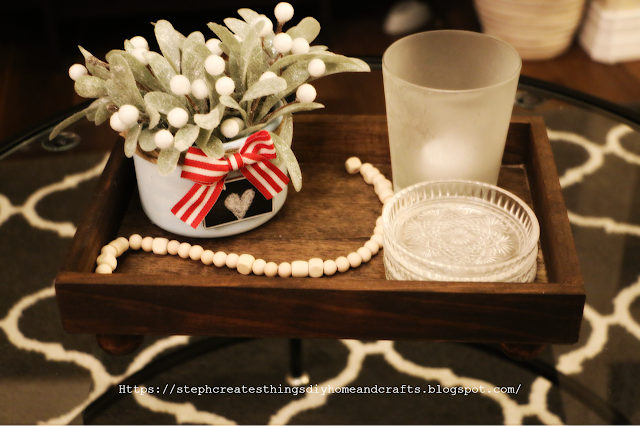
Just below your bow, you can add your mini chalkboard. Apply a small amount of glue on the back side and gently press it onto your jar. 

This is optional, but if you would like you can write, or draw on your mini chalkboard. I added a heart on my chalkboard. 

faux winter floral inside of painted blue candle jar, with mini chalkboard and bow

faux winter floral inside of painted blue candle jar, with mini chalkboard and bow. Displayed on wooden tray
Your upcycled winter floral candle jar is complete. Thank you so much for visiting and creating with me. I will see you soon.

You might also like

Easy DIY Wood Home Decor Design

DIY Mini Wood Ladders With Holiday Decorations
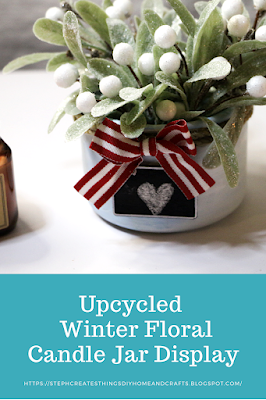
Pin/Save/Share

Pinterest pin showing faux winter floral inside of painted blue candle jar, with mini chalkboard and bow


Comments

  1. So pretty, and a lovely way to use an old candle jar. Thanks for sharing with us at Handmade Monday :-)

    ReplyDelete
    Replies
    1. Thank you so much! I love sharing at Handmade Monday link party. :)

      Delete
  2. I love checking out blogs to find new ideas to be more creative and get the juices flowing.
    I visited you via Thinking Out Loud Thursday: What I Read in October 2023
    I linked up this week with = 27+28+29. Hope you will join us M-S SeniorSalonPitStop and W-S #WordlessWednesday. You will find both under BLOGGING.

    ReplyDelete
    Replies
    1. I appreciate that so much. I'm always happy to share my creations with all of you. :)

      Delete

Post a Comment

Thank you so much for taking the time to leave a comment. Your comments brighten my day. I hope that you know that it is appreciated. I do my best to respond to every comment. If you have a question, please feel free and ask away!

Popular posts from this blog

Dollar Tree Mini Bead Floral Spring Wreaths

Transform Dollar Tree's mini bead wreaths into beautiful spring floral bead wreaths with this easy DIY tutorial. Add a touch of spring to your home decor with this creative and budget-friendly project.  I'm excited to share a quick and simple DIY project with you today. Last year, I purchased two mini bead hanging decorations displayed with the fall decor. I decided to add them to my craft stash and use them in the springtime. In this tutorial, I will show you how to create mini bead floral wreaths and provide a full list of materials needed for each step.  Dollar Tree Mini Bead Floral Spring Wreaths Video tutorial Materials Round mini beaded hanging decorations Artificial floral accents One large craft/popsicle stick Paintbrush Acrylic paint Floral cutters Hot glue/Adhesive Step one: Applying paint Before painting, remove any previous decorations such as the plaid autumn leaves that were attached to the wreaths I'm using. To start with, apply paint to your beaded wreath. Y

Transforming Ice Cream Cups: DIY Spring Tea Cup Floral Arrangements

  Today, we'll explore a fun and easy DIY project involving repurposing plastic mini ice cream cups into beautiful spring tea cup floral arrangements. This project is a great way to add a touch of spring to your home decor.  Before throwing away those plastic cups, consider the many possibilities in creating something new.  For this project, you will only need a few materials. Our main materials for creating the faux tea cup will be the ice cream cup and air-dry clay. So, if you're ready to create this adorable and creative springtime tea cup floral decoration, let's begin! VIDEO TUTORIAL Materials Plastic ice cream cups (I am reusing two plastic ice cream cups) Spanish moss Floral Mod Podge Decorative floral napkin Artificial spring flowers Acrylic paint (I'm using white) Paintbrush  Optional- Bumblebee button and small dowel rod- Dimensions : 0.1 inches x 6 inches. Air dry clay Scissors Foam block Preparing your cups After washing your ice cream cups and drying them c

DIY Spring Flower Terra Cotta Pot

Hello everyone! Today, I'm excited to share a simple re-do craft that will transform a plain terra cotta pot into a beautiful spring gift. I'm reusing one of my old terra cotta pots from a previous project for this craft.-  Spring Floral Clay Pot Design  With just a few easy steps, I'll show you how to create a stunning spring flower pot display that would make the perfect Mother's Day gift, or just to welcome Spring. Let's get started! DIY Spring Flower Terra Cotta Pot Video tutorial Materials Artificial flowers One terra cotta pot (I'm reusing a pot from a previous craft) Acrylic paint Craft stick Faux pearl embellishments Foam block Adding paint and other designs I used a pot that was previously painted and had some twine added to it. I decided to keep the existing paint and twine and add a few painted flowers to the pot. For the flowers, I used light purple and blue for the petals, and white for the center of each flower. Adding embellishments I decided to a

Eco-Friendly Crafting: How to Make a Beautiful Flower Holder from Cardboard

Discover how to create a beautiful flower holder from cardboard in an eco-friendly way. Hello everyone, today I'm excited to share an eco-friendly crafting project with you.  While cleaning up my wrapping paper collection, I noticed the paper roll had run out, leaving only the cardboard paper center. Instead of throwing it away, it would be a great opportunity to reuse the paper and create something beautiful.  Video tutorial Materials - Cardboard paper (preferably thicker wrapping paper) - Faux flowers (such as tulips and greenery) - Two fabric hearts and butterfly stickers - Two craft clothespins - Hot glue or glue stick - Twine -Hole puncher - Optional faux flexible flowers to wrap around the twine. Step one: Preparing the paper To get started, cut a piece of cardboard paper. Make sure to choose a size that will fit the flowers you plan to use later on in the craft. The size of the section should be large enough to accommodate the flowers in the center of the sleeve. For my proj

DIY Wood Riser with Floral Design

 Hello everyone! I hope you're doing well. Today, I'm excited to share a beautiful wood riser you can use to decorate your home. We'll be creating it using only a few materials, and for this project specifically, I'll be using the unfinished rectangle natural wood box from Walmart. I'll provide a detailed list of all required materials and step-by-step instructions. Video tutorial DIY Wood Riser with Floral Design Materials Unfinished rectangle natural wood box -6" x 8" x .75" 3" peg people (these are used for the legs on the wooden riser) Adhesive (I'm using Hot glue) You can also use E6000 Decorative floral napkin Mod Podge 7" One unpainted wood home word sign Scissors Paintbrush Applying paint to wood frame and home sign Begin by applying paint to the wooden box and the home word sign. Mix two paint colors together and use them for the wooden box and home sign. Adding the decorative napkin and Mod Podge Next, use scissors to cut out d

Wood Box With Glass Bottles Decorative Centerpiece

Hi everyone! I hope that you are all doing well. It has been pretty rainy these past few days. I'm enjoying the rainy weather compared to the really hot days we were getting before.  Today we are working on building a wood box centerpiece. Instead of using the wood crate boxes from Dollar Tree, I wanted to build my own box. For this project, we're using a wood fence picket. I paid $1.48 for one picket, and you can create two boxes with just this one picket. I'm also going to reuse my glass Frappuccino bottles. I will provide a video tutorial as well.  Video tutorial Materials   One wood fence picket- I purchased mine at my local Lowe's for $1.48 Two glass bottles-I am reusing my Starbucks glass bottles Paint Paintbrush Faux greenery Rub-on transfers Wood glue Corner clamps Hot glue One round wooden circle Floral snips Scissors Begin by cutting your wood fence picket. Cut the short ends of your wood 2½ inches. Next, cut the front, back, and bottom of your wood 6¼ inches.

Upcycled Tin Container Solar Light Display

  Happy Wednesday! I hope that you are all doing well. Today we're working on an upcycled project using a tin can, solar light, and a few other materials.  Upcycled Tin Container Solar Light Display Video tutorial Materials  Tin can-If you have a tin can around your house, this project is perfect to reuse your tin can.  I'm using a Wasabi tin can Paint- I'm using black chalk paint One paint brush Butterfly stickers- Purchased at Dollar Tree (I am using pop-up stickers, and they are not waterproof. My display is being displayed on a screened-in porch. Other options are vinyl stickers or another material that may be waterproof. Faux succulents- They have a variety at Dollar tree, and also at Walmart. I purchased my succulents from a few different stores Hot glue One solar light-Purchased at Dollar Tree Scissors Optional- Craft rocks or marbles- This can be placed on the inside of your tin can, to help weigh it down. Floral snips Take some of your black chalk paint, and apply

Fall Fox Garland: Easy and Affordable DIY Decor with Dollar Tree Items

Create a beautiful fall-themed fox garland using affordable Dollar Tree items. This easy and inexpensive DIY decor project will add a touch of seasonal charm to your home. Follow our step-by-step guide to make your own fall fox garland today. Hello everyone! I'm excited to share an effortless garland design with you all. Our project today involves creating a garland using fox ornaments purchased from Dollar Tree. We will also incorporate wooden mini-leaf embellishments and faux floral to add a wonderful touch. You can find a complete list of materials below. Video tutorial Creating your fall fox garland Materials  Mod Podge Paintbrush Acrylic paint Mini wood leaf embellishments Fox ornaments  Decorative napkin I'm also using a mini-craft iron  Parchment paper Hot glue Craft knife Sandpaper Adding the decorative napkin to the wooden foxes using Mod Podge To prepare the wooden fox for decorating, start by removing the bottom layer of the napkin. If you have a mini craft iron, it