Summer Craft: DIY Paper Plate Watermelon Flower Hanger

Hey everyone! I'm excited to show you a fun and easy craft. Today, we will be making a summer watermelon floral hanging design using a paper plate. This DIY project is easy to create and fun to welcome the summer season. You'll make this watermelon floral hanging design to display your artificial flowers creatively. It's also a great way to use any extra paper plates you may have lying around and aren't sure what to do with. You may have extras from a birthday party or a BBQ. If you're ready, let's get started creating your floral hanging design!

Paper Plate watermelon flower hanging design

Video tutorial
Summer Craft: DIY Paper Plate Watermelon Flower Hanger

Close up on paper plate watermelon flower hanger

Materials,-paint, faux flowers, paintbrush, and paper plate

Materials:
- Paintbrush
- Artificial flowers
- Paper plate (any size you prefer)
- String or craft twine
- Scissors
- Hot glue
Optional-Hole Puncher

Paper plate and scissors

Start by cutting the paper plate in half.

Paper plate cut in half

Paper plate, paintbrush, and paint

painted paper plate and light green paint
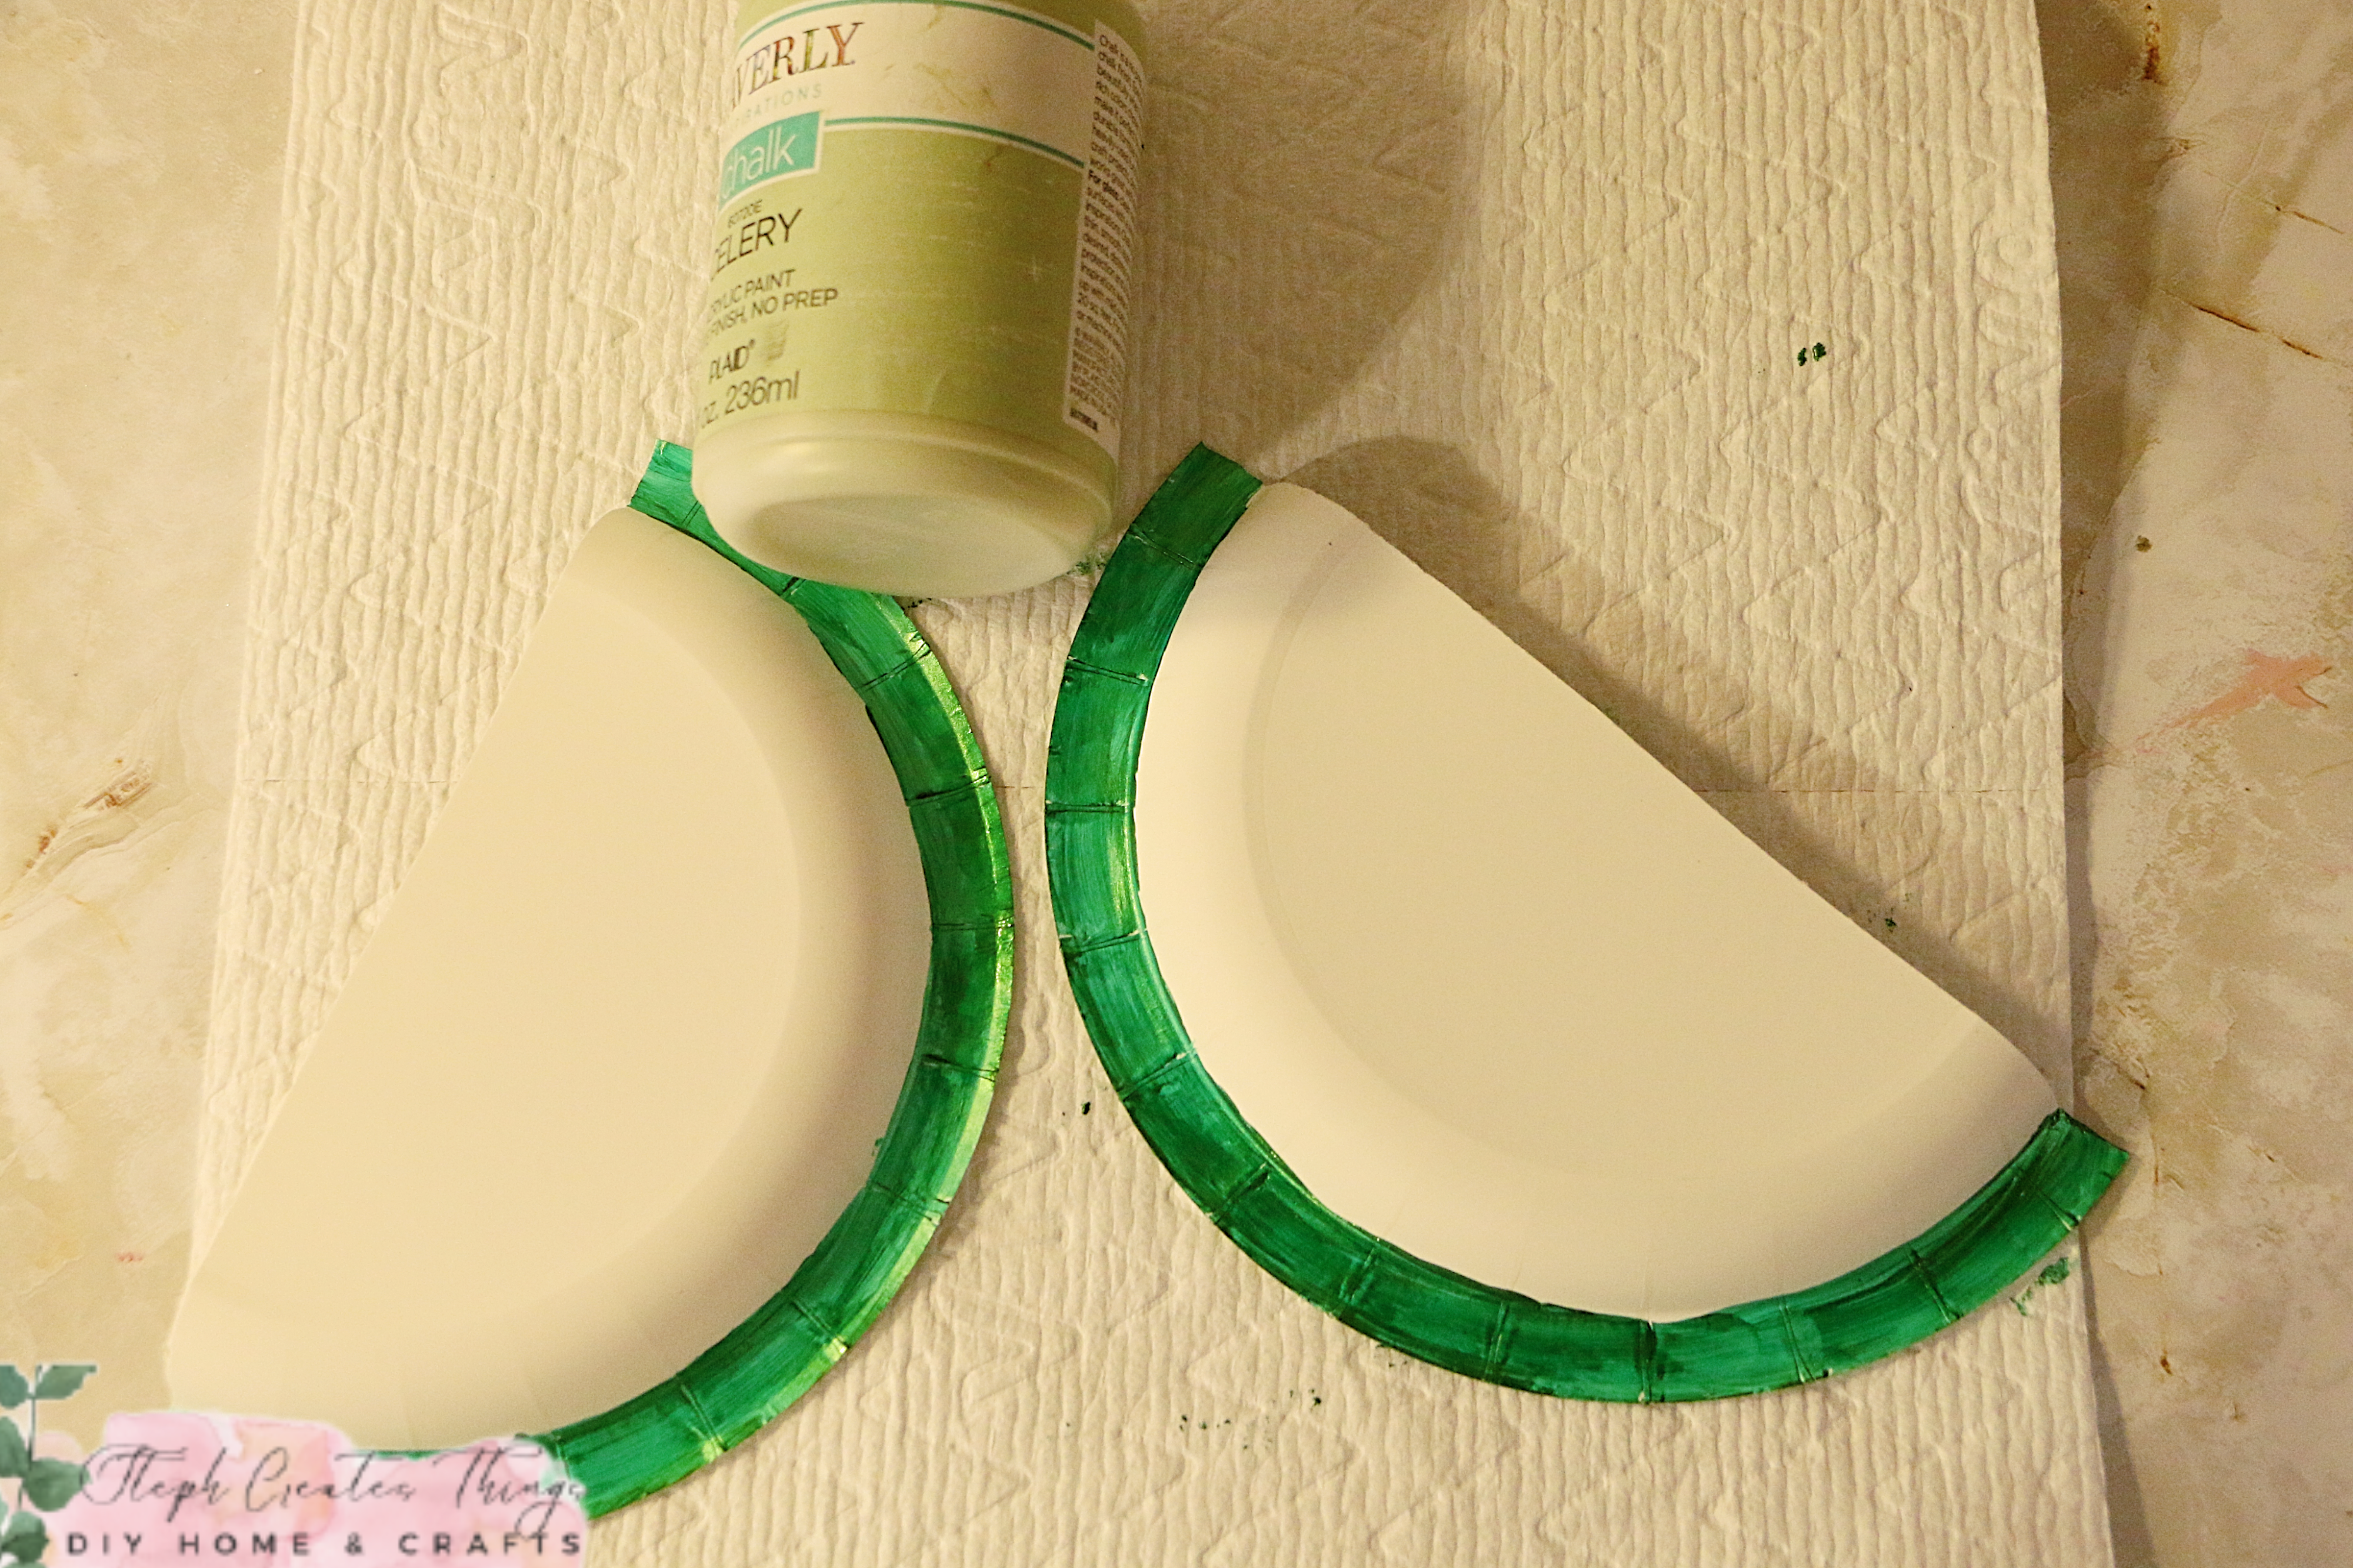
Use a darker green paint to cover the bottom area of the plate. Let it dry between each coat of paint.

Painted paper plate sections and black paint
Continue applying paint to each area of the plate. Then, add the lighter green and red paint. For the lighter green, mix the darker green with the lighter green to create the color.
Use a smaller paintbrush to create seeds on each section.

Hand holding painted plate painted green and red.

Collage showing plates sections glued together
 Apply hot glue to the inner section of one side of the plate and press the other half over it to create an opening in the middle.
Painted paper plate near string and scissors
Attach the string or twine using hot glue. If you have a hole puncher, you can punch two holes at both ends of the hanger to insert and tie off the string. Press the string in place using hot glue.

Painted paper plate near faux flowers

Add artificial flowers to the center of your design. If you find it difficult to insert the flowers, you can use a foam block cut to size to fit between the plate sections.  When adding the flowers, distribute the weight evenly to keep the design level when hanging.

Hanging watermelon flower hanger

I hope you enjoyed this DIY project. It's a fun way to display your flowers. Thank you for visiting and creating with me.
I look forward to seeing you soon.

You might also enjoy

Pin Share Save

Pinterest pin


Comments

  1. This is super cute Steph, so clever and creative!
    Jenna

    ReplyDelete
    Replies
    1. Jenna, thank you so much! You are so kind. ♡

      Delete
  2. Replies
    1. Joanne, thank you. I appreciate your feedback 😊 ❤️

      Delete
  3. You are so creative! I love this and so right for summer.

    ReplyDelete
    Replies
    1. Thank you. You are very kind. I appreciate that. ♡

      Delete
  4. Replies
    1. Amy, thank you so much. I appreciate your feedback. 😊

      Delete
  5. This is really cute! What a lovely idea.

    ReplyDelete
  6. I love that it's watermelon slices. That is as summery as you can get. Cute! #MMBC

    ReplyDelete
    Replies
    1. Carol, thank you so much! Happy you enjoyed it. :)

      Delete
  7. That is so cute and perfect for summer. What a fantastic idea for something so simple as a paper plate.

    ReplyDelete
    Replies
    1. Kim, thank you! Yes, it was a very simple creation. I hope to inspire more people to create using every day items. :)

      Delete
  8. We love watermelons in our house, I think this would make a lovely little decoration and easy enough for my youngest to make. As everyone else has said, it's very cute (And I have some spare paper plates!) #mmbc

    ReplyDelete
    Replies
    1. Thank you! Yes, this would also make a great craft for children. Thank you for visiting!

      Delete
  9. Adorable! thanks for sharing on craft schooling sunday!

    ReplyDelete
  10. Cute Idea, I'm going to do this with my Grandgirl when she comes for the weekend, thanks for the idea!

    ReplyDelete
    Replies
    1. Sandi, oh, that sounds wonderful. I hope you two enjoy this craft together.

      Delete
  11. So clever! That paper plate is the perfect shape for this adorable project. It looks SO summery!

    ReplyDelete
  12. Love, love, love the watermelon theme! So summery and cute. You're so clever, Stephanie--you come up with so many amazing things. Thank you for sharing this lovely post with us at the Will Blog for Comments #42 linkup. We hope to see you next time with more posts to share, old or new.

    ReplyDelete
    Replies
    1. Aw, you are always so kind, Jennifer. You made me smile. I'm so happy you enjoyed this summer DIY project. Thank you for taking the time to visit.

      Delete
  13. Steph , such a cute project. You are always so creative. Thanks for sharing at Love Your Creativity.

    ReplyDelete
  14. Hi, Stephanie. I'm dropping in again with congratulations--this blog post is the Host's Choice from the Will Blog for Comments #42 linkup! It will be featured in the spotlight for visitors to see for the next 2 weeks, starting today. You're welcome to save the "This Blog Post Was a Featured Favorite" image from there to share here with your readers. We hope to see you at linkup #43 as well, sharing more posts (old or new). It opens Monday morning! Have a great weekend. :)

    ReplyDelete
    Replies
    1. Jennifer, thank you so much for letting me know about the featured favorite pick. I'm excited! I'll be sure to swing by your blog and get the image to post. Thank you. Have a wonderful weekend.

      Delete
  15. What a sweet idea, it looks great. Thank you for stopping by to share with us at Handmade Monday :-)

    ReplyDelete
  16. Always such fun and creative projects, Steph! Thanks for sharing at Creatively Crafty, have a great week! Creatively, Beth

    ReplyDelete
    Replies
    1. Beth, thank you very much. Im glad you enjoyed this craft. 😊

      Delete
  17. Love summer watermelons, featuring you at Wednesdays in the Studio!

    ReplyDelete
  18. So cute!! Thanks for joining in on Home Matters Linky Party! I will be featuring your post this week! #HomeMattersParty xx

    ReplyDelete
  19. Thanks for sharing with us, I’m featuring you when the next To Grandma’s House we go link party starts!

    ReplyDelete
  20. Popping over from Pam's Party (isn't this a mouthful) to admire this fun and summery craft.
    Amalia
    xo

    ReplyDelete
    Replies
    1. Haha, yes, it sure is a mouthful! Thank you for taking the time to visit. Glad you enjoyed my summer craft.

      Delete

Post a Comment

I love hearing from you! Your comments and creative ideas truly brighten my day. I do my best to respond to everyone, so if you have a question or just want to say hello, please leave a note below. To keep our community a positive and inspiring space, spam or off-topic comments will be removed. Happy crafting!

Popular posts from this blog

DIY Magnetic Faux Succulent & Floral Lids — Upcycled Fridge Accent

I created these magnetic faux succulent and floral lids using some metal jar tops that I had saved. With a little creativity, they transformed into charming, lightweight accents that add a pop of color and personality to the fridge. Each lid features its own tiny arrangement—part succulent and part floral—all crafted with intention and charm. This project is easy and budget-friendly, allowing you to use items you already have while adding a lovely touch to your home. Quick Video Tutorial Materials Metal jar lids (one large, one small) Letter beads (to spell LOVE ) Faux moss Faux succulents Faux vines Faux flowers (pink, green foliage, white accents) Hot glue gun and glue sticks Magnets I began with the larger metal lid, attaching small letter beads to spell out LOVE . This created a meaningful little focal point and set the tone for the rest of the design. Next, I glued a layer of faux moss along the bottom of the lid. The moss added softness and helped anchor the colorful...

Transforming a Dollar Tree Metal Home Sign with Paint

Hello, blogging friends! Today, I’m excited to share an easy makeover I did using a “HOME” sign from Dollar Tree. This project is simple, but the transformation feels soft, warm, and inviting—just the kind of piece that quietly brightens a space. The sign began as plain and flat, but after a few gentle coats of paint, it became something charming and full of personality. Video tutorial  Materials Dollar Tree metal HOME sign (Crafter’s Square) Black FolkArt Matte Acrylic Paint Light green Craft Smart Matte Acrylic Paint Coral Craft Smart Matte Acrylic Paint Light pink paint Dark green Paintbrushes (flat and detail brushes) I started by applying a black base coat to the entire sign. Using a small, pointed-tip brush, I carefully reached all the tiny areas around the leaves and buds. I applied three coats of black paint, drying each layer with my heat tool. This step creates a clean, even surface and helps the top colors stand out beautifully. Next, I used a light green paint t...

Three Easy Candle Jar Ideas for Cozy Porch Décor

I've always thought there was something so comforting about soft candlelight, especially when it’s paired with a few simple faux florals and greenery. Today, I’m sharing a sweet little project in which I decorated a glass jar in three different ways. Each jar has its own personality, glow, and gentle charm. These pieces are perfect for porch décor, but they work beautifully anywhere you want to add a touch of warmth. I love projects like this—simple materials, quiet moments, and a finished piece that feels peaceful and handmade. Video tutorial  Materials I Used Clear glass jar Battery‑operated candle Faux string of pearls Faux succulents Faux vine Bright pink faux flowers (tops removed from stems) Yellow faux flowers Faux foliage Optional: woven mat or tray for display Jar 1: Succulents & String of Pearls For the first jar, I wanted something earthy and calming. I placed a faux string of pearls inside the jar and let it settle naturally. Around it, I tucked in a few faux succul...

DIY Budget-Friendly Succulent Plant Hanger Design

 Hi everyone! I hope that you are doing well. Today I am sharing an easy DIY craft that is budget-friendly, and easy to create. A material list will be provided, along with step-by-step instructions on creating your very own. Be sure to check out the video tutorial below. Video tutorial Materials One 4x4 framed art Acrylic paint Faux succulents Hot glue and any other heavy-duty adhesive Twine Scissors  Floral cutters Paintbrush You can find most of these materials at your local Dollar Tree This project costs under five dollars If your frame comes with beads as shown in the picture above, take your scissors and remove the beads. You will actually reuse the beads later on in this craft. Take the inner section of your out and set it aside. Next, take your acrylic paint and paintbrush, and begin to apply your paint to your frame. I applied three coats of my paint to my frame. Next, use your paintbrush you apply paint over the inner section of the frame we removed earlier. I applie...

Cozy Corner Kitchen Tray Styling with Mini Lamp Inspiration

Hello everyone! Join me as I style a cozy corner in my kitchen using a tray in various ways. I recently purchased a mini lamp for the kitchen and wanted to create a low-light area with some decorations. I took my wooden tray and arranged a few decorative items on it. I can't wait to share my ideas with you. Let’s work together to create a warm and inviting kitchen corner! Video tutorial I prefer to keep my tray styling simple. For my first tray design, I wanted to incorporate my pug planter. I used pink faux flowers and various types of foliage to enhance the planter. I placed the planter in one corner of the tray and arranged the foliage around it before adding the pink flowers into the planter. Additionally, I included my purple textured candle jar. To complete the design, I arranged a selection of pink faux flowers directly on the tray near the lamp. For my second cozy tray design, I decided to include a clay pot decoration filled with craft moss. This is one of my favorite desi...

Search This Blog

All content Copyright

Copyright 2021-2026 I ask that you do not take or use my photos or words without permission. If you have any questions, please feel free and contact me. Also, for more information on this blog, check out the disclosure policy tab above. Thank you