Hey everyone! I'm excited to show you a fun and easy craft. Today, we will be making a summer watermelon floral hanging design using a paper plate. This DIY project is easy to create and fun to welcome the summer season. You'll make this watermelon floral hanging design to display your artificial flowers creatively. It's also a great way to use any extra paper plates you may have lying around and aren't sure what to do with. You may have extras from a birthday party or a BBQ. If you're ready, let's get started creating your floral hanging design!
Video tutorial
Summer Craft: DIY Paper Plate Watermelon Flower Hanger
Materials:
- Paintbrush
- Artificial flowers
- Paper plate (any size you prefer)
- String or craft twine
- Scissors
- Hot glue
Optional-Hole Puncher

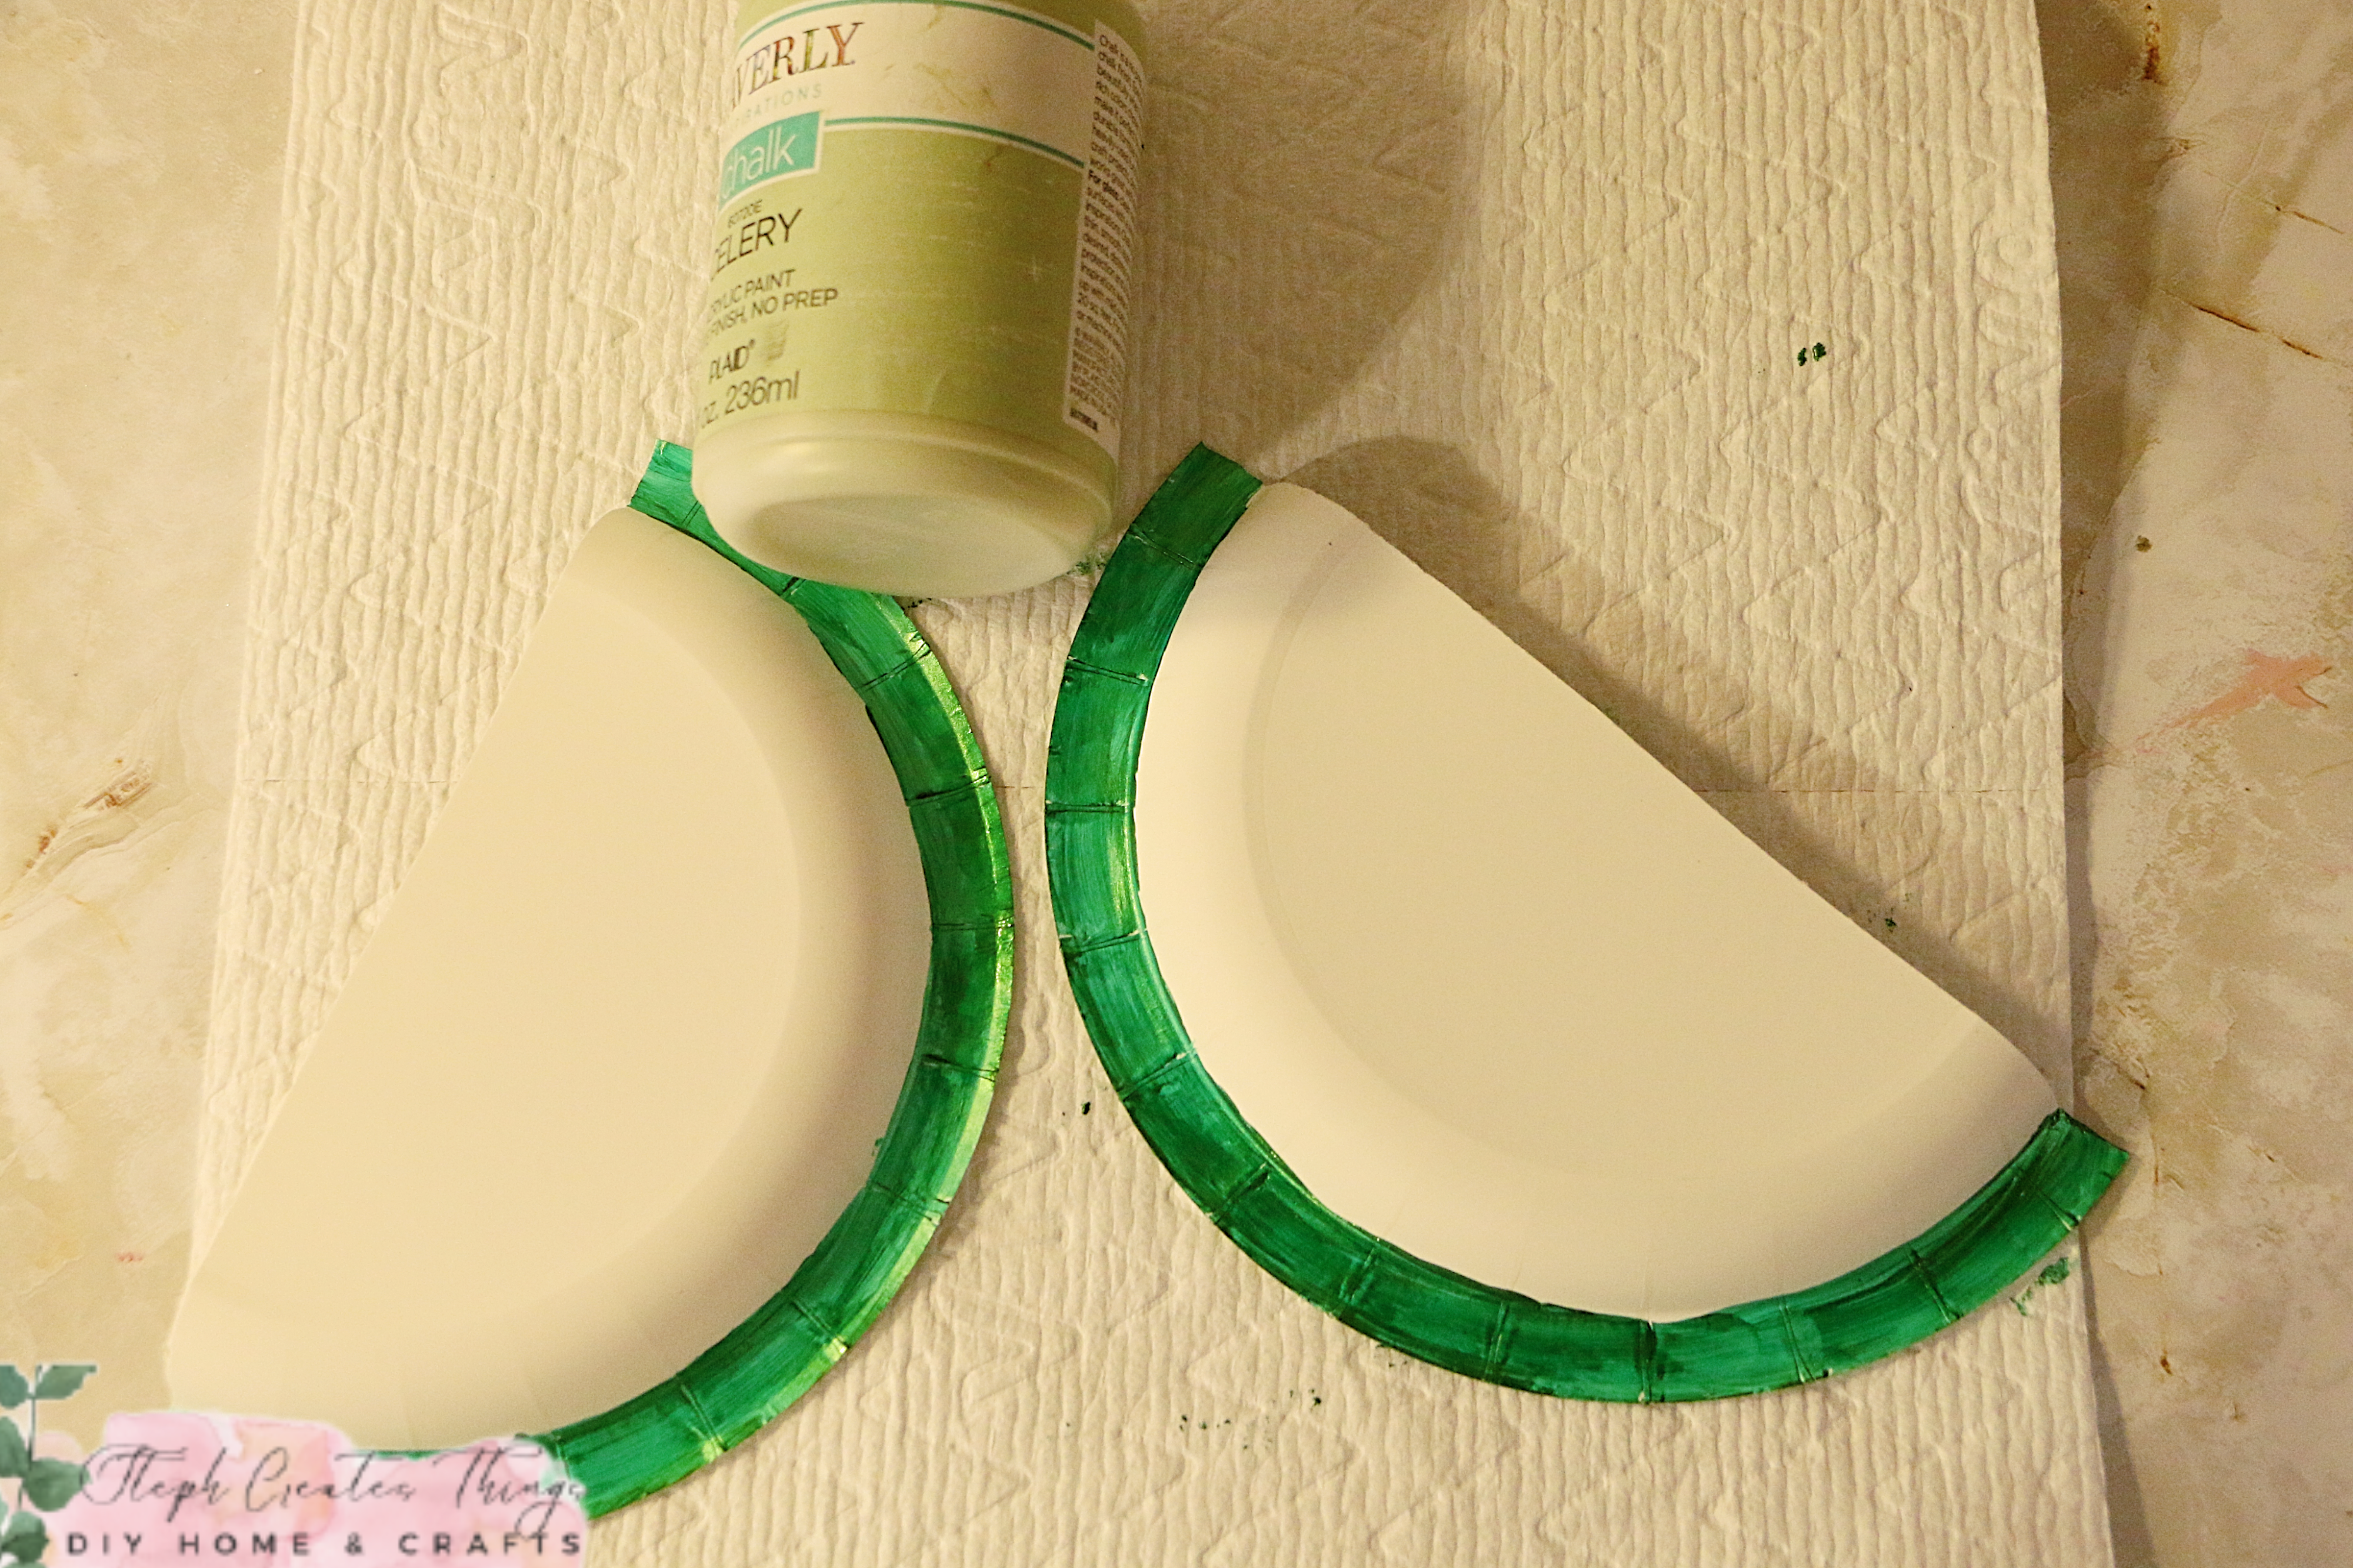
Start by cutting the paper plate in half.
Use a darker green paint to cover the bottom area of the plate. Let it dry between each coat of paint.
Continue applying paint to each area of the plate. Then, add the lighter green and red paint. For the lighter green, mix the darker green with the lighter green to create the color.
Use a smaller paintbrush to create seeds on each section.
Apply hot glue to the inner section of one side of the plate and press the other half over it to create an opening in the middle.
Attach the string or twine using hot glue. If you have a hole puncher, you can punch two holes at both ends of the hanger to insert and tie off the string. Press the string in place using hot glue.
Add artificial flowers to the center of your design. If you find it difficult to insert the flowers, you can use a foam block cut to size to fit between the plate sections. When adding the flowers, distribute the weight evenly to keep the design level when hanging.
I hope you enjoyed this DIY project. It's a fun way to display your flowers. Thank you for visiting and creating with me.
I look forward to seeing you soon. ♡
You might also enjoy
Pin Share Save


.png)


.png)


This is super cute Steph, so clever and creative!
ReplyDeleteJenna
Jenna, thank you so much! You are so kind. ♡
DeleteThat is so cute!
ReplyDeleteJoanne, thank you. I appreciate your feedback 😊 ❤️
DeleteYou are so creative! I love this and so right for summer.
ReplyDeleteThank you. You are very kind. I appreciate that. ♡
DeleteWhat a cute idea! I love it!
ReplyDeleteAmy, thank you so much. I appreciate your feedback. 😊
DeleteThis is really cute! What a lovely idea.
ReplyDeleteThank you! 😊
DeleteThis is so cute and clever!
ReplyDeleteMichelle, thank you! :)
DeleteI love that it's watermelon slices. That is as summery as you can get. Cute! #MMBC
ReplyDeleteCarol, thank you so much! Happy you enjoyed it. :)
DeleteThat is so cute and perfect for summer. What a fantastic idea for something so simple as a paper plate.
ReplyDeleteKim, thank you! Yes, it was a very simple creation. I hope to inspire more people to create using every day items. :)
DeleteWe love watermelons in our house, I think this would make a lovely little decoration and easy enough for my youngest to make. As everyone else has said, it's very cute (And I have some spare paper plates!) #mmbc
ReplyDeleteThank you! Yes, this would also make a great craft for children. Thank you for visiting!
DeleteAdorable! thanks for sharing on craft schooling sunday!
ReplyDeleteThank you! 😊
DeleteCute Idea, I'm going to do this with my Grandgirl when she comes for the weekend, thanks for the idea!
ReplyDeleteSandi, oh, that sounds wonderful. I hope you two enjoy this craft together.
DeleteSo clever! That paper plate is the perfect shape for this adorable project. It looks SO summery!
ReplyDeleteThank you so much! 😊
DeleteLove, love, love the watermelon theme! So summery and cute. You're so clever, Stephanie--you come up with so many amazing things. Thank you for sharing this lovely post with us at the Will Blog for Comments #42 linkup. We hope to see you next time with more posts to share, old or new.
ReplyDeleteAw, you are always so kind, Jennifer. You made me smile. I'm so happy you enjoyed this summer DIY project. Thank you for taking the time to visit.
DeleteSteph , such a cute project. You are always so creative. Thanks for sharing at Love Your Creativity.
ReplyDeleteLinda, thank you! 🥰
DeleteHi, Stephanie. I'm dropping in again with congratulations--this blog post is the Host's Choice from the Will Blog for Comments #42 linkup! It will be featured in the spotlight for visitors to see for the next 2 weeks, starting today. You're welcome to save the "This Blog Post Was a Featured Favorite" image from there to share here with your readers. We hope to see you at linkup #43 as well, sharing more posts (old or new). It opens Monday morning! Have a great weekend. :)
ReplyDeleteJennifer, thank you so much for letting me know about the featured favorite pick. I'm excited! I'll be sure to swing by your blog and get the image to post. Thank you. Have a wonderful weekend.
DeleteWhat a sweet idea, it looks great. Thank you for stopping by to share with us at Handmade Monday :-)
ReplyDeleteAlways such fun and creative projects, Steph! Thanks for sharing at Creatively Crafty, have a great week! Creatively, Beth
ReplyDeleteBeth, thank you very much. Im glad you enjoyed this craft. 😊
DeleteLove summer watermelons, featuring you at Wednesdays in the Studio!
ReplyDeleteJennifer, thank you. 😊
DeleteSo cute!! Thanks for joining in on Home Matters Linky Party! I will be featuring your post this week! #HomeMattersParty xx
ReplyDeleteThank you. 😊🤗
DeleteThanks for sharing with us, I’m featuring you when the next To Grandma’s House we go link party starts!
ReplyDeleteTarahlynn, thank you! 🤗
DeletePopping over from Pam's Party (isn't this a mouthful) to admire this fun and summery craft.
ReplyDeleteAmalia
xo
Haha, yes, it sure is a mouthful! Thank you for taking the time to visit. Glad you enjoyed my summer craft.
Delete