
Hello everyone! How are you all doing? I hope you are doing well. If you're anything like me, I have a few glass jars that I have washed and set aside, waiting for the perfect opportunity to use them in a craft. Today I am going to share a simple upcycled project with you. We're decorating a glass jar and adding paint, Mod Podge, and floral embellishments.


Video tutorial
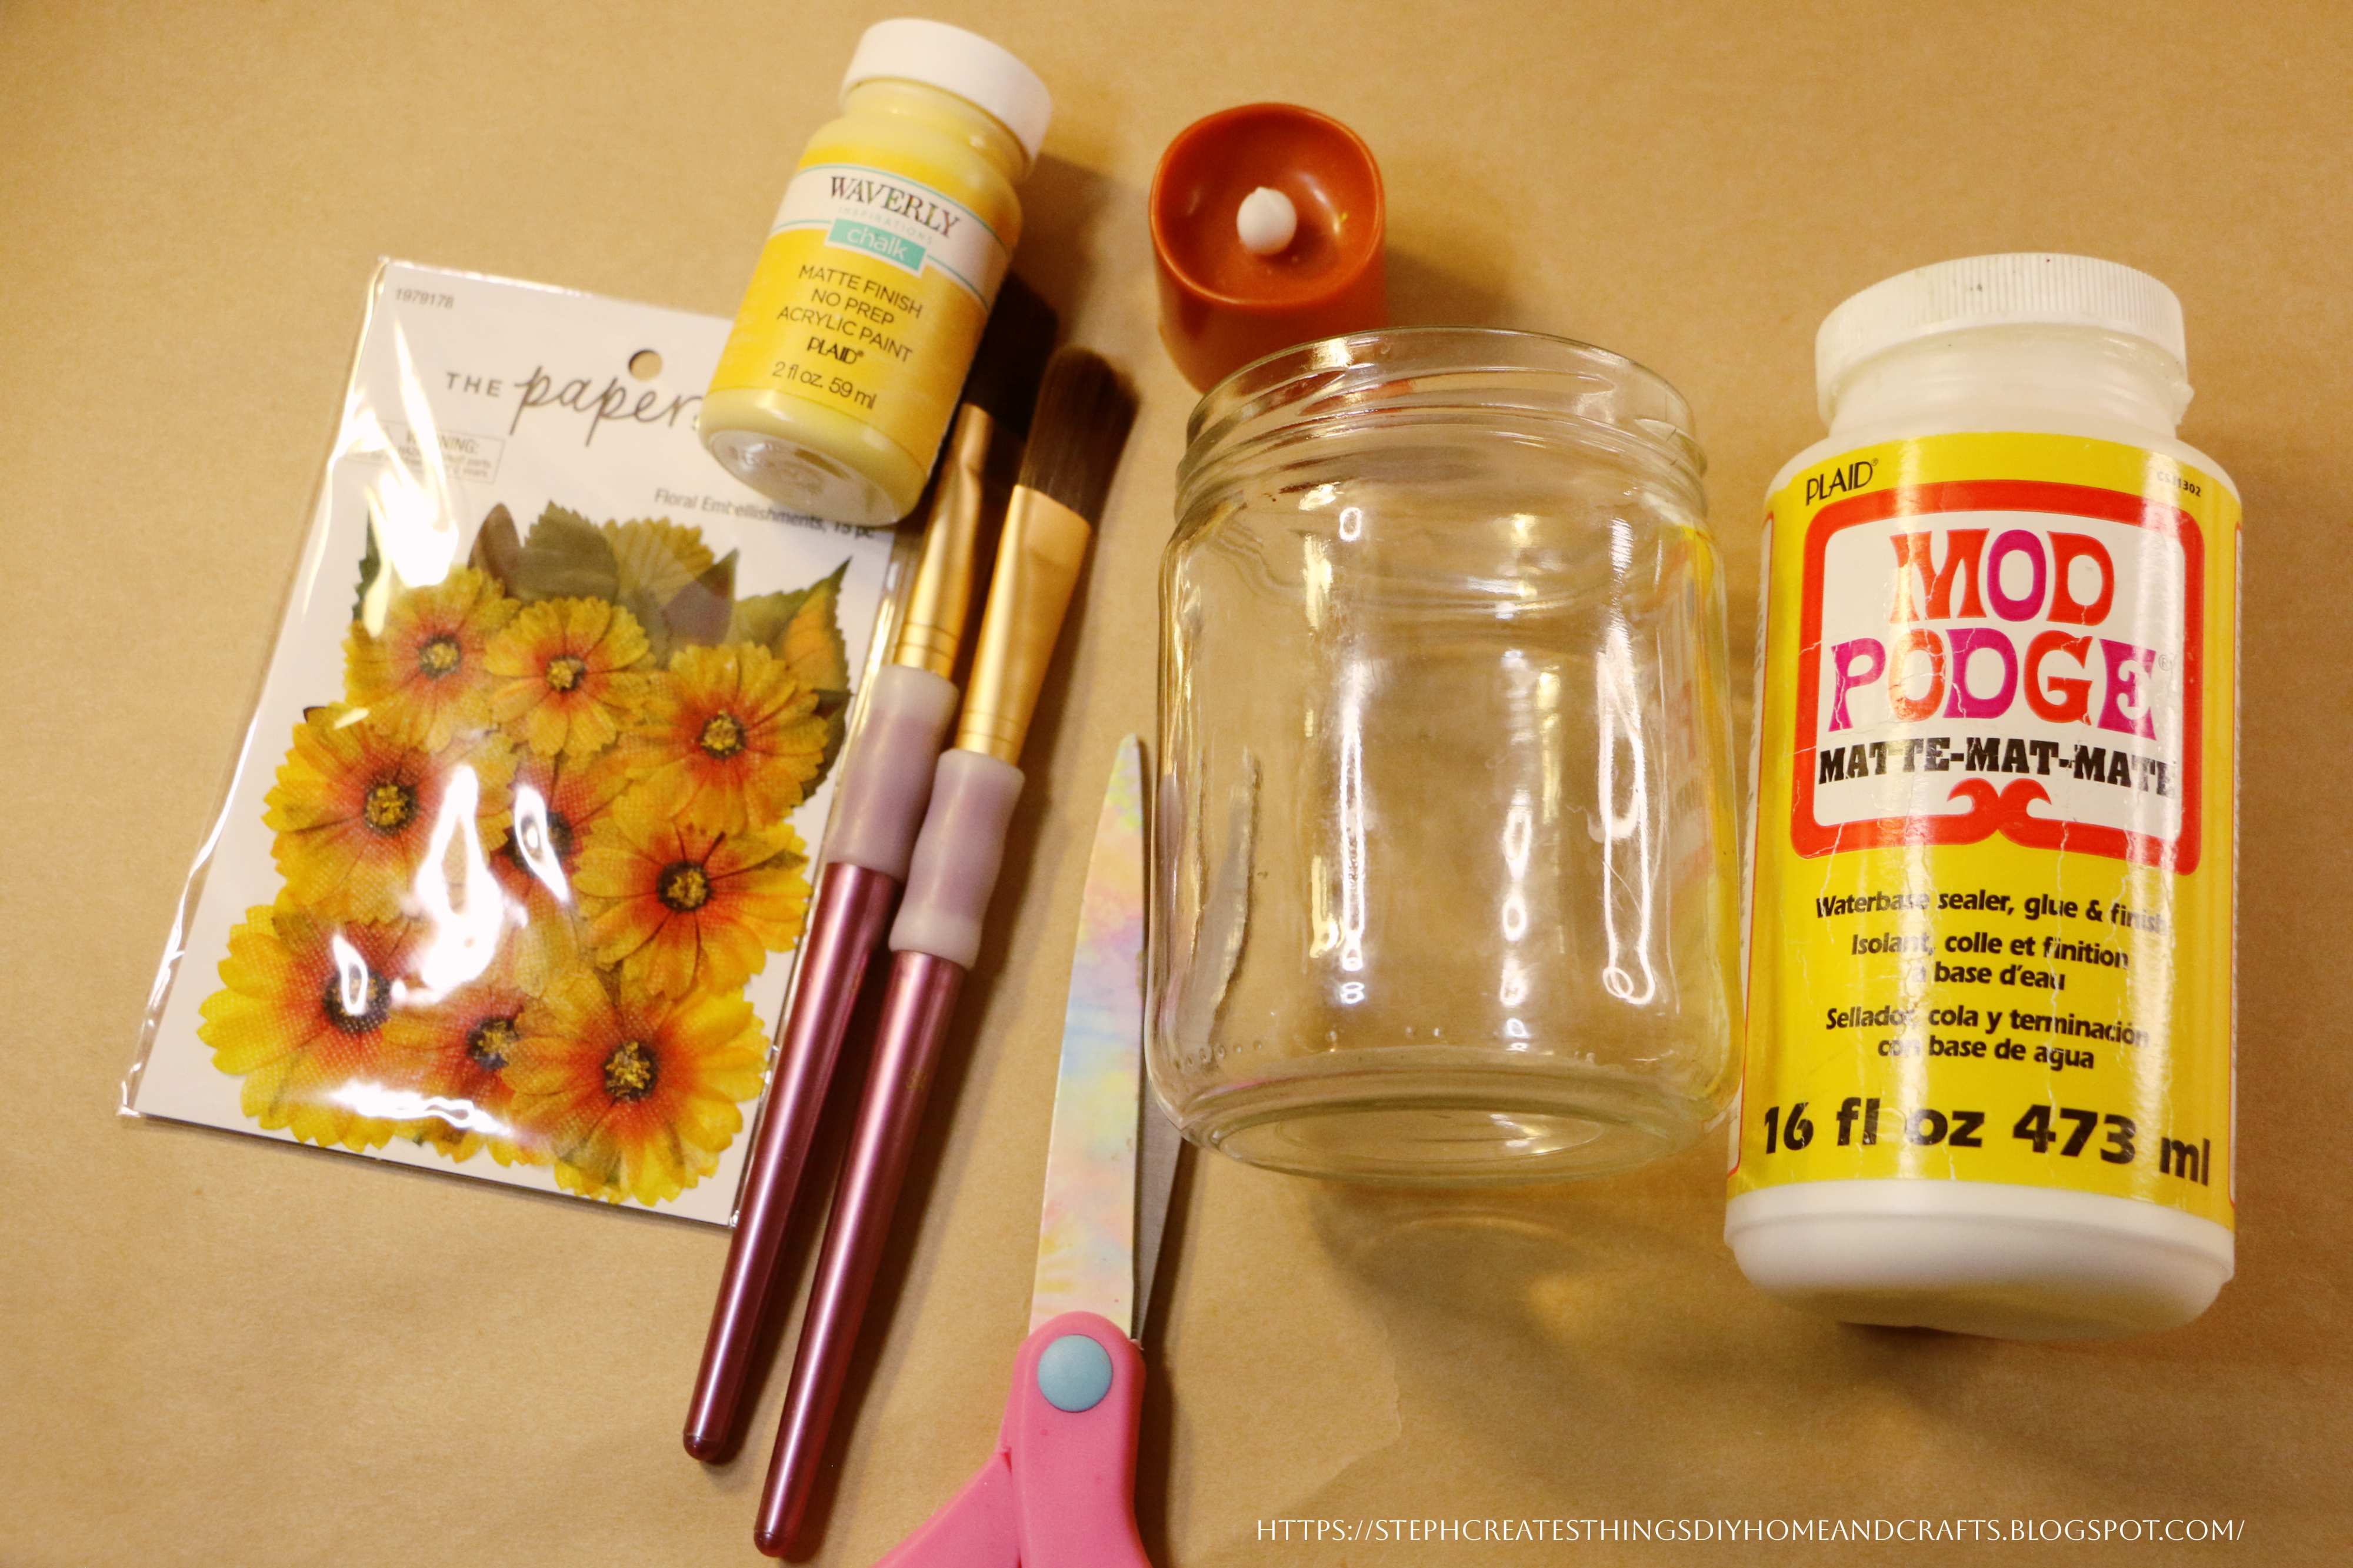
Materials
One glass jar- I am reusing a pickle jar
Floral embellishments- I am using the paper craft flowers
Mod podge
Acrylic paint- I am using Waverly no prep Matte finish
Scissors
Paintbrushes
Optional-Twine
Applying paint to the glass jar

Begin by taking your paintbrush and applying a thin layer of your paint to your jar. Add a lighter paint application if you want to add a battery-operated candle to your jar. This way you will still be able to see light through your jar.
Adding Mod Podge and paper flowers to a glass jar

Next, after applying your paint, take your flowers and begin to add them using your paintbrush and Mod Podge.

Add a thin layer of Mod Podge to the glass surface and add your flower embellishments. After, apply a coat of Mod Podge over your flower. I always use my blow dryer when applying my Mod Podge. Allow it to fully dry.

Repeat the previous step. Continue to add your flowers and Mod Podge to your glass jar.

I also added leaves to my design.
Adding twine to the glass jar

This last step is optional. Take some twine and wrap it around the opening of your jar. Tie it off, and wrap it around until you reach the desired amount. Take scissors and cut off the remaining twine. Use a little hot glue and glue the end of your twine to the jar.

What do you think? That was pretty simple. I love that this is an upcycled craft. Here are a few ideas. You can add a battery-operated candle and place it on a patio table. Enjoy the soft lighting during the evening. You can also use this glass jar to display a summer or fall flower arrangement.
Thank you so much for creating with me.
Pin Share Save


Oh, I love it. You need to open a shop :) Thanks so much for linking up at the #UnlimitedLinkParty 122. Pinned.
ReplyDeleteDee, aw thank you! I really should consider opening a shop again. Thanks so much.
DeleteThis is such a beautiful idea. Thank you for sharing :)
ReplyDeleteI'm so happy to hear that you enjoyed it. Thank you so much for stopping by.
DeleteThis is darling Stephanie! I have so many glass jars I have been saving, now I have an idea of what to do with them. Thank you for sharing your inspiration!
ReplyDeleteAw, thank you. I'm so happy to hear that you enjoyed this craft. I love upcycling glass jars.
DeleteAWESOME upcycle, Steph! We will be featuring you starting Wednesday at the Creative Crafts Linky Party! Pinned and shared!
ReplyDeleteCreatively, Beth
Beth, thank you so much. I'm thrilled to be featured on Creative Crafts!
DeleteWhat a beautiful idea, I love this!
ReplyDeleteLyndsey, thank you so much. I'm so happy to hear that you enjoyed this craft. :)
DeleteStephanie, CONGRATS! Your post is FEATURED at the #UnlimitedLinkParty 123!
ReplyDeleteDee, thank you! I'll be sure to stop by. :)
DeleteIt is a pretty result on a plain jar
ReplyDeleteThank you. 😊
DeleteGreat video Steph! Okay, so question. What kind of brush do you use and how do you avoid seeing mod podge brush strokes on the completed project? I've been doing some things with Mod Podge and dried flowers and such on jars lately and I have trouble with seeing brush strokes. Is there a trick or is this common and me just being anxious about it? Lol. Pinned 📌
ReplyDeleteThanks bunches for sharing this tutorial with Sweet Tea & Friends this month, dear friend.
Hi Paula! These are great questions. I normally use a soft bristle paintbrush when I apply my mod podge. The Paintbrushes I am using are from Walmart. I bought a set of brushes.
DeleteI like to dry my mod podge surface between each coat. I have noticed applying a few coats and drying between each coat really helps with minimizing those lines.
Also, don't worry too much if you see a few lines. There is always beauty in imperfections. 🥰 I also applied a thin coat of paint before applying the mod podge, so that helped too. Just experiment with it a little more. I am sure what you are creating is beautiful. And if you are ever up to it, I would love to see pictures of your creations. 😊
Visiting again to say thanks so much for linking up at #IMadeItMondayLinkParty 22. Pinned.
ReplyDeleteStephanie, CONGRATS! Your post is FEATURED at #IMadeItMondayLinkParty 23.
ReplyDeleteDee, thank you so much! I'll be sure to stop by =)
DeleteHi - Visiting from the Sunday Sunshine blog party. This is great - its so versatile, you can make one for every holiday or season!
ReplyDeleteThank you so much for visiting. :)
DeleteThis is so pretty!
ReplyDeleteThank you! 😊
DeleteThanks for sharing with us - I'm featuring you this week when the next To Grandma's house we go link party starts!
ReplyDeleteTarahlynn, thank you very much.
DeleteSO pretty! Those paper flowers look so much like real pressed flowers!
ReplyDeleteThank you! I'm so happy you enjoyed this.
DeleteSuch a pretty jar. I'm visiting from Handmade Monday.
ReplyDeleteLinda, thank you very much. I appreciate you visiting. 😊
DeleteSo sweet! Must try this! Thanks for joining in on Home Matters Linky Party! I will be featuring your post this week! #HomeMattersParty xx
ReplyDeleteJoy, thank you so much. I'm happy you enjoyed it. And thank you for the feature.
DeleteYou're so creative Stephanie!
ReplyDeleteVisiting from Paula's linky today where we're sitting together.
Blesings, Jennifer
Steph, I love the design of this, perfect with any jar and pretty much any paper. One of my features for the upcoming SSPS!
ReplyDelete