
Spring Mini Wood Riser

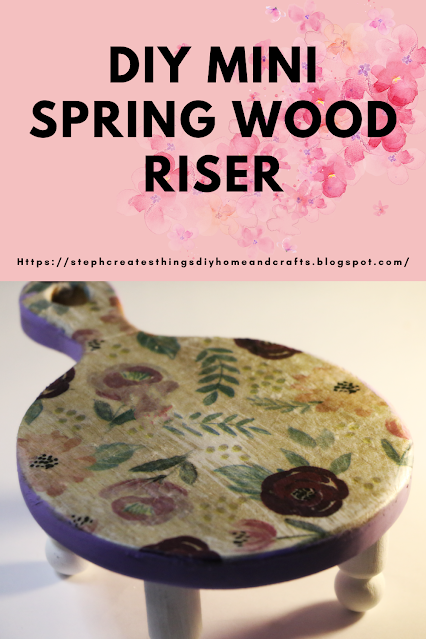
Create a charming Spring mini wood riser with this easy DIY craft. It is perfect for adding a touch of seasonal decor to your home. You can get step-by-step instructions and unleash your creativity today. This craft is beginner-friendly, and I was able to create it in around 30 minutes. If you're ready, let's begin creating your very own Spring mini wood riser.

Spring mini wood riser with floral design


Spring mini wood riser with floral design with candle

Spring Mini Wood Riser Video tutorial


Spring mini wood riser with floral design

Mini wood riser, paint, hot glue, tissue paper and Mod Podge

Materials

One mini round chopping board

I picked mine up at Hobby Lobby on sale from $7.99 to $4.79 

One pack of tissue paper - Mauve floral $ 1.49

Purchased mine at Hobby Lobby

Paint

I'm using white and a light lavender color

Mod Podge

Paintbrush

Hot glue or E6000- I ended up using my E6000 adhesive

One pack of wood pegs

Purchased mine at Hobby lobby

My total cost for this project was around $7 

Mod Podge applied on round mini cutting board
Step 1: Applying Mod Podge on the cutting board

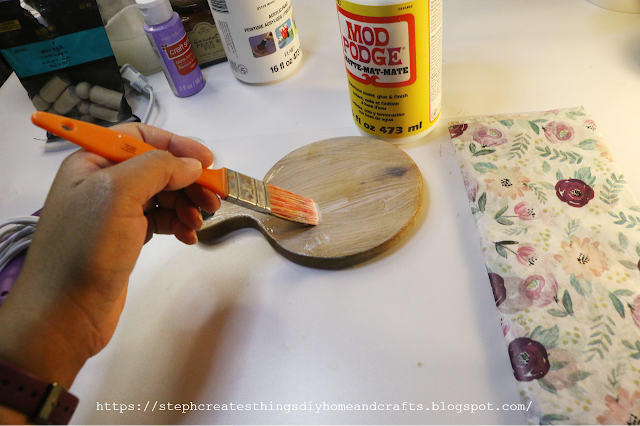
Begin by taking your paint brush and applying a layer of your Mod Podge onto the top surface of your cutting board. 

Hand holding paintbrush applying Mod Podge to round wooden board
Step 2: Applying the tissue paper

Place a layer of tissue paper on top of the Mod Podge and smooth out any wrinkles or bubbles.

Floral design tissue paper placed over round wooden board

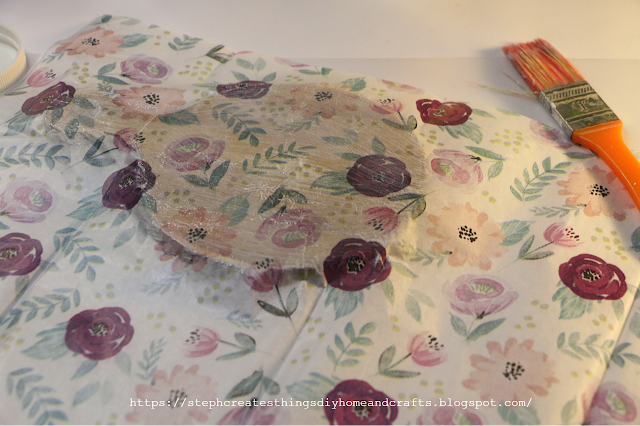
After placing the tissue paper on top, use a paintbrush to apply a layer of Mod Podge. To speed up the drying process, use a heat gun or blow dryer on low heat.

Floral design tissue paper applied to round wood riser

After your Mod Podge has dried completely, use scissors to trim any excess tissue paper around the outer edges of your cutting board. Alternatively, you can use a sanding block. If you prefer to have a little tissue paper left around the outer edge, scissors are a good choice.

 Once you have trimmed the excess paper, apply a layer of Mod Podge to the entire cutting board, including the outer edges. This will help to secure any remaining tissue paper. Allow the Mod Podge to dry completely before using the cutting board.

Acrylic paint, paintbrush and round wood riser

Hand holding paintbrush applying paint to round wood riser
Step 3: Applying acrylic paint to the cutting board and pegs

Now that you've prepared your project board, it's time to apply the paint. Start by using your purple paint and apply it around the outer section below the tissue paper. It's recommended to apply around two coats of paint for better coverage. 

After that, flip your board and apply the purple paint to the bottom side of the board. Make sure to cover the entire bottom surface with the paint. Once you're done, set your board aside and let it dry completely.
white wooden pegs

Take your wooden pegs and apply two coats of white paint to fully cover each peg.

Wooden pegs being added to cutting board
Step 4: Adding the pegs to the cutting board

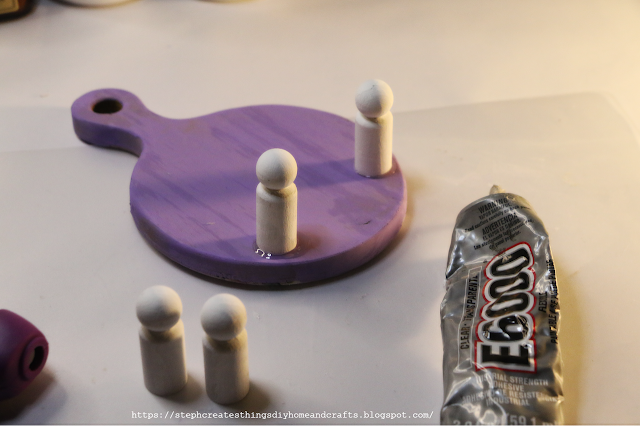
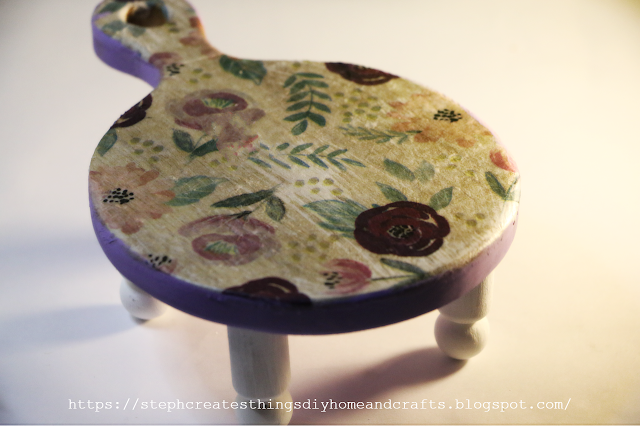
After your wooden pegs have completely dried, flip your cutting board over and attach them using hot glue or any other adhesive you prefer. I used E6000 as my adhesive of choice. Wait for the pegs to dry, then flip the board over. Your mini wood riser is now complete and ready for use. 

I'm using mine to display candles, but I'm curious to know what you plan on using yours for. Please leave a comment below and let me know!

Spring mini wood riser with floral design


Spring mini wood riser with floral design with lit candle on top displayed near faux tulips

Thank you so much for stopping by. I'll see you soon.


You might also enjoy

DIY Valentine Wooden Heart Riser


Pin/Share/Save

Spring mini wood riser with floral design


Comments

  1. How adorable, and affordable, too! I think I will make one and put a bird's nest on top. Thanks for sharing.

    ReplyDelete
    Replies
    1. Thank you so much! A bird's nest would be so adorable on this riser. I love that idea! Thanks so much for stopping by.

      Delete
  2. This is so adorable! Thanks for sharing the post on Tuesday Turn About this week!

    ReplyDelete
  3. This is so pretty, what a lovely idea. Thank you for sharing with us at handmade Monday :-)

    ReplyDelete
  4. Very pretty. Thanks so much for linking up at the #UnlimitedLinkParty 104. Shared.

    ReplyDelete
  5. it is beautiful! great idea <3 saved and PINned :) thank you for sharing the tutorial.

    ReplyDelete
    Replies
    1. Thank you so much. 😊 I really appreciate it.

      Delete
  6. What a fun project! I love using Mod podge and E6000 glue - so many possibilities! Thank you for sharing :)

    ReplyDelete
    Replies
    1. Marilyn, thank you so much. 😊 Happy to have you visit the blog.

      Delete

Post a Comment

Thank you so much for taking the time to leave a comment. Your comments brighten my day. I hope you know it is appreciated. I do my best to respond to every comment. If you have a question, please feel free to ask!

Popular posts from this blog

Winter Floral Tray: Easy Steps Using Dollar Tree Cutting Board

 Hello everyone! I’m excited to share my latest craft with you all. Today, we will be creating a floral winter tray using a bamboo cutting board from Dollar Tree. I often come across these bamboo cutting boards at my local Dollar Tree, and this time, I decided to pick one up. This craft is simple and budget-friendly. Join me as we make a winter floral tray using just a few materials! Video tutorial Materials One bamboo cutting board Winter faux foliage Paintbrush Hot glue Four wooden beads Acrylic paint Optional faux mini trees Begin by applying acrylic paint to the wooden cutting board. I decided to mix two colors together: white and English ivy green. Next, take four wooden beads and use hot glue to attach them to the underside of the board. I had a few extra beads from a previous project. After that, attach the faux foliage to the wooden board using hot glue. Depending on how you want to display the items on your board, arrange the foliage around the edges. This will ensure enou...

Upcycled glass jar design with paper floral embellishments

 Hello everyone! How are you all doing? I hope you are doing well. If you're anything like me, I have a few glass jars that I have washed and set aside, waiting for the perfect opportunity to use them in a craft. Today I am going to share a simple upcycled project with you. We're decorating a glass jar and adding paint, Mod Podge, and floral embellishments. Video tutorial Materials One glass jar- I am reusing a pickle jar Floral embellishments- I am using the paper craft flowers Mod podge Acrylic paint- I am using Waverly no prep Matte finish Scissors Paintbrushes Optional-Twine Applying paint to the glass jar Begin by taking your paintbrush and applying a thin layer of your paint to your jar. Add a lighter paint application if you want to add a battery-operated candle to your jar. This way you will still be able to see light through your jar. Adding Mod Podge and paper flowers to a glass jar Next,  after applying your paint, take your flowers and begin to add them using your ...

Fall Floral Display Using Glass Yogurt Jars

 Hi everyone. I hope that you are all doing well. I am patiently waiting for Fall to arrive. Fall is my favorite season of them all. I love the golden leaves, hot apple cider by the fire pit, sitting out in the evenings roasting marshmallows. It is simply the best for me. Do you have a favorite season? What do you enjoy about it?  Today I am sharing a quick upcycle craft. I decided to use my glass Oui yogurt jars. I love these little jars and what a perfect way to reuse them. I will show you how to decorate these jars using mod podge, and acrylic paint. We will add faux flowers to each glass jar as well. Video tutorial Materials  Three small glass jars I'm reusing my Oui glass yogurt jars Twine Acrylic paint Paintbrushes Mod podge Decorative napkin Faux floral and foliage Decorative tape/Washi tape Scissors Applying paint to glass yogurt jars Begin by applying your paint to two of your glass jars. Each jar needed around three coats of paint.  I used acrylic chalk pai...