
Create a charming Valentine's wooden heart riser with this DIY craft tutorial. It's a perfect addition to your holiday decor and makes a heartfelt gift. Get step-by-step instructions and unleash your creativity!
Be sure to check out the video tutorial below
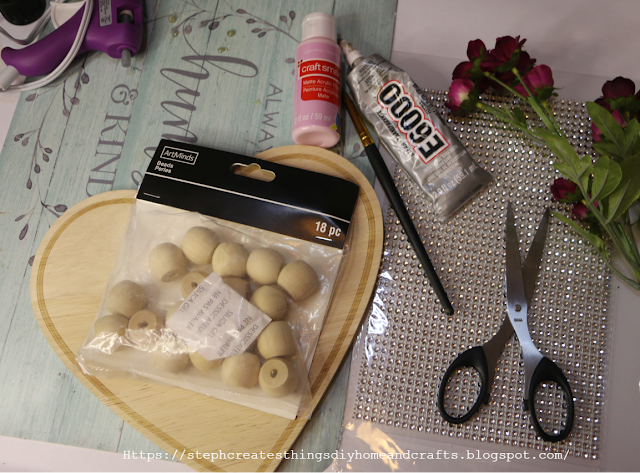
Materials
One Wooden heart
(Target Dollar Aisle)
Three large wooden beads
Diamond Gem wrap
(Purchased at the Dollar Tree. Sticky backing)
Paintbrush
Paint
(I'm using a light pink)
Scissors
Faux Flowers
Adhesive
(E6000, Any will work)
Hot Glue
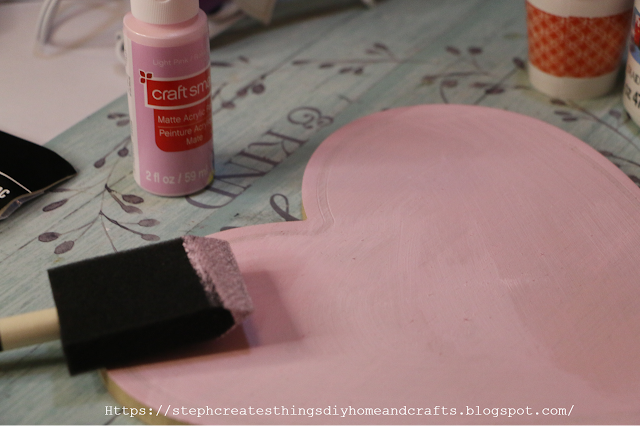

Start by taking your wooden heart, and applying pink paint to the front surface. It is entirely up to you, but you can also apply paint to the bottom side of your wooden heart.
You will need around two coats of paint when you are completely finished. Once you have applied all coats of the paint, set your wooden heart aside, and allow it to dry.
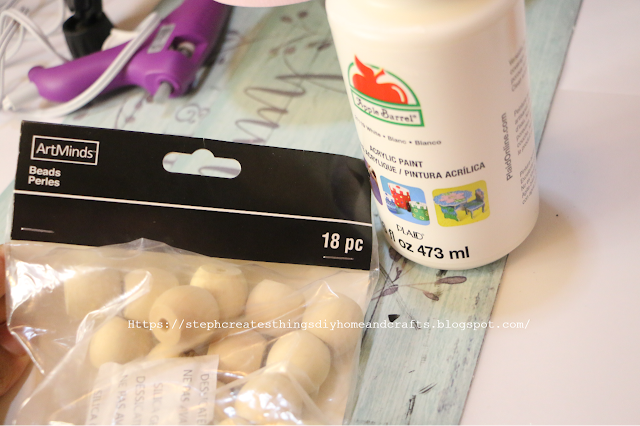
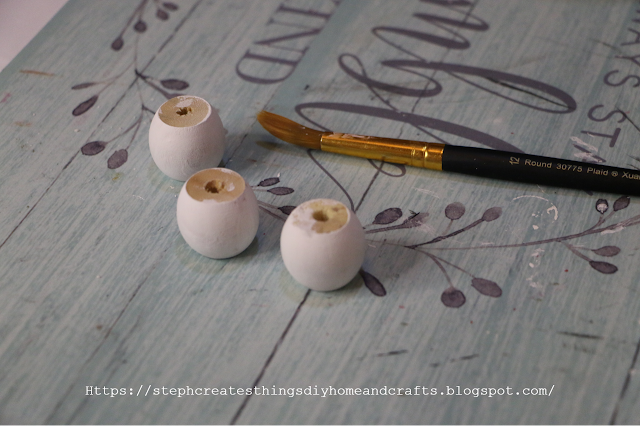
First, take three large beads and apply some white paint to each of them. Set them aside to dry.
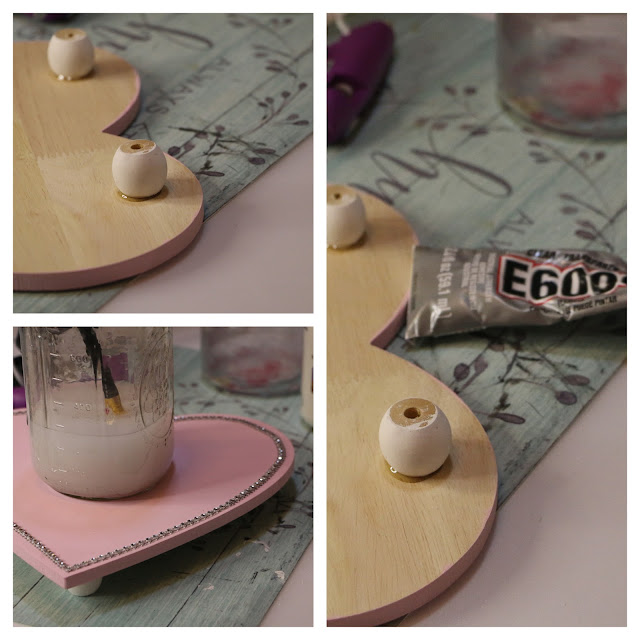
After the beads have dried, flip the wooden heart over and use adhesive to attach them to the bottom side of the heart. Place two beads on the upper section and one on the lower end.
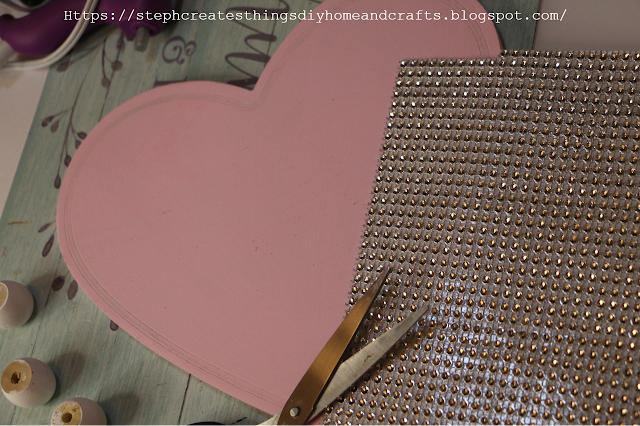
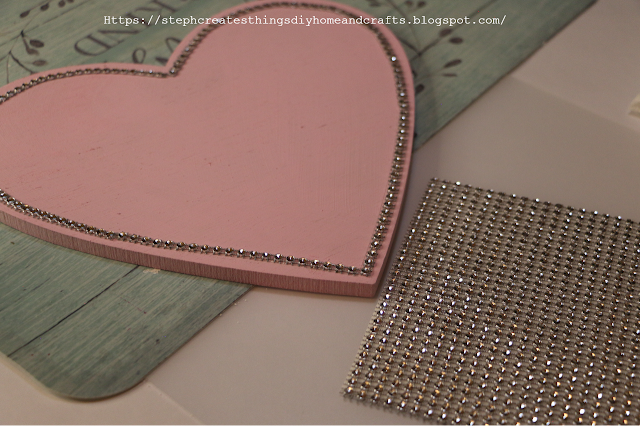
Next, it's time to add the gem wrap. You can find different colors of gems at your local dollar store. For this project, diamond gems were used.
Start by cutting sections of the gem wrap and removing the paper backing from the backside of the gems. Then, gently press the gems down and around the front section of the wooden heart. As you apply the gems, you will form the shape of the heart around the heart.

After adding your gem wrap, you can now start to add your faux flowers to your wooden heart. Take your scissors, or wire cutters, and cut sections of your leaves, and flowers apart.
Using a hot glue gun, add your leaves, and flowers to the bottom section of your wooden heart.


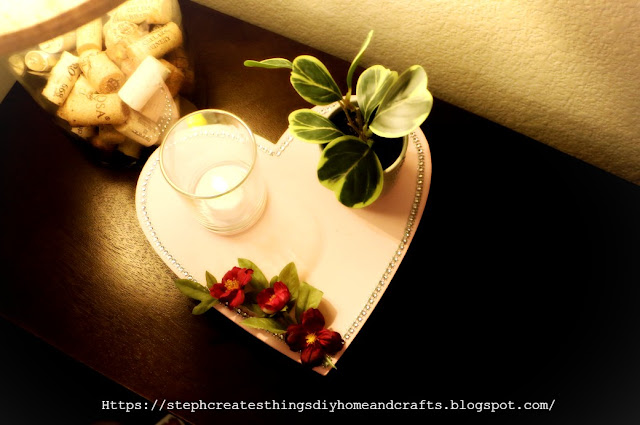
You're all finished. Adding your flowers, and leaves to the heart is the last step to complete this project.

You can add a small potted plant and a glass jar with an LED candle. It is simple, and so pretty when displayed. I hope that you have enjoyed this simple DIY project.
Pin/Share/Save

Be sure to check out my other DIY tray/riser projects below
DIY $8 Holiday Wood Risers. Build And Decorate
How pretty, looks nice! Thanks so much for linking up at A Themed Linkup 95 for All Things Love and Valentine’s Day. Pinned.
ReplyDeleteDee, thank you!!
DeleteCONGRATS Steph! Your post is FEATURED at A Themed Linkup 96 for Handcrafted Jewelry from the previous linkup for All Things Love and Valentine’s Day.
ReplyDeleteThank you so much!!
Delete