
DIY Spring Decor: Bee Happy Decoration

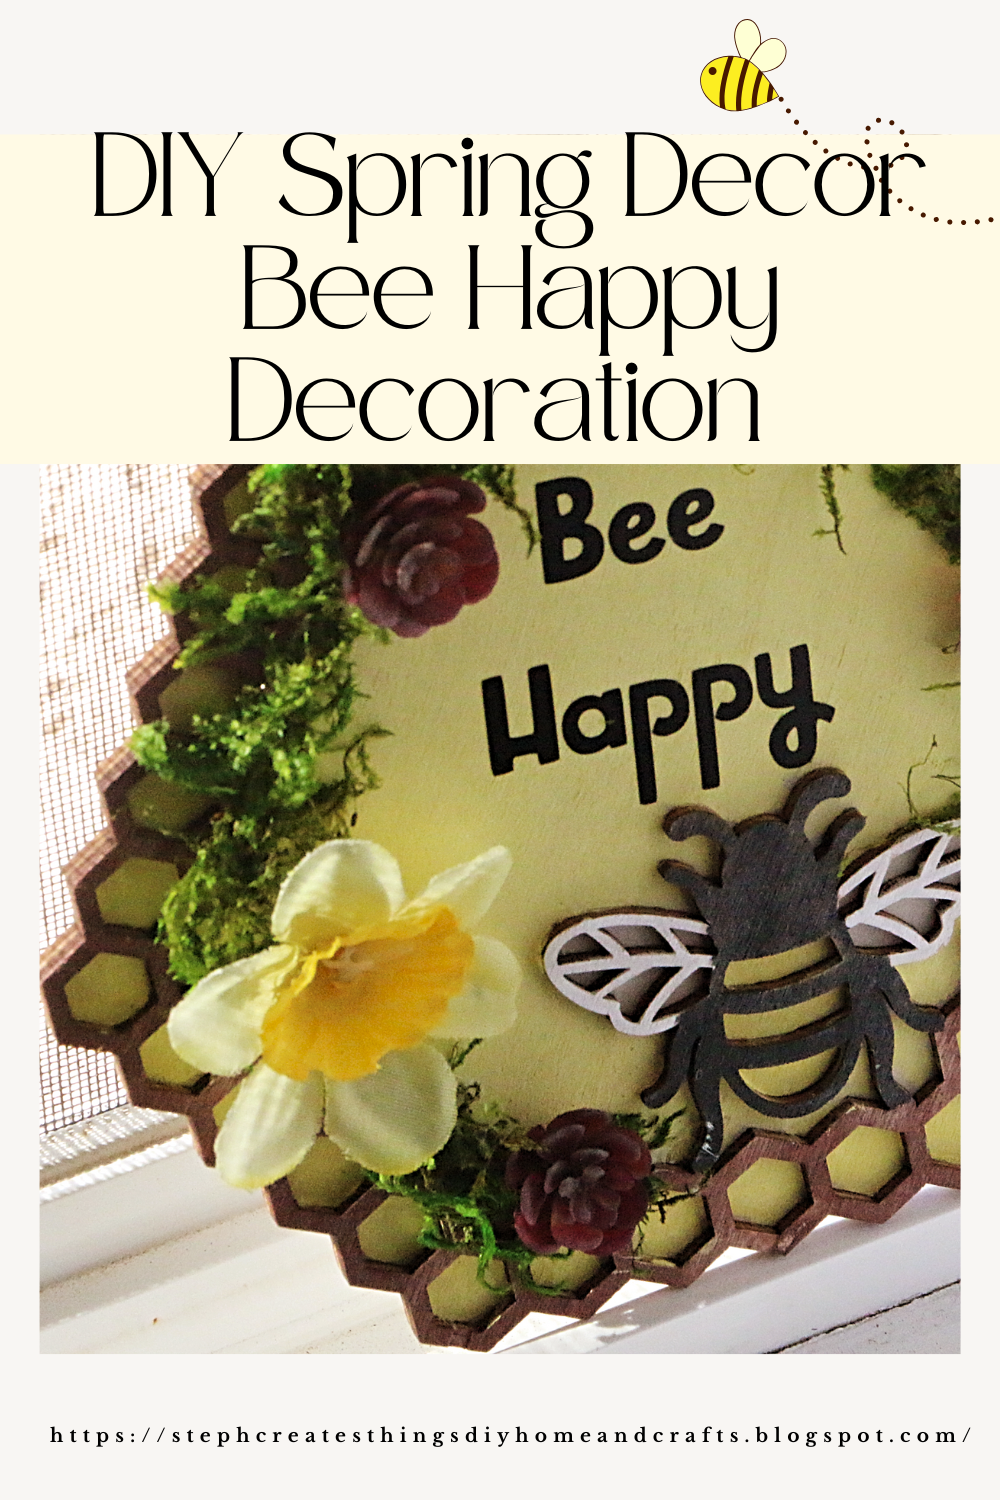
 Hello everyone! Today, I would love to share an easy DIY project with all of you. Recently, during one of my trips to my local Michaels store, I purchased this cute little plywood beehive decoration, and I knew I wanted to create something for spring. It was the perfect decoration to add a bit of my creative twist and some lettering. For this project, I used my Cricut machine to create the letters. You can use any lettering, vinyl, stickers, or paint markers. I will provide you with a list of materials. If you're ready, let's get started.

Beehive plywood decoration


Video tutorial


Materials for plywood beehive craft

Materials:
-One plywood beehive sign
-Acrylic paint: I'm using white, brown, and yellow.
-Paintbrush and/or sponge brush
-Hot glue
-Craft moss
-Lettering: stickers or vinyl letters. I used my Cricut machine to create the letters.

plywood beehive craft and paint
Applying Acrylic paint
I started by applying my brown acrylic paint to the outer surfaces of the beehive using a sponge brush. I added a bit of paint and a little water to a glass jar. By adding water, I could thin the paint before applying it.

Applying paint to decoration

 After that, I used a smaller paintbrush to apply yellow paint to the honeycomb sections of the design. Using a smaller paintbrush was helpful, as these areas were much too small for the sponge brush. 
I also painted the bee, along with the middle section of the decoration.

Hand holding yellow acrylic paint

Applying yellow paint to beehive decor

Adding yellow paint to center of decoration
Adding craft moss, lettering, and flowers
I used hot glue to attach craft moss around the inner section of the decoration. Then, I added the letters I created with my Cricut machine; however, you can also use sticker letters if you prefer. Finally, I attached my artificial flowers to complete the decoration. 
Collage showing craft moss, lettering, and flowers

Did you enjoy this project? Let me know your thoughts in the comments below. I believe it's the perfect spring decoration to complement your existing decor. You can hang it up or place it on a tiered tray or shelf. Thank you for visiting and creating with me. I look forward to seeing you soon!

Pin Share Save

Pinterest pin showing Bee Happy Decoration

Comments

Post a Comment

I love hearing from you! Your comments and creative ideas truly brighten my day. I do my best to respond to everyone, so if you have a question or just want to say hello, please leave a note below. To keep our community a positive and inspiring space, spam or off-topic comments will be removed. Happy crafting!

Popular posts from this blog

DIY Budget-Friendly Succulent Plant Hanger Design

 Hi everyone! I hope that you are doing well. Today I am sharing an easy DIY craft that is budget-friendly, and easy to create. A material list will be provided, along with step-by-step instructions on creating your very own. Be sure to check out the video tutorial below. Video tutorial Materials One 4x4 framed art Acrylic paint Faux succulents Hot glue and any other heavy-duty adhesive Twine Scissors  Floral cutters Paintbrush You can find most of these materials at your local Dollar Tree This project costs under five dollars If your frame comes with beads as shown in the picture above, take your scissors and remove the beads. You will actually reuse the beads later on in this craft. Take the inner section of your out and set it aside. Next, take your acrylic paint and paintbrush, and begin to apply your paint to your frame. I applied three coats of my paint to my frame. Next, use your paintbrush you apply paint over the inner section of the frame we removed earlier. I applie...

Summer Craft: DIY Paper Plate Watermelon Flower Hanger

Hey everyone! I'm excited to show you a fun and easy craft. Today, we will be making a summer watermelon floral hanging design using a paper plate. This DIY project is easy to create and fun to welcome the summer season. You'll make this watermelon floral hanging design to display your artificial flowers creatively. It's also a great way to use any extra paper plates you may have lying around and aren't sure what to do with. You may have extras from a birthday party or a BBQ. If you're ready, let's get started creating your floral hanging design! Video tutorial Summer Craft: DIY Paper Plate Watermelon Flower Hanger Materials: - Paintbrush - Artificial flowers - Paper plate (any size you prefer) - String or craft twine - Scissors - Hot glue Optional-Hole Puncher Start by cutting the paper plate in half. Use a darker green paint to cover the bottom area of the plate. Let it dry between each coat of paint. Continue applying paint to each area of the plate. Then, ad...

Easy DIY Summer Serving Tray

Hello everyone! How's everyone doing? I hope all is well. Today I am bringing you a quick and easy design. We're going to create a summer serving tray. You could also use this tray as a decor element as well. I am reusing a wooden crate I purchased a few years back for $3 at my local Target store. I figured it would be perfect to repaint and add a few other embellishments. If you're ready, let's create a cute summer tray. Video tutorial Materials One wooden crate I am reusing an old wooden crate I purchased at Target for $3.  Acrylic paint Optional mod podge-If you decide to seal your paint One paintbrush Scissors Fruit stickers or other summer embellishments  I found a pack of clear fruit stickers at Dollar Tree One wooden summer word sign E6000 or hot glue Begin by applying your acrylic paint to your wooden tray. I am using multisurface acrylic paint for the main tray. Be sure to allow your tray to fully dry. Between each coat of paint, I used my blow dryer to help wi...

Upcycled Plastic Bowl Hanging Planter

  Hi everyone! I hope that you are doing well. I had a few microwavable noodle bowls that I washed out and put away. I took a few days to think about what I could create using these bowls. It finally came to me, and I decided I would take one of the plastic bowls, and upcycle it. We will take this plastic bowl, and create a hanging planter. I will take you through each step, and as always I will provide a video tutorial. If you're ready, create with me! Hanging planter video tutorial Materials One Plastic Bowl  I'm reusing a plastic noodle bowl One hole puncher Twine You will need four sections of twine, of the same length. River pebbles, or craft rocks  I purchased river pebbles at my local Dollar Tree. Medium size wood beads (optional) Paint I'm using Acrylic chalk paint. Color is called mineral.l Hot glue Faux succulents, and vines Craft foam blocks Paintbrush or sponge brush Scissors Floral snips Begin by taking your hole puncher, and punching out four holes in your ...

Decoupaged Glass Jar Candle Holders with Faux Leaves and Gold Wire

  Learn how to create beautiful decoupaged glass jar candle holders using leaves and gold wire. This DIY project is a perfect way to upcycle old glass jars and create unique candle holders for your home decor.  I hope you're all doing well. The weather has cooled down, and we're enjoying the change. I'd like to share a quick upcycling decoupage project with you all today.  I had some extra glass yogurt jars and bought two taper candle holders from Target's dollar section. I wasn't sure what to do with them at first. In today's project, I will show you how to decorate small glass jars using faux fall leaves and gold wire. Video tutorial Materials Needed: - Two taper candle holders - A paintbrush - Mod Podge - Faux fall leaves or a decorative napkin - Hot glue - Two battery-operated tealight candles - Gold wire Applying Mod Podge and faux leaves to glass jars To start with, grab a paintbrush and use it to apply Mod Podge on your glass jar. Apply a small amount of ...

Search This Blog

All content Copyright

Copyright 2021-2026 I ask that you do not take or use my photos or words without permission. If you have any questions, please feel free and contact me. Also, for more information on this blog, check out the disclosure policy tab above. Thank you