Give your Dollar Tree Happy Easter sign a personalized makeover with this fun and easy DIY makeover. Add a touch of creativity to your Easter decor by adding your personal twist.
Last year, I bought this adorable Easter sign, and I was torn between keeping it as is or infusing my own creative touch. Ultimately, I opted for a few subtle alterations. Join me as we transform this sign!
Video tutorial
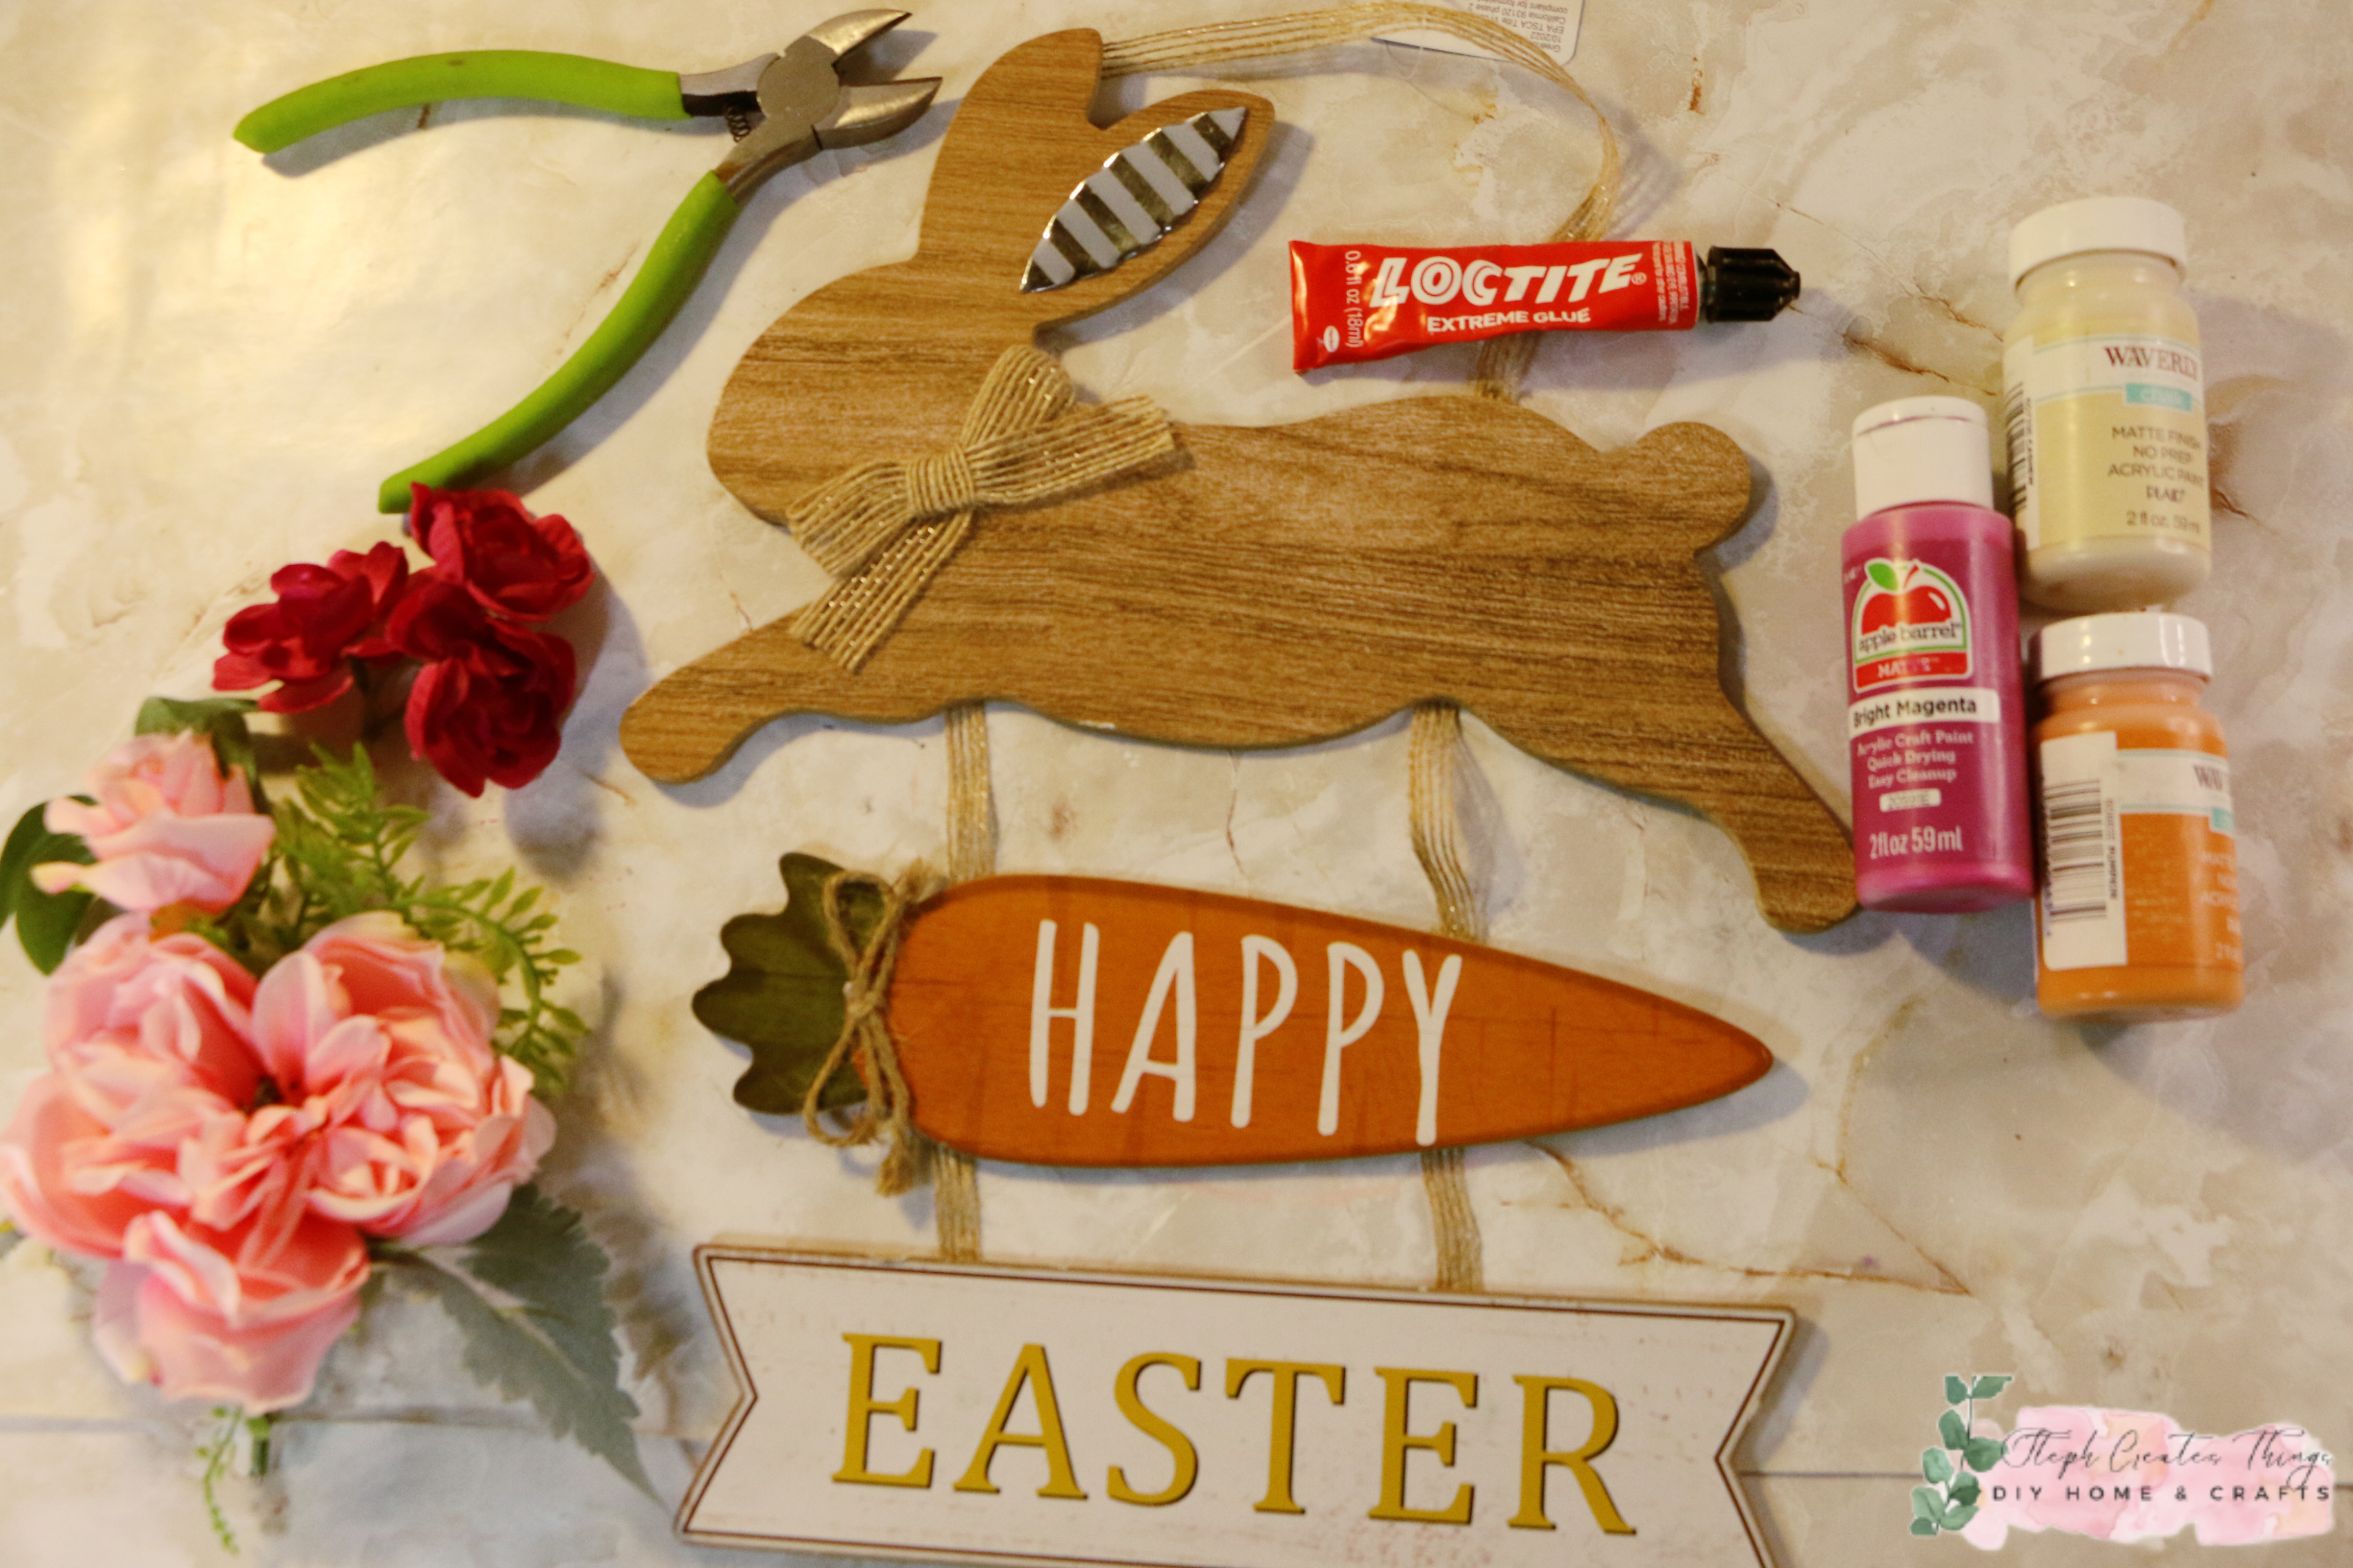
Materials needed:
Easter sign(purchased at Dollar Tree)
Acrylic paint
Paintbrush
Artificial flowers
Floral cutters
Hot glue/adhesive
Gold letters
Let’s get creative and transform that sign! 🌸
Step one: Repainting the Easter sign
To begin, I repainted the bunny using a lovely cream paint color. I intentionally retained the original details that adorned the bunny, I simply enhanced it with a fresh coat of paint.
Following the bunny’s transformation, I turned my attention to the carrot. I mixed a blend of orange paint and the same cream color I used earlier. Additionally, I applied a lighter green shade to the top portion of the carrot, adding depth and dimension.
Following the bunny and carrot transformations, I turned my attention to the last section of the sign. I generously applied white paint to this area, to completely cover the original letters. I traced the sign’s edges with a darker pink color, giving it an outline. The previous outline was a darker brown.
Step two: Adding the gold letters
I decided to give the sign new letters by adding gold letters to the sign. Although the stickers came with a sticky backing, I applied additional adhesive to ensure that my letters remained securely in place.
Step three: Adding artificial flowers and greenery to the sign
Grab your floral cutters and start snipping away at the greenery and flowers. Then, apply some hot glue to the top section of the carrot and add the foliage.
Following the previous steps, I carefully attached the flowers to the sign using adhesive. I strategically placed one flower on the carrot. The remaining blossoms found their home at the bottom of the sign, creating a simple arrangement.
I absolutely adore how effortlessly delightful this little makeover turned out to be! And here’s a friendly reminder: don’t hesitate to infuse your own personal touch into any decoration. Sometimes, a splash of paint and a handful of materials can breathe new life into your cherished decor.
I sincerely hope you enjoyed this simple yet rewarding project. Thank you all for joining me on this creative journey! I'll see you soon.
I love hearing from you! Your comments and creative ideas truly brighten my day. I do my best to respond to everyone, so if you have a question or just want to say hello, please leave a note below. To keep our community a positive and inspiring space, spam or off-topic comments will be removed. Happy crafting!
Create a beautiful autumn wreath with this simple DIY tutorial. Learn how to incorporate floral elements and beads to make a stunning seasonal decoration for your home. Hello! I am delighted to have you here with me today. For this DIY project, I have a simple idea that I think you'll love. We will be creating an Autumn floral and bead wreath using just a few materials. If you're viewing this project, I'm sure you love Fall as much as I do. It is my favorite season, and I have been busy creating new crafts to share with all of you. Video tutorial How to create an Autumn floral and bead wreath Materials One wreath $4.99 (I'm using a grapevine wreath, and I purchased it at Michael's. It is a 14'' wreath) Faux fall floral (My flowers were purchased at Michael's, and it was actually a stem bundle) $9.99 , but they are having a sale. I paid $4.99 Beads $1.60 (Purchased at Michael's) Stretch cord $2.88 (Purchased at Walmart) You will also...
Transforming Oui Yogurt jars into a hanging flower display is a simple way to add charm to any space. In this post, you'll learn how to customize and hang these jars with flowers. Get ready to create a beautiful, eco-friendly display that brightens up your home or garden. Whether you're new to upcycling or just itching for a quick creative fix, this easy and budget-friendly project will brighten up any window in your home with elegance and charm. Video tutorial What You’ll Need: 3 Oui yogurt jars (or any small glass jars you have on hand) Transfer stickers of your choice — I used cold transfer stickers I snagged on sale at my local Michaels Artificial flowers Scissors Floral cutters Twine Spring tension rod (or clear sturdy command hooks) 1. Prep Your Jars and Add a Personal Touch Begin with clean, dry jars. These little glass containers serve as the perfect blank canvas. Select your transfer stickers—I opted for a floral theme because who doesn’t love more blooms? I trimmed th...
Learn how to design and create your own personalized organizer using affordable Dollar Tree items. Get creative with materials and follow these easy DIY steps to make a unique and functional organizer for your home or office space. Hi everyone! I hope that you are doing well. Recently I took a trip to my local Dollar Tree and found these stackable plastic organizers. Today we're going to design our very own organizer. To create your organizer you will only need a few materials. Most of my materials were purchased at my local Dollar Tree store. You will need three of the plastic organizing drawers. Be sure to check out my YouTube channel for more DIY tutorials-- For more DIY Tutorials Click here! And I would love it if you subscribed to the channel DIY Organizer video tutorial below Materials THREE STACKABLE ORGANIZING DRAWERS 5X5X1.75 IN ASSORTED FAUX PEARL BEADS SMALL WOOD BEADS PEEL AND STICK FLORAL DECALS PEEL AND STICK DECORATIVE PAPER HOT GLUE PAINT- I'M USING AC...
I've always thought there was something so comforting about soft candlelight, especially when it’s paired with a few simple faux florals and greenery. Today, I’m sharing a sweet little project in which I decorated a glass jar in three different ways. Each jar has its own personality, glow, and gentle charm. These pieces are perfect for porch décor, but they work beautifully anywhere you want to add a touch of warmth. I love projects like this—simple materials, quiet moments, and a finished piece that feels peaceful and handmade. Video tutorial Materials I Used Clear glass jar Battery‑operated candle Faux string of pearls Faux succulents Faux vine Bright pink faux flowers (tops removed from stems) Yellow faux flowers Faux foliage Optional: woven mat or tray for display Jar 1: Succulents & String of Pearls For the first jar, I wanted something earthy and calming. I placed a faux string of pearls inside the jar and let it settle naturally. Around it, I tucked in a few faux succul...
Hello everyone. I hope that you are all doing well. Last week was a busy week for my household. We had lessons and appointments, and a lot of studying happened. With all of the hecticness going on, I was able to take a trip with my girls to one of our local Target stores. I found this super cute mini wheelbarrow in the dollar section during our trip there. This was five dollars, and I couldn't wait to come up with a craft to share with all of you. This is a quick redesign project; you only need a few materials. Video tutorial Materials One mini wheelbarrow Spray paint Faux floral or succulents Painter's tape Floral cutters Hot glue Craft rocks Adding painter's tape to the wheelbarrow Stary by adding your painter's tape to your wheelbarrow. I applied my tape to the areas where I did not want my spray paint getting on. Adding Spray paint to the wheelbarrow After adding your tape, take your wheelbarrow and add your spray paint. Adding craft rocks inside of the wheelbarrow...
Copyright 2021-2026
I ask that you do not take or use my photos or words without permission. If you have any questions, please feel free and contact me. Also, for more information on this blog, check out the disclosure policy tab above. Thank you


.jpg)


So cute! I love it!
ReplyDeleteAmy, thank you! 😊
DeleteSuper cute with a lovely updated look. Thank you for sharing this post at the Will Blog for Comments #28 linkup! Hope to see you next week, too.
ReplyDeleteJennifer, thank you! 😊
DeleteBeautiful as all of your stuff! Love it!
ReplyDeleteYou are so kind. Thank you!
Delete