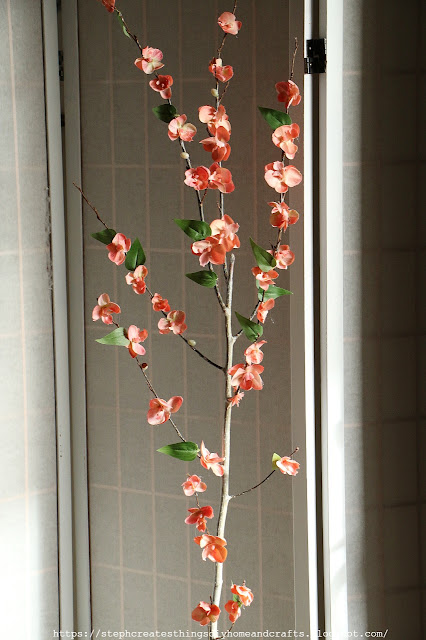
Section of branches from a tree in my yard
faux florals and leaves
hot glue
A planter pot
Floral cutters
A foam floral block, and optional rocks
After inserting your tree branch into the foam block, you can add rocks on top. This will provide additional weight to your pot and prevent the tree branch from shifting or moving around.
Cutting the flowers and leaves
To create a beautiful blossom tree, follow these steps. First, take floral cutters and remove the flowers and leaves from the stems. Cut as many flowers as needed for your tree.
Attaching the flowers to the branches
Next, use hot glue to attach the flowers to the branches. Be sure to protect your fingers while using the hot glue. Add a few flowers to each branch and then add some faux leaves to some of the branches. Space them out evenly.
Adding the tree to the pot
Insert a foam block into your planter pot. If the foam block is too big, cut it to the right size. If it is too small, add extra foam blocks to fill the empty space. Insert the branch into the foam block. If the branch is unstable, add a few rocks above the foam block to keep it in place.
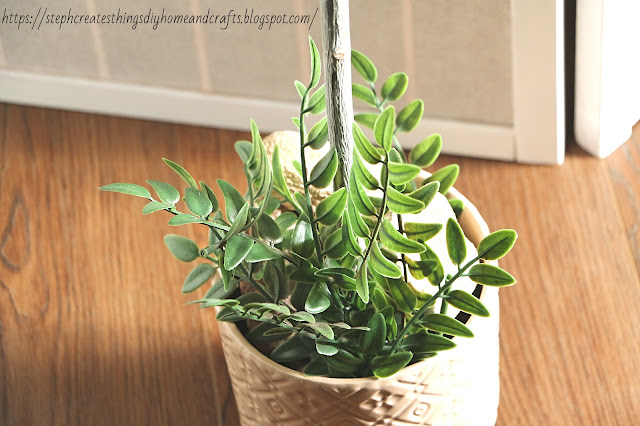
Finally, add some extra faux leaves to the bottom of the pot for decoration.
Your faux blossom tree is now complete. I am delighted with how easy this project was. It was both fun and affordable. I only had to buy the flowers and leaves for this project, and luckily, they were discounted. Since I already had most of the materials, I could complete this tree for just under $5. Thank you for joining me in creating your very own blossom tree. If you enjoyed this simple DIY project, check out my other blossom branch project that I have worked on, Blossom branch arrangement.
Pin Share Save


Interesting idea, I would for sanity's sake use larger/fewer blossoms for a statement. Spring branches are always lovely early in the year.
ReplyDelete:) It didn't take too long adding the blossoms, but you definitely want to protect your fingers when working with the hot glue. Thank you for visiting.
DeleteThis is super pretty!!!
ReplyDeleteThank you so much! 😊
DeleteWhat a lovely idea! This looks so effective and so pretty. :)
ReplyDeleteThanks so much for sharing with #MMBC Stephanie, I hope you can join us next week.
Jayne, thank you so much.
Deletevery pretty reminds me of spring thanks for sharing come see us at http://shopannies.blogspot.com
ReplyDeleteAnnie, thank you so much. I'm so ready for Spring.
DeleteThis is beautiful and I have to try it as soon as possible. Spring calling :)
ReplyDeleteThank you! Yes, Spring is calling for sure. I'm so ready! Thank you for visiting. 😊
DeleteSo very pretty!
ReplyDeleteThank you so much. 😊
DeleteI really love this. So pretty and simple! Thank you for sharing this post at the Will Blog for Comments #22 linkup. Hope to see you there next week, too. Have a great week!
ReplyDeleteJennifer, thank you. Happy to hear you enjoyed this DIY project. 😊
DeleteSo pretty, what a beautiful craft to help us get ready for Spring!
ReplyDeleteJulie, thank you. I'm so ready for Spring! :)
DeleteThat is so pretty! What a fantastic, budget idea to decorate your home.
ReplyDeleteKim, thank you so much. 😊
DeleteThat's very pretty, it would look lovely brightening up a winter household, I can't wait for the spring.
ReplyDeleteOh my goodness... how pretty!! I would have never thought to make your own spring blossomed branches. It turned out so amazing!
ReplyDeleteThank you so much! I love making blossom branches using the branches from my yard. I appreciate you stopping by. :)
Delete