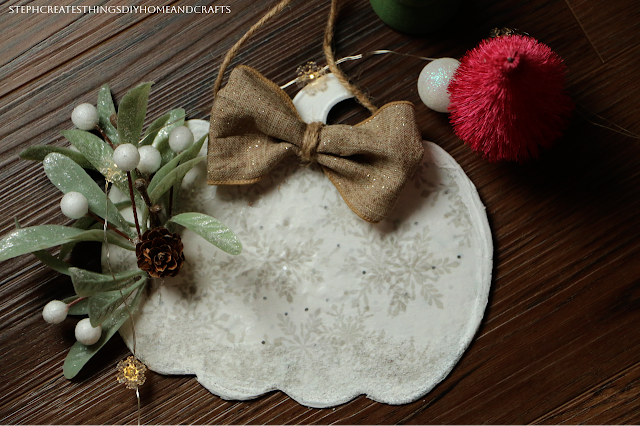
Transform your hanging metal pumpkin decoration into a stunning winter decor piece with this easy DIY project. Learn how to repurpose and give new life to your pumpkin for the winter season.
Video tutorial
Materials needed
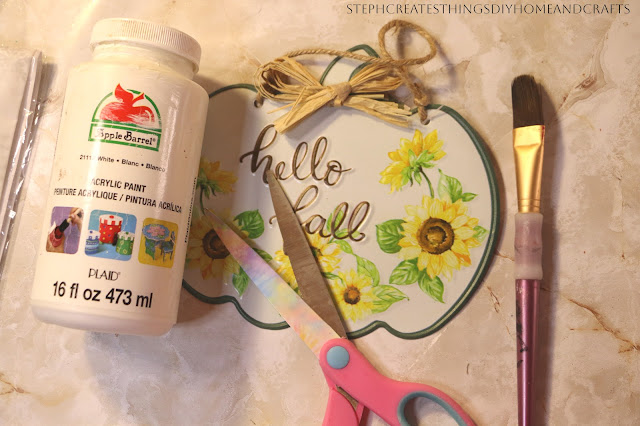
- One metal pumpkin purchased from Dollar Tree
- Gift tissue paper (snowflake pattern)
- Acrylic paint (white)
- One paintbrush
- Faux winter foliage/greenery
- One bow (optional)
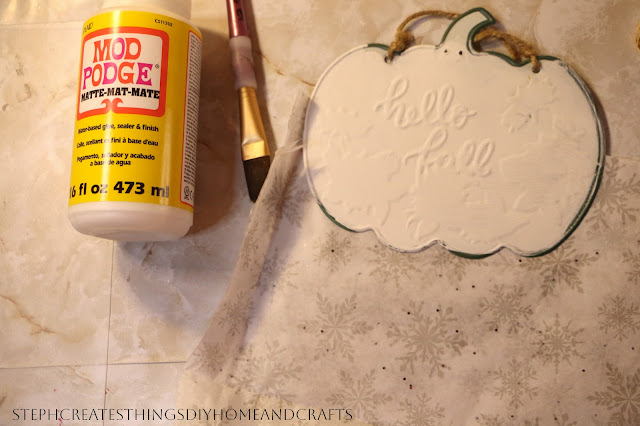
- Mod podge
- Hot glue
- Scissors
Applying Acrylic paint to metal pumpkin
To begin decorating your metal pumpkin, remove any labels or decorations that came with it. Then, apply a coat of acrylic paint using a paintbrush. I recommend applying two coats of paint and using a blow dryer to help with the drying process between each coat.
Applying Mod Podge
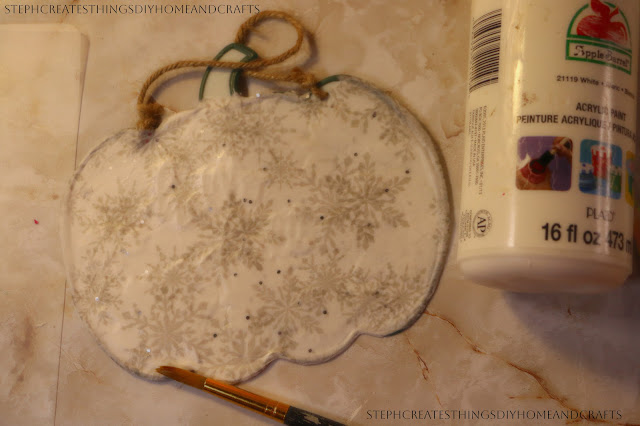
Next, cut a section of your tissue paper using scissors. If the metal pumpkin has lettering, consider using two sections of tissue paper to cover the letters as much as possible. Apply a layer of Mod Podge to the metal pumpkin using a paintbrush. Place one section of tissue paper over the pumpkin and use a blow dryer to help with the Mod Podge application. Once you’ve applied the first tissue paper, apply a second layer of Mod Podge over it using your paintbrush. Then, place the second tissue paper on top of the first one and cover it with a thin layer of Mod Podge before using your blow dryer. To remove excess tissue paper, use a small square sander and gently go over the areas.
Applying paint, foliage, and bow
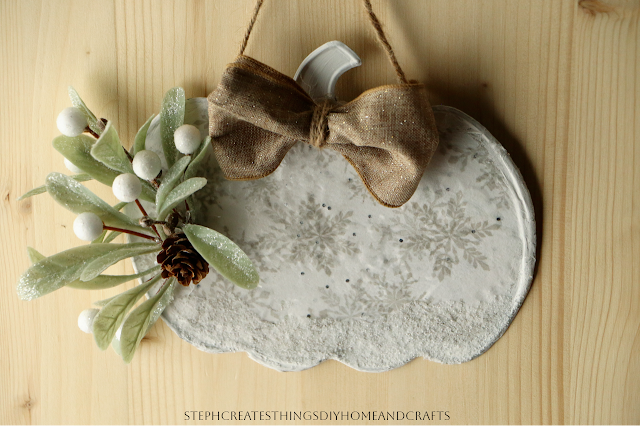
Afterward, paint around the outer surface of the pumpkin with white acrylic paint. For an added touch, I sprinkled a layer of faux snow on the bottom of the pumpkin.
Finally, attach your ribbon bow and winter foliage to the metal pumpkin using hot glue.
You have successfully transformed your autumn pumpkin into an adorable winter pumpkin hanging decoration. I hope you enjoyed this quick and easy DIY project. Have a great day!You may also enjoy
Pin share save

.png)

It's really beautiful! I can hardly believe it's the same piece. I've never thought of decorating with pumpkins in the winter, but that snowflake pattern and all the neutrals just turned out so lovely! Thank you for sharing this post on the Will Blog for Comments #12 linkup. Hope to see you there next week as well.
ReplyDeleteJennifer, thank you. I wasn't sure if I was going to like it, but I love how it turned out. Thank you so much for stopping by.
DeleteSuch an amazing transformation!
ReplyDeleteAmy, thank you so much. 😊
DeleteSo pretty, looks awesome! Thanks so much for linking up at #IMadeItMondayLinkParty 30. Pinned.
ReplyDeleteDee, thank you. 😊 I appreciate it.
DeleteVisiting again to say thanks so much for linking up at #AThemedLinkup 170 for Winter Crafts and Décor. Pinned.
ReplyDeleteCONGRATS Stephanie! Your post is FEATURED at #IMadeItMondayLinkParty 31.
ReplyDeleteThank you! 🥰
DeleteStephanie, CONGRATS! Your post is FEATURED at #AThemedLinkup 171 for Handcrafted Jewelry from the previous linkup for Winter Crafts and Décor.
ReplyDeleteDee, thank you. I'll be sure to visit to thank you. :)
DeleteLove this repurpose Steph. Seeing your creations always brighten my day.
ReplyDeleteThanks so very much for sharing this with Sweet Tea & Friends this month dear friend.
Paula, you are too kind. I appreciate it so much. I'm glad to hear that it brightens your day.
DeletePerfect for Midwest Thanksgivings...you never know if you will be buried in snow. Good tutorial, also.
ReplyDeleteSandi, thank you. I'm glad you enjoyed it.
DeleteThis is so clever Steph, I love the idea of updating decor so it can be used for more than one occasion.
ReplyDeleteJulie, thank you! It was such a fun redo project. Always nice updating decor.
DeleteGorgeous! Featuring you at Wednesdays in the Studio!
ReplyDelete