
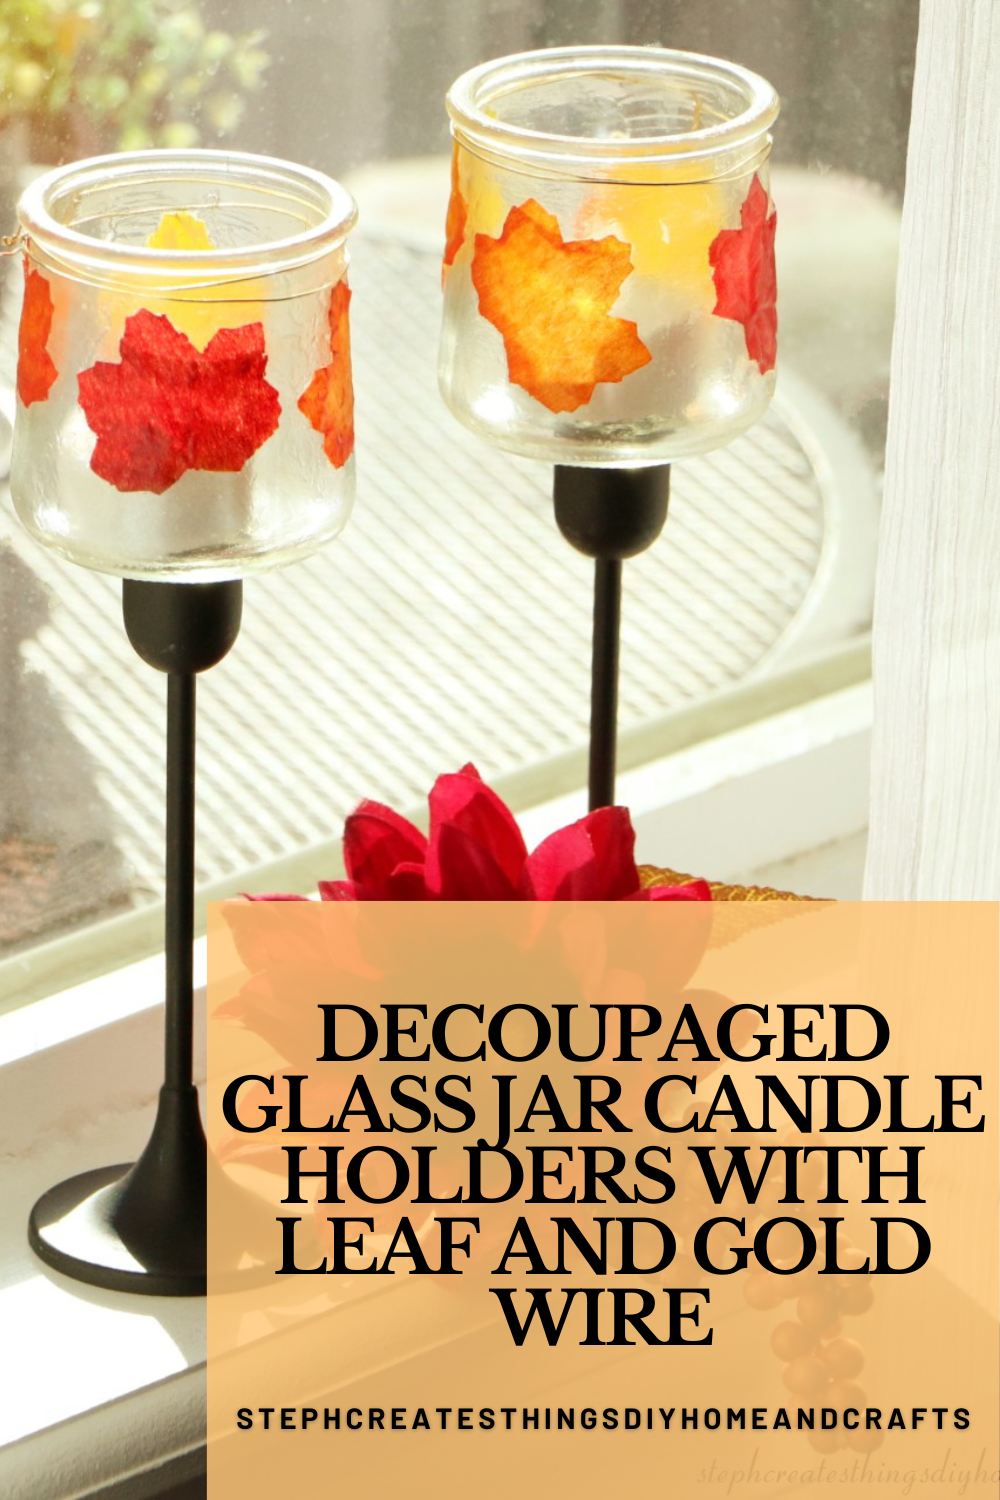
Learn how to create beautiful decoupaged glass jar candle holders using leaves and gold wire. This DIY project is a perfect way to upcycle old glass jars and create unique candle holders for your home decor.
I hope you're all doing well. The weather has cooled down, and we're enjoying the change. I'd like to share a quick upcycling decoupage project with you all today.
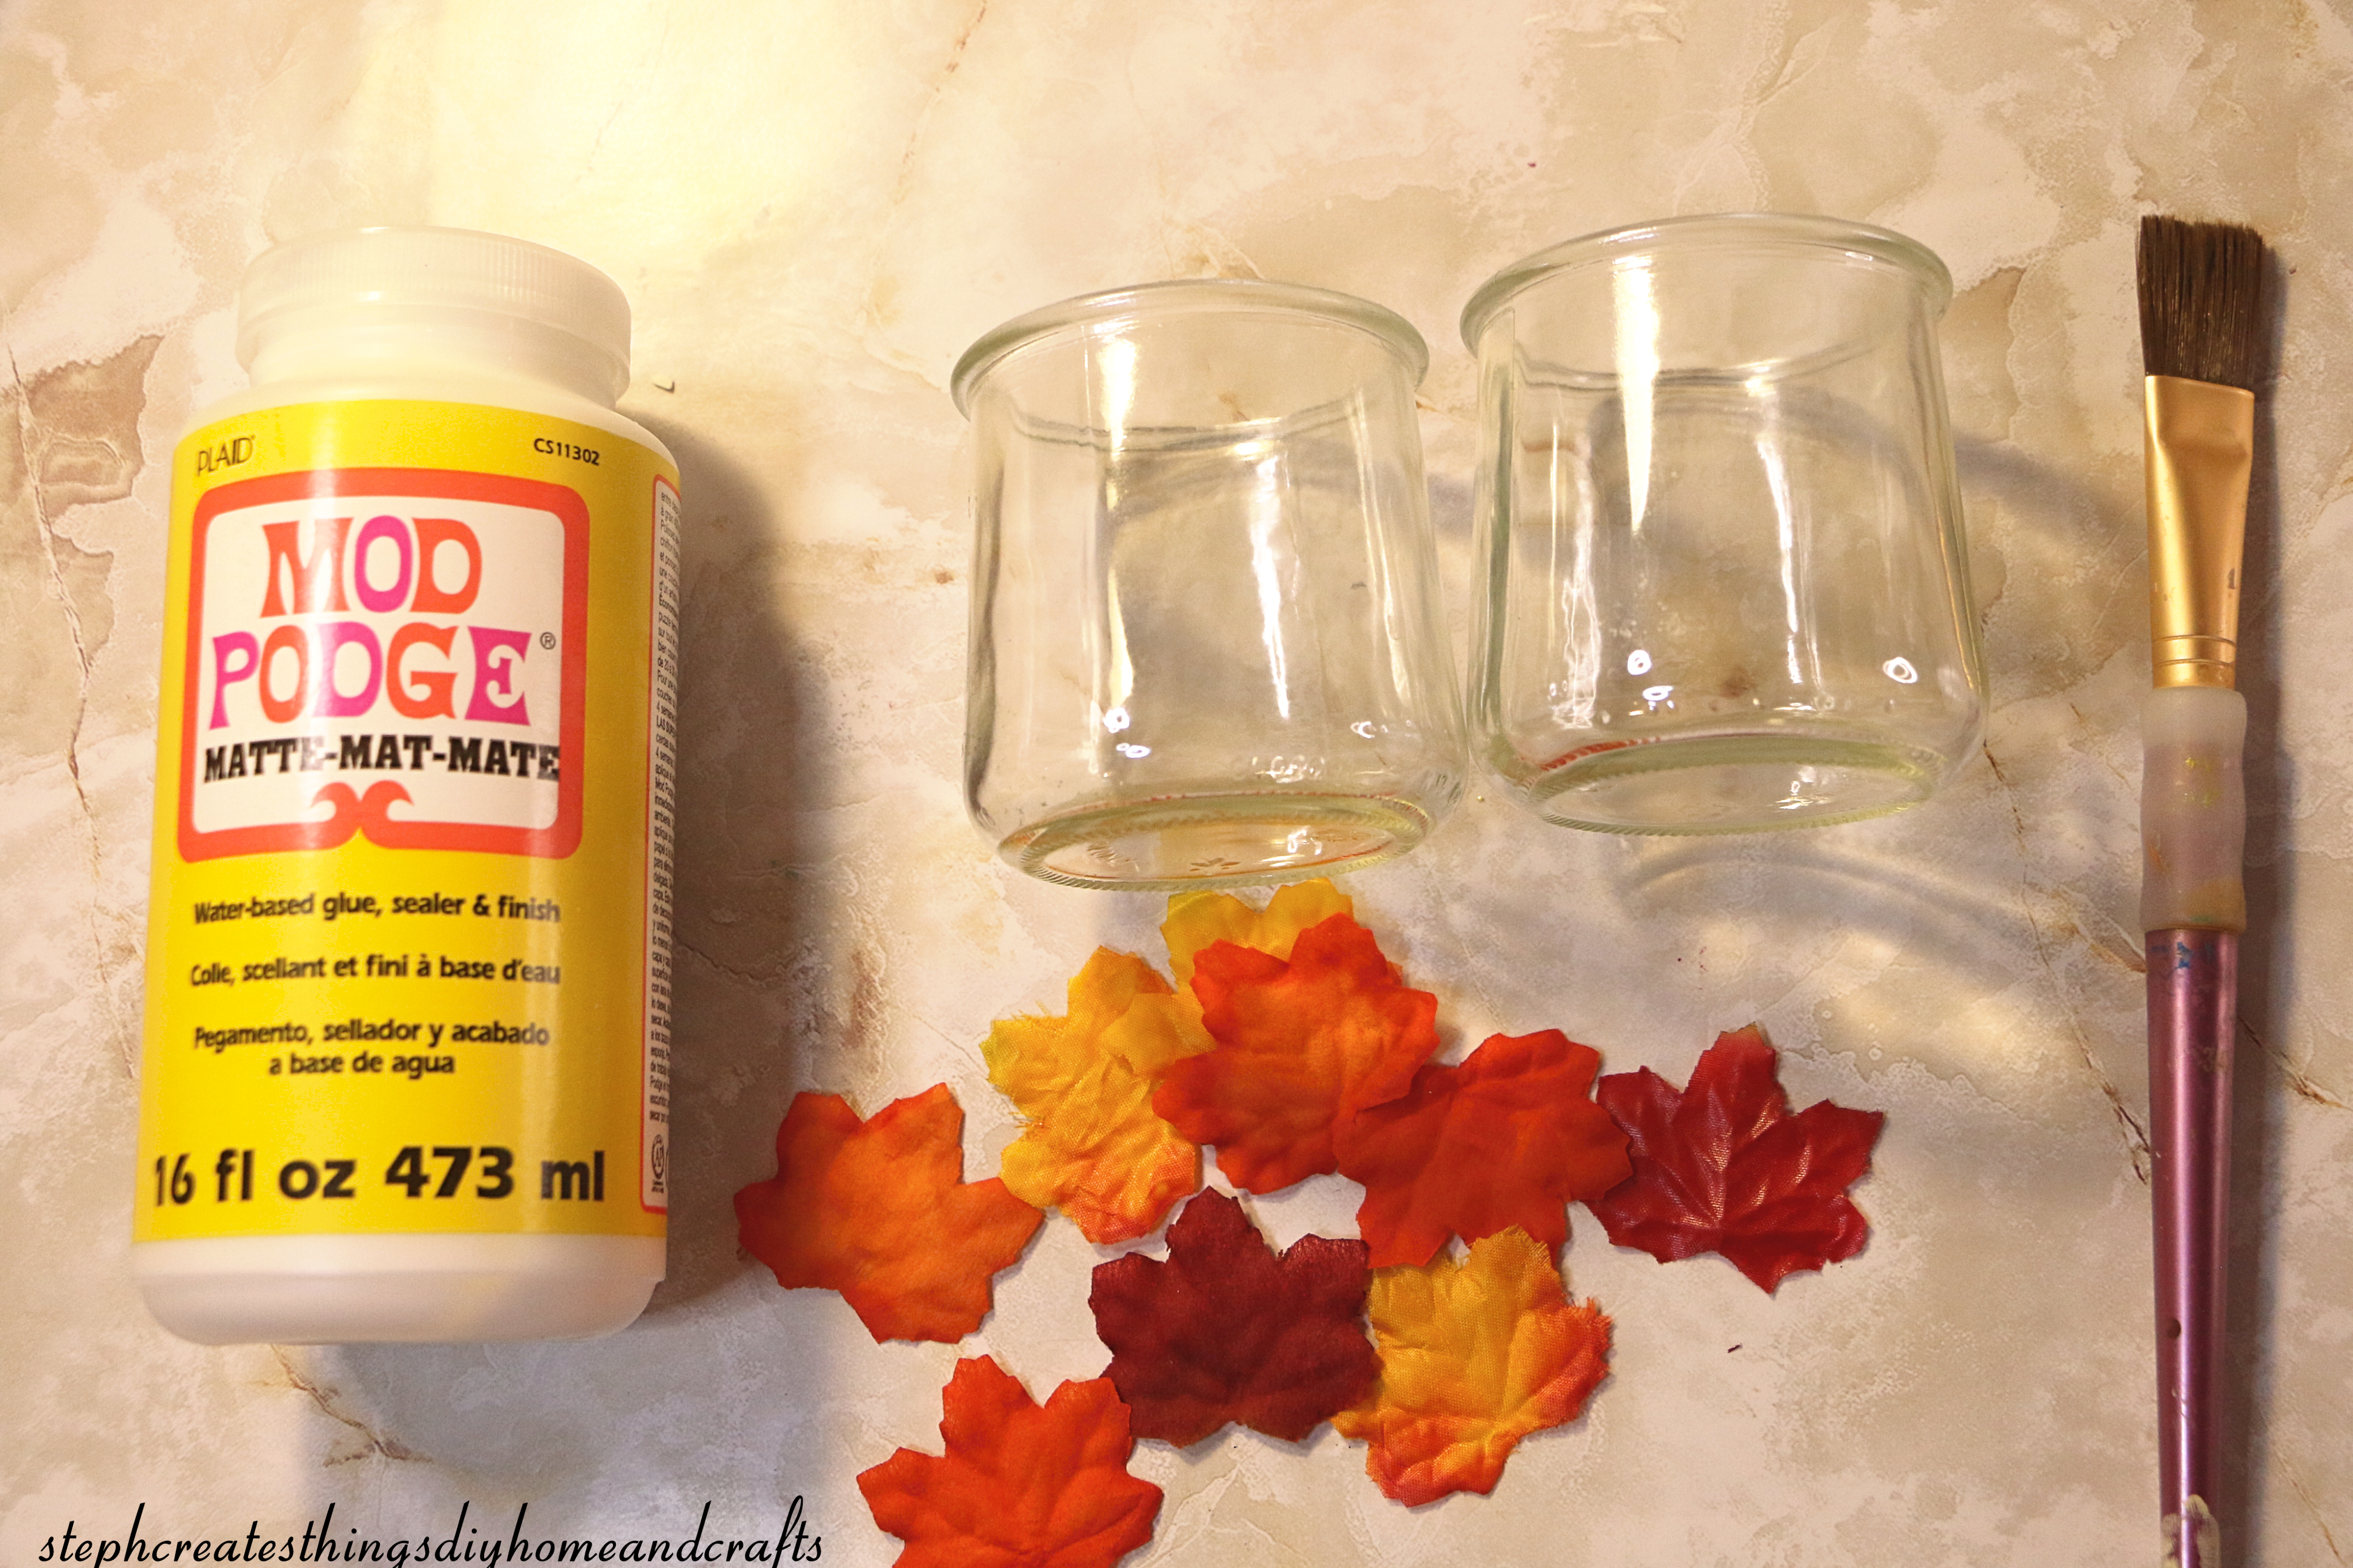
I had some extra glass yogurt jars and bought two taper candle holders from Target's dollar section. I wasn't sure what to do with them at first. In today's project, I will show you how to decorate small glass jars using faux fall leaves and gold wire.
.jpg)
Video tutorial

Materials Needed:
- Two taper candle holders
- A paintbrush
- Mod Podge
- Faux fall leaves or a decorative napkin
- Hot glue
- Two battery-operated tealight candles
- Gold wire
Applying Mod Podge and faux leaves to glass jars
To start with, grab a paintbrush and use it to apply Mod Podge on your glass jar. Apply a small amount of Mod Podge to the jar first before applying it to the back of each leaf. After you've applied the Mod Podge to the leaves, use the paintbrush to apply it to the top of each leaf as well. This process requires patience, and you may need to reapply some leaves. To make the process easier, you can use a blow dryer. After placing the leaves onto the glass, cover the entire outer surface with Mod Podge. Let it dry naturally or speed up the process with a blow dryer.
Attaching a glass jar to a taper candle holder
Apply a small amount of hot glue to the bottom of each glass jar, then place the jars on top of the taper candle holders.


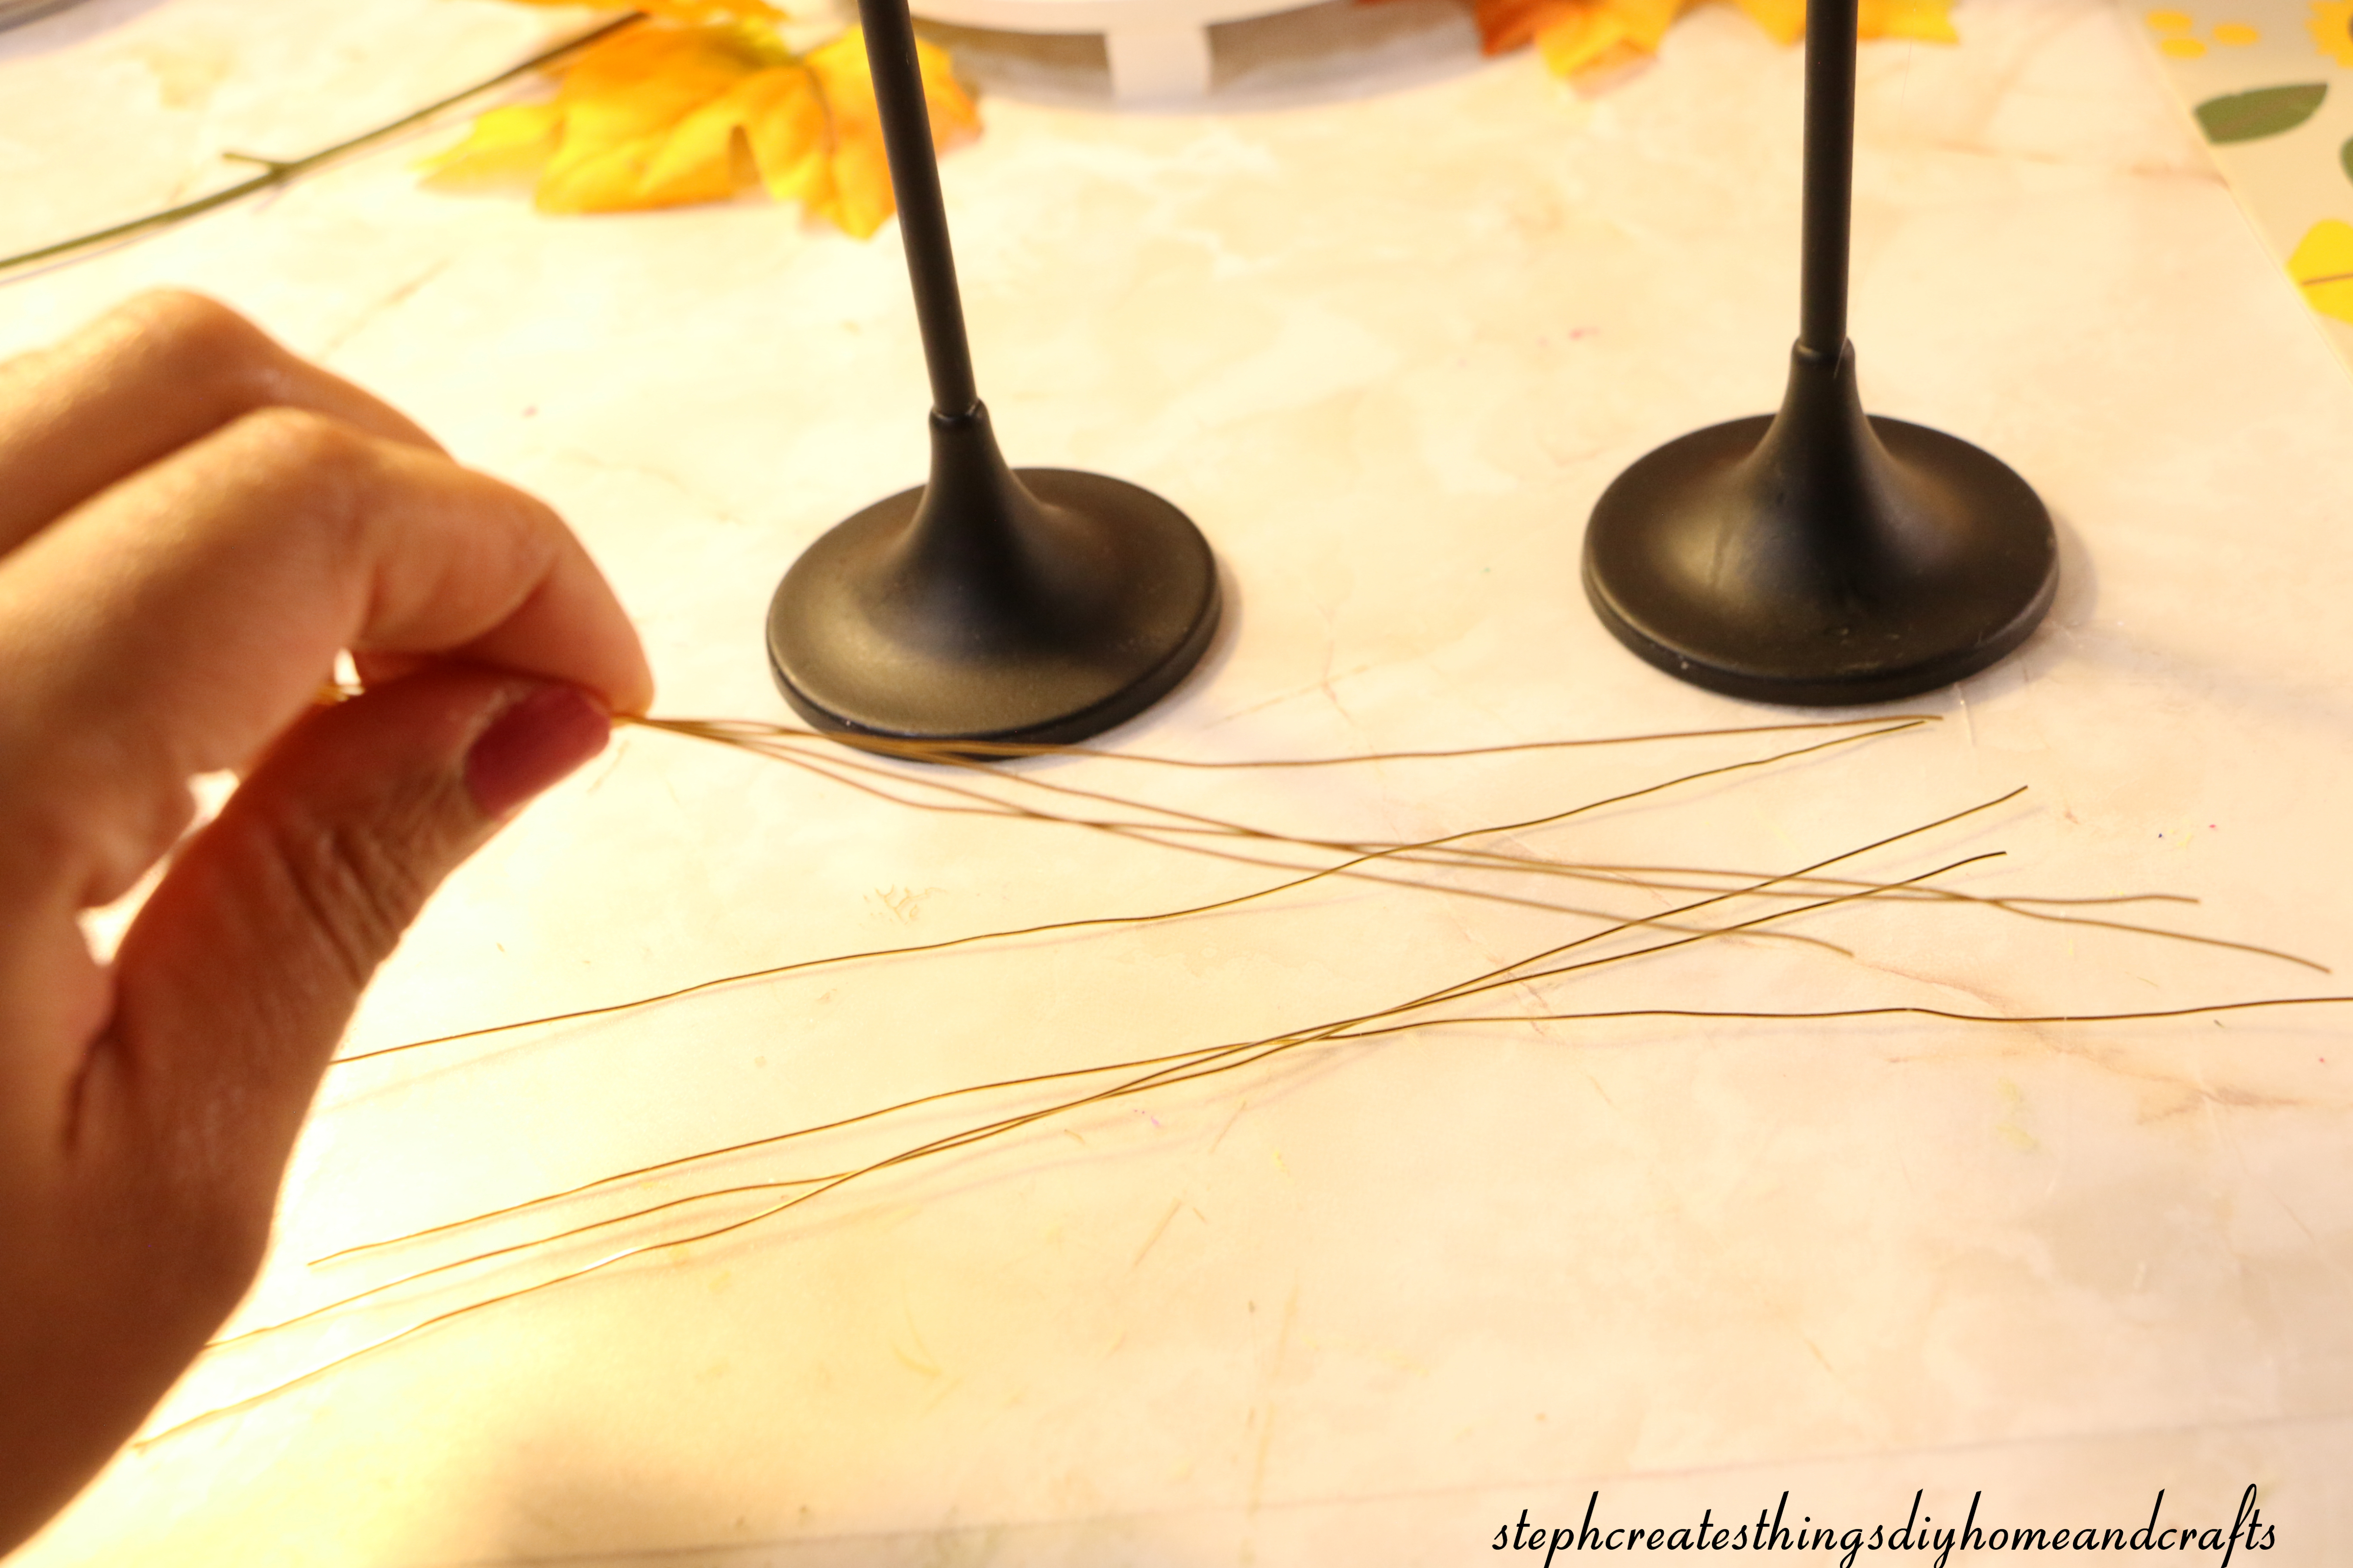
Adding gold wire to glass jars
First, cut a few strands of gold wire. Make sure to cut them in a way that they can fit around the top of the glass jar. Once you have the right size, wrap two sections of gold wire around each jar. Finally, twist off the ends of the wire to keep them in place.
Your decoupaged glass jar candle holder design is now complete and ready to be displayed. I have placed two battery-operated tealight candles inside each jar. This project was incredibly simple, and during the evenings, the jars emit a beautiful glow. I hope that you enjoyed creating this upcycled decoupaged glass jar project. If you decide to create your very own, please let me know. I'll be happy to hear from you. Take care, and I'll see you soon!


You might also enjoy
Pin Share Save

Oh, those look nice in the daylight and lit up at night :) Thanks so much for linking up at the #UnlimitedLinkParty 133. Pinned.
ReplyDeleteDee, thank you. 😊
DeleteThat little wire is so delicate and lovely. These are beautiful--I just love them with the candles lit inside! :) Thanks for sharing this post at the Will Blog for Comments #10 linkup. Hope to see you again next week!
ReplyDeleteJennifer, thank you so much. I like the added gold wire, too! Thank you for visiting. 😊
DeleteVisiting again to say thanks so much for linking up at #IMadeItMondayLinkParty 28. Pinned again.
ReplyDeleteDee, thanks for visiting again! :) Have a wonderful week.
DeleteCONGRATS Stephanie! Your post is FEATURED at the #UnlimitedLinkParty 134!
ReplyDeleteYay! Thank you, Dee. 😊 I appreciate it.
DeleteThese are so clever, Stephanie!! What a great way to re-use glass jars!! These are so festive for the season. Thanks so much for sharing at Home Imagined this week!
ReplyDeleteThank you so much. I really appreciate it.
DeleteThose are so pretty!
ReplyDeleteJoanne, thank you. 😊
DeleteStephanie,
ReplyDeleteI love these candle holders. Congratulations, you are being featured on TFT. I hope you stop by. https://www.eclecticredbarn.com/2023/10/halloween-decor-ideas-on-thursday.html
Hugs,
Bev
Bev, thank you. I appreciate it. 😊 I'll be sure to stop by. 😊
DeleteHi Stephanie - What a super creative idea! I love how this project turned out. Thank you for sharing your post with the Home Imagined Link Party.
ReplyDeleteThank you so much. I'm so happy to hear that you enjoyed it. I appreciate you visiting. :)
DeleteCONGRATS Stephanie! Your post is FEATURED at #IMadeItMondayLinkParty 29.
ReplyDeleteDee, thank you! 😊 I appreciate it.
DeleteThese are so pretty, what a lovely idea. Thank you for sharing with us at Handmade Monday :-)
ReplyDeleteJulie, thank you. 😊 I appreciate you visiting.
DeleteThese are super cute! Parsimonious Décor Darling
ReplyDeleteThank you so much. I appreciate it. 😊
DeleteGorgeous and so pretty.
ReplyDeleteThank you for sharing your links with us at #284 SSPS Linky. See you again next week.
Aw, thank you so much. I appreciate that. :)
DeleteWonderful, thanks so much for sharing on craft schooling sunday!
ReplyDelete:)
Deletethanks so much for sharing on craft schooling sunday, great to "meet" you!
ReplyDeleteThank you so much. It is great "meeting" you as well. :)
DeleteThis is such a lovely and inspiring project! I absolutely love the idea of upcycling glass jars into beautiful candle holders with faux leaves and gold wire. The combination of the fall leaves and the soft glow from the candles creates such a warm and cozy atmosphere, perfect for this time of year. Your step-by-step instructions are so clear and easy to follow, making this DIY accessible for everyone, even those who may be new to decoupage. Thank you for sharing this creative and sustainable idea—I'm excited to try it out myself!
ReplyDeleteAnna, I appreciate your kind words. For you to take the time to leave such a thoughtful and meaningful comment has truly left me feeling wonderful. I value feedback from those who take the time to visit and create my crafts with me. I'm happy to hear that you enjoyed this DIY project. I hope that I am able to inspire enough people to explore their creative side. Thank you for taking time out of your day to check out my craft and give feedback. I appreciate it so very much. ♡
DeleteAnother beautiful creation, your creativity seems to be unlimited. I'll use these in the winter for my cabin, we'll be making our own candles as well with beeswax. Thank you for sharing!
ReplyDeleteThank you so much. I truly appreciate your visit and your wonderful feedback. I'm delighted that you'll be making your own candles.
DeleteThese are so elegant! Love them.
ReplyDeleteThanks' bunches for sharing with Sweet Tea & Friend's this month.
Paula, thank you! I'm so happy you enjoyed them. It's always so nice sharing at your party. :)
DeleteVery cute DIY. Thanks for the share.
ReplyDeleteThank you! ☺️
DeleteNow that's one gorgeous way to elevate a typical votive! Adore the transparent leaves on the jars, that must look so pretty lit!
ReplyDeleteThank you so much. :)
Delete