
How to Create Fall Crate Décor Using Dollar Tree Items

Hello everyone! I hope you are doing well.

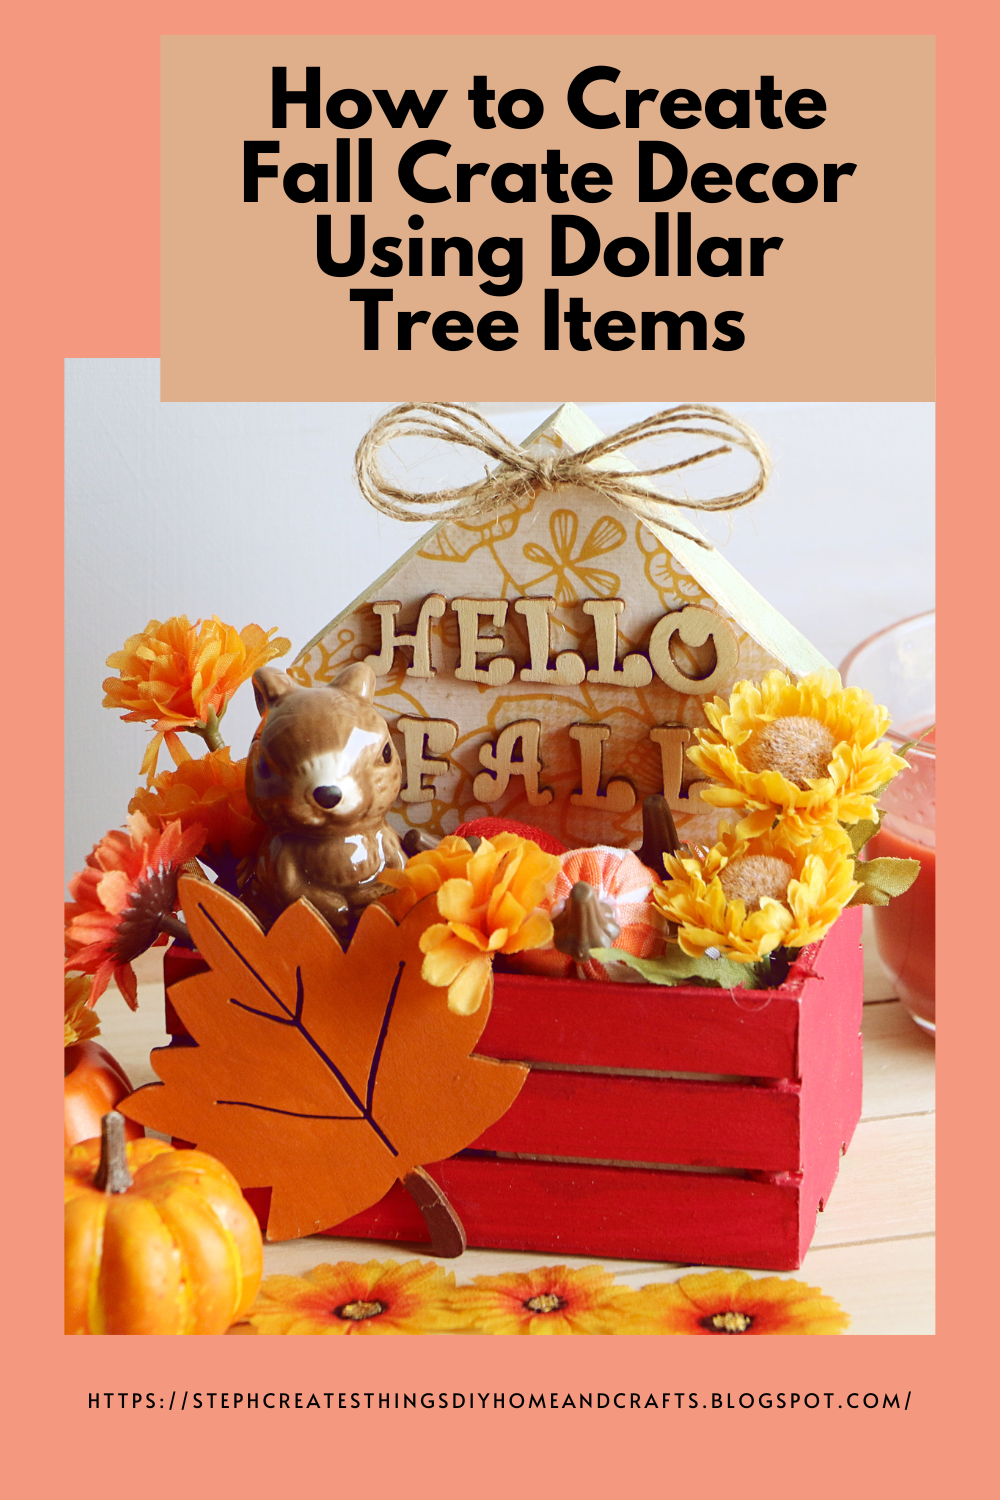
You all know how much I love these wooden crates from Dollar Tree. I created this cute fall decor that can be added to a tiered tray or mantel. We'll use one wooden crate and a house plaque from Dollar Tree. Let's create and decorate together!

Please check out my newest link party on the Crazylittlelovebirds blog if you haven't already. It runs from Fridays at 9:00 a.m. MST to Tuesdays at 11:00 p.m. MST. 

Red wooden crate decoration with squirrel figurine, faux floral near two orange mini pumpkins and a candle in a glass jar

Video tutorial


Craft materials displayed on a table. Faux floral, mini pumpkins, paintbrushes, and more.
Materials
One wooden crate
One wooden house plaque
Acrylic paint
Wooden letters
Any Adhesive or Hot glue
Foam craft blocks
Faux fall floral/greenery
Paintbrushes
Mod Podge
Decorative paper
Floral cutters
Scissors
One pencil for tracing
I have chosen to decorate with mini pumpkins, a squirrel figurine, and an unpainted leaf ornament for the fall season.

Step 1: Tracing your wooden house plaque onto decorative paper

Place the wooden house plaque on the decorative paper and trace its shape with a pencil. Cut out the traced shape with scissors.

Step 2: Applying Mod Podge

Apply a thin layer of Mod Podge to the surface of the wooden crate. Place the decorative paper over it and apply a second layer on top. Use any Podge technique you prefer. I usually apply a layer, add the paper, smooth the surface, and use a blow dryer between each coat.


Put your house plaque aside for now. We will return to it when we add the wooden letters.

Step 4: Apply paint to the wooden crate

After, apply paint to your wooden crate. Originally, I was going to use yellow on my crate, but I decided to go with a deeper red color. 

Step 4: Apply paint to the wooden leaf decoration

Start by painting the wooden leaf with acrylic paint. You can find wooden leaves at Joann's or Dollar Tree.

Step 5: Attaching the wooden leaf to the crate

You can attach your leaf design to the wooden crate using any adhesive. To ensure that it sits flat, add the leaf higher up on the crate.

Step 6: Attaching wooden letters to the house plaque

Take the wooden house set aside earlier and add wooden letters. I added "Hello Fall" to my plaque using Loctite adhesive.

Step 7: Adding a wooden house plaque to the wooden crate

Put your wooden house plaque inside the crate without permanently attaching it, allowing you to easily switch to a different fall theme when desired.

Step 8: Adding foam blocks

Insert foam blocks in a wooden crate for height and flower placement. I reused my foam blocks from my faux succulent planters.


All that's left is to add your fall decorations. I chose fall flowers, squirrel decor, and cute fabric pumpkins from Dollar Tree.


Your autumn-themed crate decor is complete. It's absolutely adorable! I'm thrilled with how it turned out. Did you enjoy this craft? If so, be sure to let me know. 

As always, thank you for stopping by and creating with me! I'll see you soon.

Pin Share Save

Comments

  1. How cute and fallsy, wait, is that a word? How about autumny? Nah, neither one but it is prefect for our upcoming season, huh? Thanks so much for linking up at the #UnlimitedLinkParty 126. Pinned.

    ReplyDelete
    Replies
    1. Dee, haha 😄 I love it. We'll make those two official words now. Thank you for stopping by. 😊

      Delete
  2. Visiting again to say thanks so much for linking up at #IMadeItMondayLinkParty 21. Pinned.

    ReplyDelete
  3. SO many cute things at Dollar Tree...thanks for the tips. My neighbor just dropped off tiny decorative pumpkins from his garden, so I am on my way to Fall feeling!

    ReplyDelete
    Replies
    1. Ann, I'm happy to hear you enjoyed the tips. I'm so ready for fall. Decorative pumpkins are always so fun to decorate with.

      Delete
  4. Love this Steph! Thanks bunches for sharing this tutorial with Sweet Tea & Friends this month dear friend.

    ReplyDelete
    Replies
    1. Paula, thank you. Always a pleasure sharing at Sweet Tea & Friends.

      Delete
  5. Such an adorable little crate your created for fall, Steph. Thanks for sharing at Tuesday Turn About. I'm happy to be sharing your DIY this week at the party! Pinned!

    ReplyDelete
  6. Visiting again to say thanks so much for linking up at #AThemedLinkup 163 for Fall Crafts and Décor. Pinned.

    ReplyDelete
  7. I can't believe you did all this from Dollar Tree items. It's so darling! Thank you for sharing it at the Will Blog for Comments #13 linkup. Hope to see you next week, too.

    ReplyDelete
    Replies
    1. Thank you, Jennifer. Yes, it is all from Dollar Tree. These days they have some cute decorations. Thank you for visiting. :)

      Delete
  8. Thanks for sharing with us, I'm featuring you this week when the next To Grandma's house we go link party starts. Happy Halloween!

    ReplyDelete
  9. Thanks for sharing with the Homestead Blog Hop each Wednesday. You're being features this week!

    ReplyDelete

Post a Comment

I love hearing from you! Your comments and creative ideas truly brighten my day. I do my best to respond to everyone, so if you have a question or just want to say hello, please leave a note below. To keep our community a positive and inspiring space, spam or off-topic comments will be removed. Happy crafting!

Popular posts from this blog

Easy Steps to Create a Cozy Autumn Tablescape at Home

Hello everyone! I’m excited that you decided to visit the blog today. I wanted to share how to create a cozy autumn tablescape at home. My goal was to design something warm and inviting, as our table is a space where we share conversations, drink coffee, tackle homework, and simply enjoy each other’s company.  I typically don’t go all out when decorating my dining table, but I wanted to show you how I styled it using decor pieces I already had. I would love for you to join me in this decorating adventure! Watch the video tutorial Create a Cozy Autumn Tablescape at Home Items I'm adding to my table:  -White tablecloth runner - Battery-operated leaf lights  - Reusing glass jars  - Mini pumpkins and other fall decorations  - Small "Hello Fall" sign  - Faux flowers I began by spreading my white tablecloth down the center of the table. Around Halloween, I purchased this tablecloth a few years ago at my local Walmart. After laying it out, I realized that I could ...

Easy Double-sided Glass Panel Pressed Flower Design

Learn how to make a beautiful double-sided glass panel with a pressed flower design with this easy and creative craft tutorial . It's perfect for adding a unique touch to your home decor or as a personalized gift.  In this quick DIY project, I'll show you how to create a pressed flower design using a frame decor with panels, which I purchased from my local Target for $3. Initially, I wasn't sure what to do with them, but I had a few ideas, and this is what I came up with. The project typically takes around 10 minutes to assemble. Check out the video tutorial Materials Papercraft faux flower embellishments, or you can use real dried flowers One frame decor with two plastic or glass panels Paintbrush Acrylic paint Mod Podge- I'm using the Super Gloss finish Applying paint to the frame Begin by removing the panels from your frame. Once you have removed the glass/plastic panels, set them aside. Take your paintbrush and apply paint to your frame. I painted two coats of paint...

Transforming Oui Yogurt Jars: Creating a Window Hanging Flower Display

Transforming Oui Yogurt jars into a hanging flower display is a simple way to add charm to any space. In this post, you'll learn how to customize and hang these jars with flowers. Get ready to create a beautiful, eco-friendly display that brightens up your home or garden. Whether you're new to upcycling or just itching for a quick creative fix, this easy and budget-friendly project will brighten up any window in your home with elegance and charm. Video tutorial What You’ll Need: 3 Oui yogurt jars (or any small glass jars you have on hand) Transfer stickers of your choice — I used cold transfer stickers I snagged on sale at my local Michaels Artificial flowers Scissors Floral cutters Twine Spring tension rod (or clear sturdy command hooks) 1. Prep Your Jars and Add a Personal Touch Begin with clean, dry jars. These little glass containers serve as the perfect blank canvas. Select your transfer stickers—I opted for a floral theme because who doesn’t love more blooms? I trimmed th...

A Little Autumn Glow: DIY Candle Holder Decor

It's been a little while since I last shared a craft project. Between life, family time, and various adventures, my craft supplies have mostly been sitting quietly, waiting for me to return. While I've enjoyed the break, it felt great to pull everything out again and spend some time creating.   Before our trip, I explored Hobby Lobby. I found a small wooden frame and paper flowers. I decided to make a simple candle holder using a wooden frame and paper flowers.  Supplies I used Wooden frame Acrylic paint Decorative scrapbook paper Mod Podge Paper flowers Faux leaves Hot glue gun and glue sticks Flameless candle Craft knife Paintbrush To get started, I applied paint to the wooden frame to give it a darker, rustic look. I knew I wanted the flowers to be the focal point, and the darker wood seemed like the perfect backdrop for the soft colors of the paper flowers. After the paint dried completely, I cut a piece of scrapbook paper to fit the center opening of the frame. Using a cr...

Three Easy Candle Jar Ideas for Cozy Porch Décor

I've always thought there was something so comforting about soft candlelight, especially when it’s paired with a few simple faux florals and greenery. Today, I’m sharing a sweet little project in which I decorated a glass jar in three different ways. Each jar has its own personality, glow, and gentle charm. These pieces are perfect for porch décor, but they work beautifully anywhere you want to add a touch of warmth. I love projects like this—simple materials, quiet moments, and a finished piece that feels peaceful and handmade. Watch the Video Tutorial Materials I Used Clear glass jar Battery‑operated candle Faux string of pearls Faux succulents Faux vine Bright pink faux flowers (tops removed from stems) Yellow faux flowers Faux foliage Optional: woven mat or tray for display Jar 1: Succulents & String of Pearls For the first jar, I wanted something earthy and calming. I placed a faux string of pearls inside the jar and let it settle naturally. Around it, I tucked in a few fa...

Search This Blog

All content Copyright

Copyright 2021-2026 I ask that you do not take or use my photos or words without permission. If you have any questions, please feel free and contact me. Also, for more information on this blog, check out the disclosure policy tab above. Thank you