
Hello everyone! I hope you are doing well.
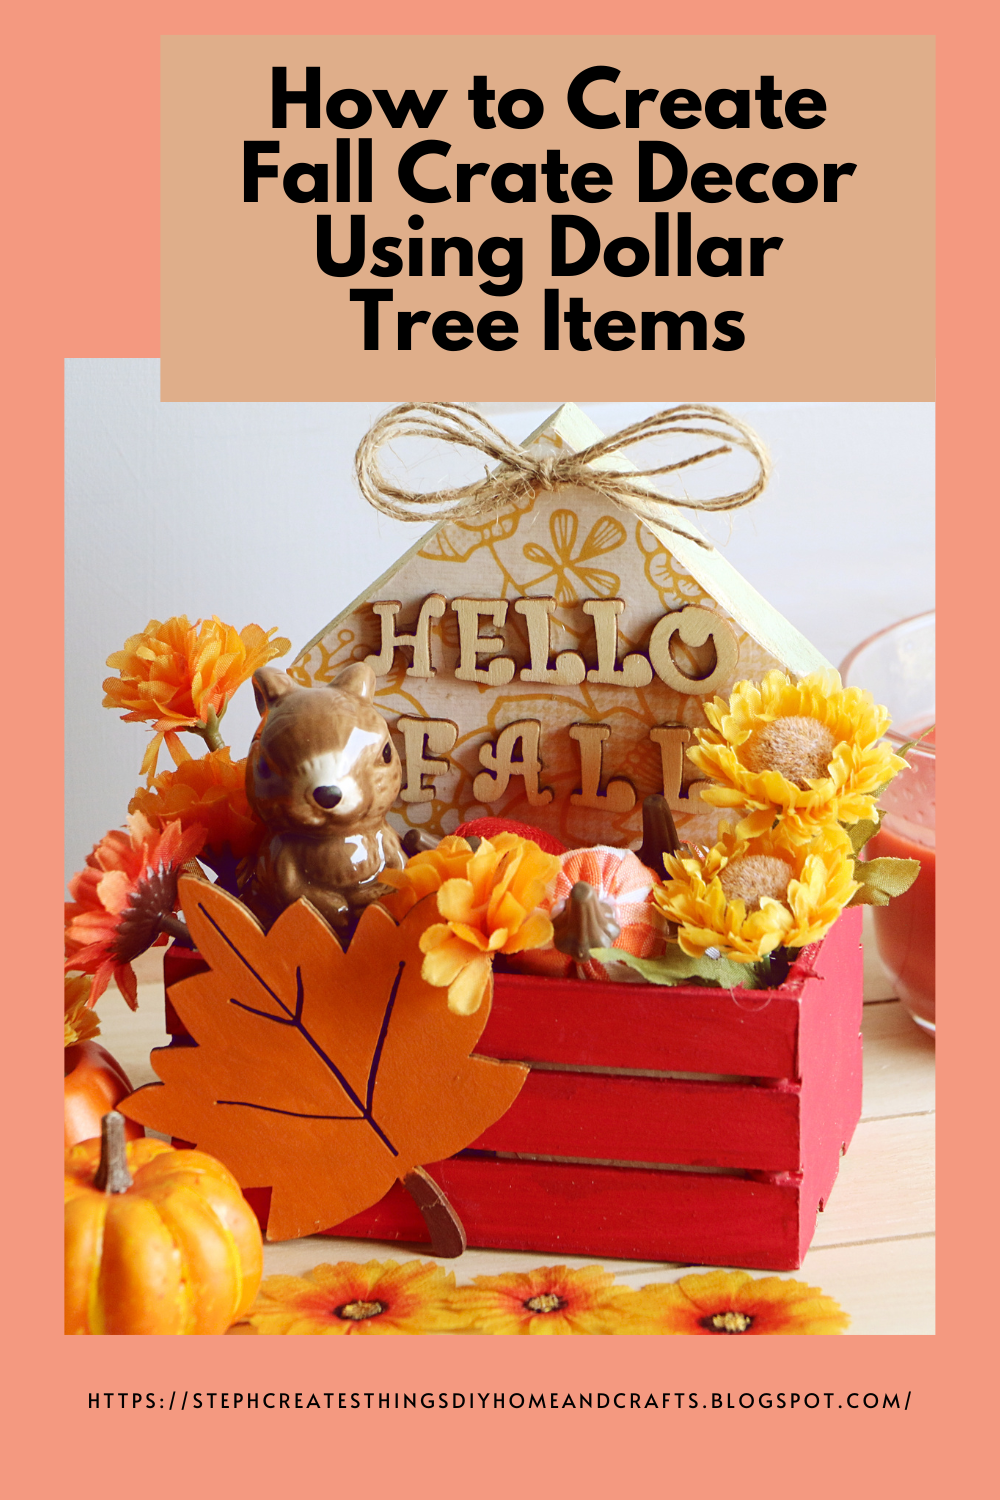
You all know how much I love these wooden crates from Dollar Tree. I created this cute fall decor that can be added to a tiered tray or mantel. We'll use one wooden crate and a house plaque from Dollar Tree. Let's create and decorate together!
Please check out my newest link party on the Crazylittlelovebirds blog if you haven't already. It runs from Fridays at 9:00 a.m. MST to Tuesdays at 11:00 p.m. MST.

Video tutorial

Materials
One wooden crate
One wooden house plaque
Acrylic paint
Wooden letters
Any Adhesive or Hot glue
Foam craft blocks
Faux fall floral/greenery
Paintbrushes
Mod Podge
Decorative paper
Floral cutters
Scissors
One pencil for tracing
I have chosen to decorate with mini pumpkins, a squirrel figurine, and an unpainted leaf ornament for the fall season.
Step 1: Tracing your wooden house plaque onto decorative paper

Place the wooden house plaque on the decorative paper and trace its shape with a pencil. Cut out the traced shape with scissors.
Step 2: Applying Mod Podge

Apply a thin layer of Mod Podge to the surface of the wooden crate. Place the decorative paper over it and apply a second layer on top. Use any Podge technique you prefer. I usually apply a layer, add the paper, smooth the surface, and use a blow dryer between each coat.

Put your house plaque aside for now. We will return to it when we add the wooden letters.
Step 4: Apply paint to the wooden crate

After, apply paint to your wooden crate. Originally, I was going to use yellow on my crate, but I decided to go with a deeper red color.
Step 4: Apply paint to the wooden leaf decoration

Start by painting the wooden leaf with acrylic paint. You can find wooden leaves at Joann's or Dollar Tree.
Step 5: Attaching the wooden leaf to the crate
.png)
You can attach your leaf design to the wooden crate using any adhesive. To ensure that it sits flat, add the leaf higher up on the crate.
Step 6: Attaching wooden letters to the house plaque

Take the wooden house set aside earlier and add wooden letters. I added "Hello Fall" to my plaque using Loctite adhesive.
Step 7: Adding a wooden house plaque to the wooden crate

Put your wooden house plaque inside the crate without permanently attaching it, allowing you to easily switch to a different fall theme when desired.
Step 8: Adding foam blocks

Insert foam blocks in a wooden crate for height and flower placement. I reused my foam blocks from my faux succulent planters.

All that's left is to add your fall decorations. I chose fall flowers, squirrel decor, and cute fabric pumpkins from Dollar Tree.


Your autumn-themed crate decor is complete. It's absolutely adorable! I'm thrilled with how it turned out. Did you enjoy this craft? If so, be sure to let me know.
As always, thank you for stopping by and creating with me! I'll see you soon.
Pin Share Save
How cute and fallsy, wait, is that a word? How about autumny? Nah, neither one but it is prefect for our upcoming season, huh? Thanks so much for linking up at the #UnlimitedLinkParty 126. Pinned.
ReplyDeleteDee, haha 😄 I love it. We'll make those two official words now. Thank you for stopping by. 😊
DeleteSounds like a plan :)
DeleteVisiting again to say thanks so much for linking up at #IMadeItMondayLinkParty 21. Pinned.
ReplyDeleteDee, thank you! :)
DeleteSO many cute things at Dollar Tree...thanks for the tips. My neighbor just dropped off tiny decorative pumpkins from his garden, so I am on my way to Fall feeling!
ReplyDeleteAnn, I'm happy to hear you enjoyed the tips. I'm so ready for fall. Decorative pumpkins are always so fun to decorate with.
DeleteLove this Steph! Thanks bunches for sharing this tutorial with Sweet Tea & Friends this month dear friend.
ReplyDeletePaula, thank you. Always a pleasure sharing at Sweet Tea & Friends.
DeleteSuch an adorable little crate your created for fall, Steph. Thanks for sharing at Tuesday Turn About. I'm happy to be sharing your DIY this week at the party! Pinned!
ReplyDeleteJulie, thank you so much. :)
DeleteVisiting again to say thanks so much for linking up at #AThemedLinkup 163 for Fall Crafts and Décor. Pinned.
ReplyDeleteI can't believe you did all this from Dollar Tree items. It's so darling! Thank you for sharing it at the Will Blog for Comments #13 linkup. Hope to see you next week, too.
ReplyDeleteThank you, Jennifer. Yes, it is all from Dollar Tree. These days they have some cute decorations. Thank you for visiting. :)
DeleteThanks for sharing with us, I'm featuring you this week when the next To Grandma's house we go link party starts. Happy Halloween!
ReplyDelete