Design your very own organizer using Dollar Tree Items

 Learn how to design and create your own personalized organizer using affordable Dollar Tree items. Get creative with materials and follow these easy DIY steps to make a unique and functional organizer for your home or office space.

Hi everyone! I hope that you are doing well. Recently I took a trip to my local Dollar Tree and found these stackable plastic organizers.

 Today we're going to design our very own organizer. To create your organizer you will only need a few materials. Most of my materials were purchased at my local Dollar Tree store. You will need three of the plastic organizing drawers. 

Be sure to check out my YouTube channel for more DIY tutorials--For more DIY Tutorials Click here! And I would love it if you subscribed to the channel

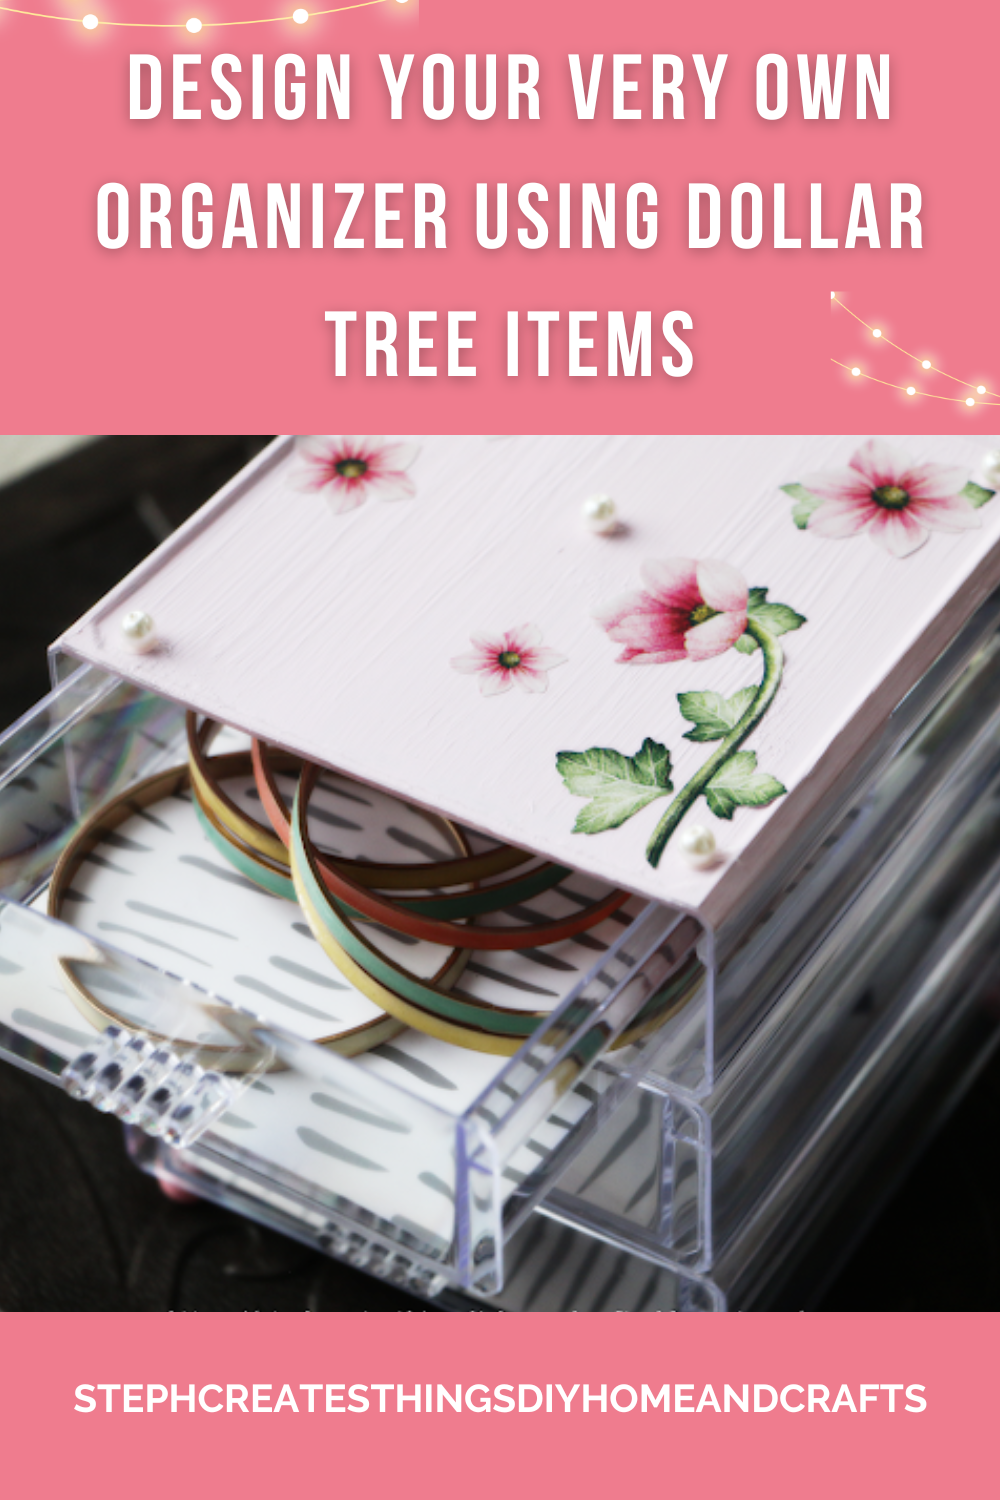
Three drawer organizer painted pink top with floral and craft pearl bead design

Three drawer organizer painted pink top with floral stickers

DIY Organizer video tutorial below


Materials such as hot glue, paint, floral stickers, craft pearl beads and clear organizer drawers


Materials

THREE STACKABLE ORGANIZING DRAWERS 5X5X1.75 IN

ASSORTED FAUX PEARL BEADS

SMALL WOOD BEADS

PEEL AND STICK FLORAL DECALS

PEEL AND STICK DECORATIVE PAPER

HOT GLUE

PAINT- I'M USING ACRYLIC MULTI-SURFACE PAINT

SCISSORS

PAINTBRUSH

One pencil


Clear organizer drawer, paint, and one paintbrush


Start by taking your paint, and applying it to one of your plastic organizers. You will only apply paint on the top surface. I used my blow dryer between coats.  You will need around two coats of paint.

Painted organizer drawer, floral stickers and one paintbrush


Afterward, take your floral peel-and-stick stickers, and begin to add them to the top painted section on your organizer.

Painted organizer drawer with floral stickers near clear drawer, and peel and stick decorative paper


Next, take your peel-and-stick decorative paper, and begin to trace the outline of one of your plastic organizers. Place your organizer on top of your decorative paper, and trace around it. After tracing it out, take your scissors and cut out the traced shape. In the end, you will end up with three decorative cut-out papers.

Three clear drawers with peel and stick paper


Begin to add each traced shape to your organizer drawers. Remove the backing, and gently press each one onto the bottom of your organizer drawer. If your paper is too big, just take your scissors and trim. 

clear organizing drawer with pink beads


Flip only one of your drawers over. Take four of your wood beads and place each bead onto each bottom corner.  Your beads will act as legs on the bottom of your organizer. Apply hot glue onto each corner and add each bead.


Clear organizing drawers with hot glue and pink beads

Next, take each of your organizing drawers and stack them. I used hot glue since I wanted my drawers to not move around. I applied glue onto the four corners of my bottom and middle drawer. Your top drawer should end up being your painted drawer with your floral decal. 

stacked organizer drawer with craft pearl beads

Three drawer organizer painted pink top with floral stickers


After you have stacked your plastic drawers, add your pearls to the top drawer. 

Three drawer organizer painted pink top with floral stickers

Three drawer organizer painted pink top with floral stickers


Your organizer is now complete. I love how easy this was to design. Let me know if you decide to create your very own. Thank you so much for stopping by, and creating with me.


You might also like


Pin Share Save

Pinterest pin showing Three drawer organizer painted pink top with floral stickers, and craft pearl beads


Comments

  1. Aw, how cute is that? Thanks so much for linking up at the Unlimited Link Party 79. Pinned.

    ReplyDelete
  2. Wow! That's so pretty! Pinning. (visiting from Grammy's Grid linkup)

    ReplyDelete
  3. Visiting again to say thanks so much for linking up at #IMadeItMondayLinkParty 11. Shared.

    ReplyDelete
    Replies
    1. Dee, thank you. Always a pleasure linking up!

      Delete
  4. This is one of the cutest things I've seen this season! I love it. Thank you for sharing it with us on Farmhouse Friday. I'll be featuring it tomorrow. Hope you link up again soon. pinned

    ReplyDelete
    Replies
    1. Cindy, thank you so much! I'm so happy to hear that you enjoyed it.

      Delete
  5. what a sweet project, thanks for sharing with us at Creatively Crafty Link Party

    ReplyDelete
    Replies
    1. Janet, thank you so much. 😊 I appreciate you visiting.

      Delete
  6. Great job and well done, love it, pinned it.
    I visited you via Home Matters Linky Party #453. I linked up this week with = 54+55+56. Come and join us Mon - Saturday at SeniorSalonPitStop as well as #WordlessWednesday #Photography Wednesday - Saturday. You will find the info under BLOGGING

    ReplyDelete
    Replies
    1. Thank you so much. I appreciate you visiting and pinning as well.

      Delete
  7. Super cute and so pretty
    Happy Thanksgiving to you all.
    Thank you for sharing your links with us at #286 SSPS Linky. See you again next week.

    ReplyDelete
  8. I am totally amazed by this! It's beautiful. Well done! Thanks for sharing this post at the Will Blog for Comments #32. Hope to see you at the next linkup, too. Have a great week.

    ReplyDelete
  9. Very cute, such a fun way to give some rather plain plastic drawers a glam glow up!

    ReplyDelete
  10. Wow! These drawers can be displayed and not hidden in a closet now!

    ReplyDelete
  11. Thanks for sharing with us on the Homestead Blog Hop! A great craft. Very beautiful

    ReplyDelete
    Replies
    1. Kelly, thank you so very much. I appreciate you visiting. :)

      Delete
  12. My favorite combination...pretty, practical, and Dollar Tree! I have that same silver and white paper. Featuring when my party opens!

    ReplyDelete
    Replies
    1. Carol, thank you! I'm happy you enjoyed it. Excited to be featured at your party.

      Delete
  13. So so pretty! Thanks for joining in on Home Matters Linky Party! I will be featuring your post this week! #HomeMattersParty xx

    ReplyDelete
    Replies
    1. Joy, thank you very much. I appreciate it. ♡

      Delete
  14. Your organizer is so pretty! I love the flowers and the other colors you chose. Great idea!

    ReplyDelete
    Replies
    1. Debbie, thank you very much. Happy you enjoyed it. 🤗

      Delete
  15. Lovely! Featuring you at Wednesdays in the Stuido!

    ReplyDelete
  16. Very pretty! I 'd love to find a cute organizer like that at my Dollar Tree Store and do the same to dress it up.

    ReplyDelete

Post a Comment

I love hearing from you! Your comments and creative ideas truly brighten my day. I do my best to respond to everyone, so if you have a question or just want to say hello, please leave a note below. To keep our community a positive and inspiring space, spam or off-topic comments will be removed. Happy crafting!

Popular posts from this blog

Celebrate in Style: DIY Patriotic Napkin Rings

Hey everyone! I hope you're doing well. Today, I want to share an easy DIY project. We're going to make patriotic napkin rings using just a few materials. I usually find extra craft supplies in my craft bins because I often shop craft sales at the stores. I got the wooden stars and rings from my local Hobby Lobby store. The great thing about this project is that it's easy and quick. I'll provide you with a materials list and a step-by-step tutorial. Video tutorial Celebrate in Style: DIY Patriotic Napkin Rings Materials Acrylic paint  Gem strips (I'm using the gem strips from Dollar Tree)  E6000 or hot glue  Paintbrush  Wooden stars  Wood rings size 1.89in (4.8cm) Start by painting each of your wooden rings and stars. I chose to paint my rings white. Apply the paint to each ring's outer, back, and inner surface. For the stars, I went with red, white and blue. Next, we will attach the gem strips to each ring. Before adding the gem strips, attach each star to a wo...

How I Styled Six Fall Trays Using Simple Reused Decor

  This fall, I wanted to challenge myself to decorate with just a few simple items—things most of us already have tucked away in our craft bins. With one round tray, a Dollar Tree lantern, a battery‑operated LED candle, a handful of faux florals, and a mix of Dollar Tree pumpkins, I created six different autumn looks. Each one feels cozy, seasonal, and unique, all without buying a bunch of new décor. My goal was to show how versatile your everyday pieces can be. By swapping out colors, textures, and small accents, you can build fresh designs that fit your style and your space. Watch the video tutorial Decorating Each Tray My First Tray: Classic Lantern & Autumn Florals For my first tray, I began by placing a round tray on a woven placemat to create a cozy base. Next, I placed the black lantern in the center and added a small LED candle inside. I figured this would provide a soft autumn glow that I love. I took yellow faux florals and arranged them around the lantern to brighten...

DIY Ghost Frame (Easy Dollar Tree Halloween Craft)

  Hi everyone! Halloween crafts don’t have to be spooky or complicated, and this little ghost frame is the perfect example. I put it together with a Dollar Tree frame, a few wooden ghosts, some gem buttons, and craft paper I already had in my stash. It’s quick, budget‑friendly, and adds the cutest touch of Halloween charm to any shelf or vignette. I love projects like this because they’re simple and relaxing, and you can customize them however you want. Different colors, different ghosts, different backgrounds — it all works. If you’re looking for a fast Halloween craft that still feels handmade and sweet, this one is definitely worth trying. Watch this video tutorial Materials I used for this project Dollar Tree frame Wooden ghost cutouts Craft paper (any color or pattern you like) Gem buttons or small embellishments Glue (hot glue or craft glue) Scissors Optional: stickers, paint, or extra accents Take the frame apart I started by removing the back of the frame, taking out both ...

Three Easy Candle Jar Ideas for Cozy Porch Décor

I've always thought there was something so comforting about soft candlelight, especially when it’s paired with a few simple faux florals and greenery. Today, I’m sharing a sweet little project in which I decorated a glass jar in three different ways. Each jar has its own personality, glow, and gentle charm. These pieces are perfect for porch décor, but they work beautifully anywhere you want to add a touch of warmth. I love projects like this—simple materials, quiet moments, and a finished piece that feels peaceful and handmade. Watch the Video Tutorial Materials I Used Clear glass jar Battery‑operated candle Faux string of pearls Faux succulents Faux vine Bright pink faux flowers (tops removed from stems) Yellow faux flowers Faux foliage Optional: woven mat or tray for display Jar 1: Succulents & String of Pearls For the first jar, I wanted something earthy and calming. I placed a faux string of pearls inside the jar and let it settle naturally. Around it, I tucked in a few fa...

DIY Magnetic Faux Succulent & Floral Lids — Upcycled Fridge Accent

I created these magnetic faux succulent and floral lids using some metal jar tops that I had saved. With a little creativity, they transformed into charming, lightweight accents that add a pop of color and personality to the fridge. Each lid features its own tiny arrangement—part succulent and part floral—all crafted with intention and charm. This project is easy and budget-friendly, allowing you to use items you already have while adding a lovely touch to your home. Watch the Video Tutorial Quick Video Tutorial Materials Metal jar lids (one large, one small) Letter beads (to spell LOVE ) Faux moss Faux succulents Faux vines Faux flowers (pink, green foliage, white accents) Hot glue gun and glue sticks Magnets I began with the larger metal lid, attaching small letter beads to spell out LOVE . This created a meaningful little focal point and set the tone for the rest of the design. Next, I glued a layer of faux moss along the bottom of the lid. The moss added softness and h...

Search This Blog

All content Copyright

Copyright 2021-2026 I ask that you do not take or use my photos or words without permission. If you have any questions, please feel free and contact me. Also, for more information on this blog, check out the disclosure policy tab above. Thank you