Hello everyone. I'm so excited to share this mini wood lantern craft with you all. I recently bought a box of wood tumbling blocks from Dollar Tree, and I wasn't sure what I was going to create with them. I decided since I also had some wood craft popsicle sticks on hand that I would use those with the blocks, and create a mini wood lantern. This project took around 30 minutes, but I promise you, you will just love how it all comes together with just a few materials. If you're ready, I'd love it if you created it with me!
Video tutorial
Materials
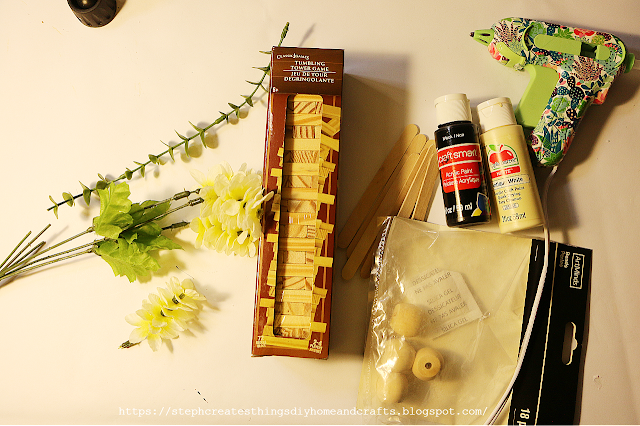
One pack of wood tumbling blocks
I purchased mine at my local Dollar Tree
Ten wood craft popsicle sticks
Paint
I'm using black paint, I also had some antique white paint on hand, but I went with black paint
Hot glue
Twine
Faux floral, and greenery
One medium-sized bead
One battery-operated candle
Floral snips
Scissors
Building the top and bottom sections of the lantern
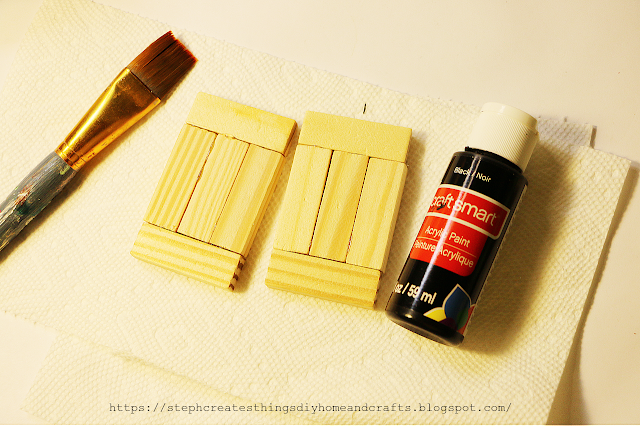
Start by taking five of your tumbling blocks. Using your hot glue them together. You will glue three together in the middle, take the last two blocks, and all of them onto the sides of the three blocks in the middle. Repeat this step when you work on creating the second set of your blocks.
Applying paint
Next, begin to add your black paint to your blocks. I added around two coats of paint.
Attaching craft sticks
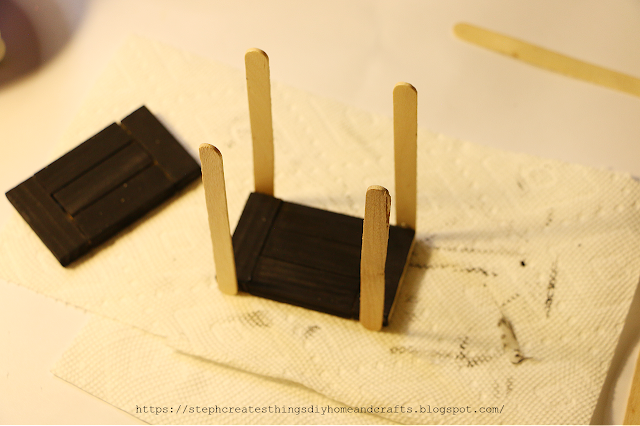
You are now ready to add your craft popsicle sticks. Start by taking your hot glue, and adding just a little on the end of each popsicle stick. Once you have done this, add the sticks to your painted wood section. Glue two sticks onto one side of your glued blocks, and take another two sticks and add them on the opposite side.
Take your second painted glued block section, and using hot glue add that between the popsicle sticks on the top.
Next, take your wooden craft sticks, and add them. You will create an X when you add them. Add them onto the back, and two sides of your lantern. You will want to keep an opening in the front for when you add your battery-operated candle.
Attaching wooden bead
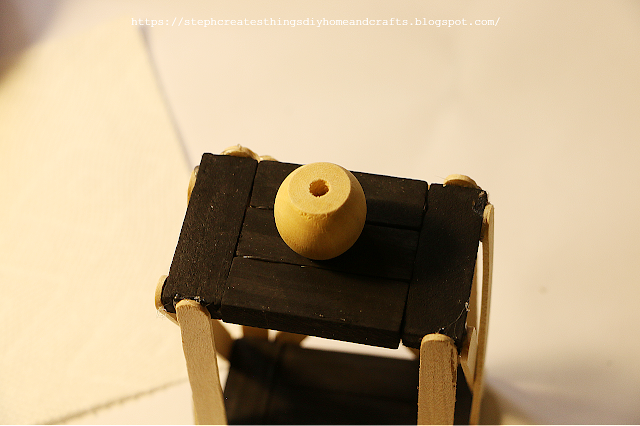
After applying your wood craft sticks, take some hot glue and your medium-sized bead and add it to the top of your glued wood blocks.
Applying paint to craft sticks and wooden bead
Next, apply paint to your craft sticks, and wooden bead.
Adding faux floral and twine
You are now ready to add on your floral, greenery, and twine.
Take a strand of twine, and tie it around your bead on top. I folded my twine in half and then tied it around my bead. I used some hot glue to glue down any remaining twine once I had cut the ends off.
Take your flowers, and greenery and add them to your lantern. I added my floral on the top section of my lantern, and my vines on the front of my lantern.
All that is left is to take your battery-operated candle and add that to the inside of your lantern. Once you have added that in, take any remaining greenery, and add it to the inside of your lantern. I went ahead and placed a piece of vine on the inside of my lantern.
Your mini wood lantern is now complete! I absolutely love how this project turned out. This is perfectly displayed in any space. I hope you enjoyed this DIY mini wood lantern. Be sure to let me know if you decide to create one too! I'll see you soon.

.png)


.png)


.png)


Great tutorial Steph and a such a gorgeous end result! Thanks for sharing!
ReplyDeleteHi Denise, you are always so kind. Thank you so much. --And thank you for stopping by. =)
DeleteI'm a huge fan of using Dollar Tree finds for crafts and decor and this is a darling project! Thanks for sharing at Vintage Charm. xo Kathleen
ReplyDeleteKathleen, thank you so much. I would have seen this comment sooner if it
Deletewasn't marked as spam. I have no clue why that happened. Thank you so much
for stopping by.
How cute is that? Love it! Thanks so much for linking up at the Unlimited Link Party 78. Pinned.
ReplyDeleteDee, thank you!
DeleteVisiting again to say thanks so much for linking up at the #UnlimitedLinkParty 103. Shared.
ReplyDeleteDee, thank you! Always a pleasure linking up.
DeleteStephanie, CONGRATS! Your post is FEATURED at the #UnlimitedLinkParty 104!
ReplyDeleteDee, thank you!!
DeleteI love little things like this I call them charmers because they typically make someone smile thanks for sharing come see us at http://shopannies.blogspot.com
ReplyDeleteAw, that is nice to hear. Thank you for visiting, and I'm always happy to hear that I was able to make someone smile. :)
DeleteOmg, this is so adorable 🥰 I have plenty of small leftovers of wood so I'll give it a try when I have time. Where did you buy the flowers?
ReplyDeleteAw, thank you so much. It's such a simple project. The flowers are from Michaels craft store. :)
DeleteWhat an adorable little DIY Stephanie!!
ReplyDeleteThank you for sharing your mini wood lantern at Create, Bake, Grow & Gather this week. I'm delighted to be featuring it at Friday's party and pinning it too.
Hugs ~ Kerryanne
Kerryanne, thank you so much. I'm happy to hear that you enjoyed my mini lantern project. I'm excited to be part of the featured posts at the next party. Thank you. 😊
DeleteHow clever is a wooden lantern built for a candle votive! This is so unique!
ReplyDeleteThank you so much. This was such a fun project to work on.
DeleteThis is so adorable, I will certainly save the post and make a few of these. So cute :)
ReplyDeleteThank you! 😊
DeleteThat is adorable!
ReplyDeleteThis would perfect as a table centerpiece for a summer party. Thanks for sharing the idea. This post will be a feature this week. #HomeMattersParty
ReplyDeleteDonna, thank you. 😊
DeleteSuper adorable, Steph! Such a clever DIY, too! Thanks for sharing at Tuesday Turn About. I'll be featuring you at this week's party! Pinned!
ReplyDeleteJulie, I'm so happy to hear you enjoyed my mini lantern craft. It puts a big smile on my face. Thank you, and I'm thrilled to be featured at your party. ♡
DeleteI cannot get over that you made the lantern yourself! This is so darling. I love how cozy this looks. Beautiful job, Steph. Visiting from the Wednesdays in the Studio linkup.
ReplyDelete