Transform your Target wood sleigh into a stunning Christmas centerpiece with this easy DIY upgrade. Get step-by-step instructions and ideas to spruce up your holiday decor.
Video tutorial
Hi everyone! I'm so excited to share this simple decorating craft with you. I recently took a trip to one of my local Target stores, and I found this wood sleigh in the Dollar spot. I was pretty excited because I knew I could upgrade the look of this sleigh with just a few materials. Like most of my crafts, I use just a few materials when creating my crafts. If you're ready let's begin and upgrade this wood sleigh.
Materials needed for this craft
One Wood Sleigh
(Target dollar spot)
Wooden Stars
(Joann's Craft Store)
White paint
Red paint
Scissors
Hot glue
Christmas greenery
(Joann's Craft Store)
Twine
Optional - Mini lights, Wrapped gifts, Christmas Vinyl Sticker
This craft was around $12
Start by applying some white paint to your sleigh. When applying the paint to your sleigh you can also paint the inside of your sleigh. You will probably need around 2-3 coats of paint for your sleigh.
Set it aside, and allow it to fully dry.
Once your sleigh has had enough time to dry, you can add your Christmas vinyl sticker on the back side of your sleigh. Again, this is completely optional.
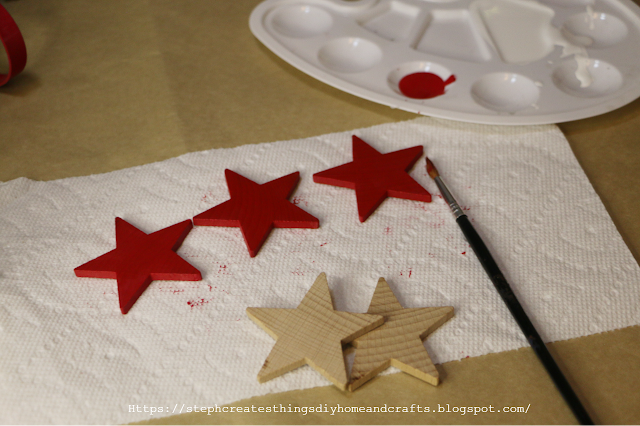
Next, take your wooden stars, and apply red paint. For my sled, I decided to use three stars. Be sure to allow your stars to completely dry.
Take some twine, and cut a small strand using your scissors. Using some hot glue, apply your twine onto one side of your sleigh. Apply the hot glue onto the ends of the twine.
( You can either add your stars on before adding the twine onto your sleigh, or you can add them on after you have added your twine onto your sleigh).
I went ahead and added my stars on after my twine was glued onto my sleigh.
When adding on your stars, be sure to protect your fingers from the hot glue. Add each star onto the twine, and that's it for that step.
This step is completely optional, but it honestly adds a cute touch to this project. If you have any old boxes around your home or gift boxes they can easily be added to this project. Take any box and wrap them in your favorite holiday wrapping paper. If you have some gift boxes, take them, and add some twine, greenery, and a cute bow.
You're ready to start adding in your gift boxes, and greenery. Take your greenery, and gift boxes, and add them to the inside of your sleigh. If you choose to add any mini lights, add them after you have added them to your decorations.
Your project is now complete, and wasn't it so easy to create?! I hope you have enjoyed this sleigh upgrade. I love hearing from you all. Let me know in the comments below if you'll be creating your very own. Thank you so much for stopping by.
I'll see you soon!
Pin Share Save


Very cute- I love the lights! Thank you for sharing at Party In Your PJ's - you are being featured on my blog Tuesday evening!
ReplyDeleteAnn, thank you very much. :)
DeleteI love your adorable sled. It brings back memories of my childhood.
ReplyDeleteMerry Christmas,
Kippi
Kippi, thank you so much. I love that it brought back some memories of childhood for you. :) Thank you so much for stopping by.
DeleteMerry Christmas,
Stephanie
How cute, I like that you added the mini lights! Thanks so much for linking up at the Unlimited Link Party 91. Shared.
ReplyDeleteAbsolutely adorable and so creative.
ReplyDeleteI visited you via Share Your Style #412
I linked up this week with = 10+11+12. It would be awesome if you would share your links with us M-S at SeniorSalonPitStop. You will find it under BLOGGING.
This turned out so great. I was just there and didn't see these. Oh well, may have to go back! I did get two cute star shaped pillows. Featuring when my party opens. Happy Thanksgiving!
ReplyDeleteCarol—oh, I really hope they bring these wagons back! I purchased this some time ago, but it sure would be great if they brought them back. Those pillows sound super cute! I'll need to visit my Target soon and check it out. Thank you for the feature; very exciting. Happy Thanksgiving!
Delete