
Easy Easter Tray Decor Ideas for Springtime

Hello everyone! I'm excited that Spring is just around the corner. I've started my spring cleaning and decorating. Today, I want to share three easy Easter tray decor ideas perfect for showcasing during the Spring season. I'll show you three ways I decorated my ceramic tray, and here's a little secret: the ceramic tray I used can be found in the bath section at Target—yes, you heard that right! My designs will be simple and easy to follow, and I'll also include two bonus decorating ideas that I found useful. Join me as we prepare for some Springtime decorating!

***Note and disclaimer: All decorations used in my post/video were for staging purposes. Decorate your tray as you wish, but always remain safe when lighting a candle near other objects and remain close by. My candle was watched at all times and was for staging and photographic purposes. Thank you!***


Video tutorial


**Materials Needed:**

- One ceramic tray (purchased from the bath section at my local Target)
- Two gold Easter bunnies (found in the Dollar section at Target)
- One candle
- Eucalyptus leaves
- Assorted flowers
- Medium to large-sized wooden beads
- Artificial flowers
- Foam eggs
- One decorative mini bowl
- One mini pot

**Extras:**
- One Easter gift box
- Assorted flowers
- One ceramic bowl
- One bunny decoration

Let's get started on our Springtime decorating!

Tray Design One: Decorating my tray


I began by setting my ceramic piece on a woven centerpiece. Then, I arranged my eucalyptus leaf vine around the tray. Afterward, I placed a candle in the center of the tray. Next, I positioned two gold bunnies on either side of the candle. To complete the design, I added my pink artificial flowers. Lastly, I lit the candle.


Tray Design Two


I decided to use my mini blossom ceramic bowl as the centerpiece of the tray. Then, I placed my two gold bunnies on either side of the mini bowl on the ceramic tray. Next, I arranged my purple artificial flowers on one side of the tray in front of the bunny. I completed the design by scattering a few loose florals on the tray.


Tray Design Three


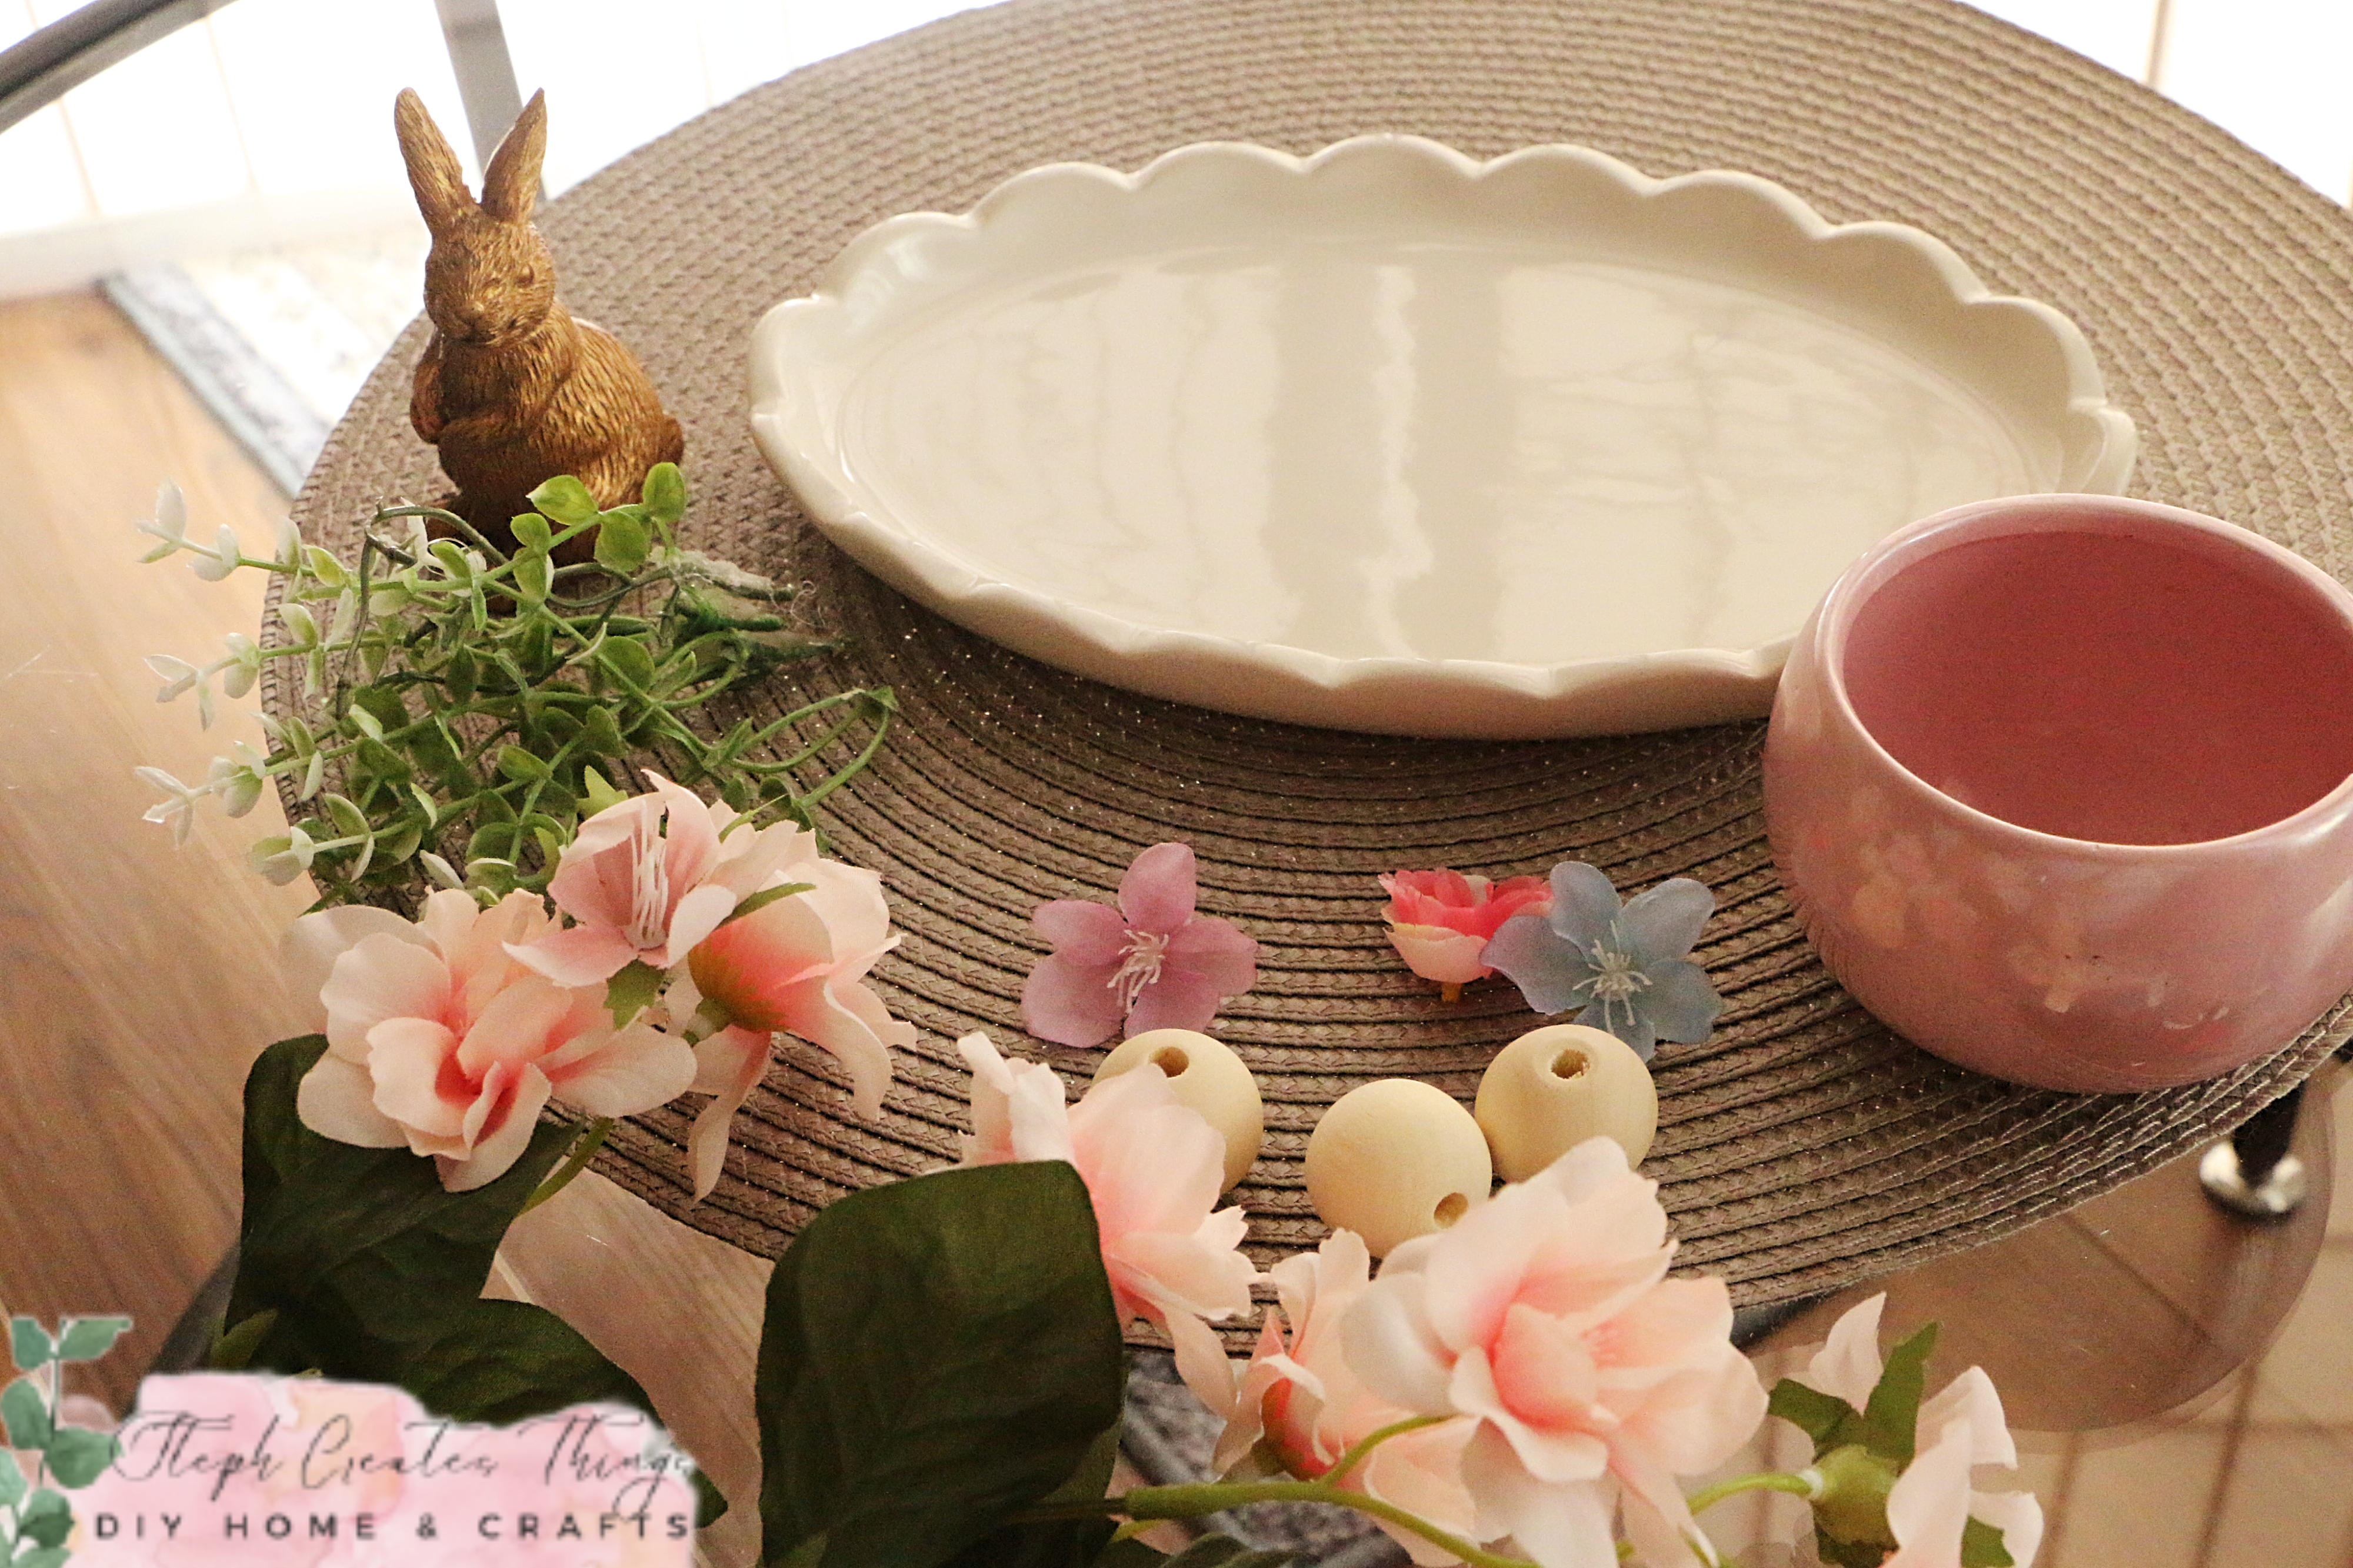
For my last tray design, I decided to use my mini round pink pot. I added the pot to the tray and then placed my pink artificial flowers inside. Next, I positioned one of my gold bunnies next to the pink pot. After that, I arranged some faux greenery in front of the bunny. Finally, I took a medium-sized wooden bead and added a loose flower into the hole of the bead. I completed my design by adding a total of three beads with loose flowers.


Bonus Decor Ideas
I wanted to include two bonus decor ideas for quick Spring displays. For my first design, I am reusing a ceramic bowl. I had some faux foliage with purple flowers on the tip that I added to the bowl. I then added a bunny decoration in the middle of the display.


For my final design idea, I wanted to share a simple way to display faux flowers. This charming Easter Springtime gift box is ideal for showcasing flowers. While I was at my local Dollar Tree store, I came across this delightful box. I was searching for something to use for displaying my faux flowers, and this fits the bill perfectly! If you're looking for an easy way to showcase your spring flowers, this is a great option!

Pin Share Save


Comments

  1. So adorable. I love how you showed different options for the ceramic tray.

    ReplyDelete
    Replies
    1. Amy, thank you. I'm glad you enjoyed it. 😊

      Delete
  2. So adorable I love how cute them little rabbits are!

    ReplyDelete
    Replies
    1. Jen, thank you! Those rabbits are at Target. 😊

      Delete
  3. Beautiful! I love the eucalyptus leaves. And those "mini flower pots" are darling!! Thanks for sharing this post with us at the Will Blog for Comments #58 linkup. Looking forward to seeing what you share at #59. :) Have a great weekend!

    ReplyDelete
  4. Congratulations! This post was one of the most popular at the Will Blog for Comments #58 linkup! It will be in the spotlight for 2 weeks, starting today. You're welcome to save the "This Blog Post Was a Featured Favorite" post from there to share with your readers here. Thanks for being a great part of our linkup!

    ReplyDelete
    Replies
    1. Jennifer, thank you so much. I'm so thrilled to be featured at your party. Always a great place to connect.

      Delete

Post a Comment

Thank you so much for taking the time to leave a comment! Your feedback truly brightens my day, and I appreciate it. I always strive to respond to every comment. If you have a question, please don’t hesitate to ask! Please note that spam or comments that do not provide value will be automatically removed. Thank you!

Popular posts from this blog

Transforming Oui Yogurt Jars: Creating a Window Hanging Flower Display

Transforming Oui Yogurt jars into a hanging flower display is a simple way to add charm to any space. In this post, you'll learn how to customize and hang these jars with flowers. Get ready to create a beautiful, eco-friendly display that brightens up your home or garden. Whether you're new to upcycling or just itching for a quick creative fix, this easy and budget-friendly project will brighten up any window in your home with elegance and charm. Video tutorial What You’ll Need: 3 Oui yogurt jars (or any small glass jars you have on hand) Transfer stickers of your choice — I used cold transfer stickers I snagged on sale at my local Michaels Artificial flowers Scissors Floral cutters Twine Spring tension rod (or clear sturdy command hooks) 1. Prep Your Jars and Add a Personal Touch Begin with clean, dry jars. These little glass containers serve as the perfect blank canvas. Select your transfer stickers—I opted for a floral theme because who doesn’t love more blooms? I trimmed th...

Transforming Ice Cream Cups: DIY Spring Tea Cup Floral Arrangements

  Today, we'll explore a fun and easy DIY project involving repurposing plastic mini ice cream cups into beautiful spring tea cup floral arrangements. This project is a great way to add a touch of spring to your home decor.  Before throwing away those plastic cups, consider the many possibilities in creating something new.  For this project, you will only need a few materials. Our main materials for creating the faux tea cup will be the ice cream cup and air-dry clay. So, if you're ready to create this adorable and creative springtime tea cup floral decoration, let's begin! VIDEO TUTORIAL Materials Plastic ice cream cups (I am reusing two plastic ice cream cups) Spanish moss Floral Mod Podge Decorative floral napkin Artificial spring flowers Acrylic paint (I'm using white) Paintbrush  Optional- Bumblebee button and small dowel rod- Dimensions : 0.1 inches x 6 inches. Air-dry clay Scissors Foam block Preparing your cups After washing your ice cream cups and drying the...

Transforming a Metal Can into Shabby Chic Keepsake Decor

Hello everyone, I am excited to share this easy DIY project with you. We will be transforming a metal can into a charming shabby chic keepsake decor using a fabric heart garland, paint, and a few other materials. You will love the end result of this project. Let's turn your trash into treasure with this simple DIY project. I will provide a detailed list of materials below. If you're ready, let's start creating our keepsake decor. Shabby Chic Keepsake Decor Video tutorial Materials One metal can Acrylic paint in Ballet Slipper by Waverly and white Four acorn wooden dowels with a 1’’ 3/8’’ hole purchased from Hobby Lobby Paintbrush Fabric heart garland from Dollar Tree Repurposed fabric from an old vest Decorative sticker pack from Dollar Tree Faux pearls Faux paper flower Applying paint to a metal can Begin by taking a metal can and applying acrylic paint to it. Use a heating tool between each coat of paint. I recommend using acrylic paint with a matte finish and applying ar...

Seasonal Transformation: Repurposing a Metal Pumpkin for Winter

  Transform your hanging metal pumpkin decoration into a stunning winter decor piece with this easy DIY project. Learn how to repurpose and give new life to your pumpkin for the winter season. Video tutorial Materials needed One metal pumpkin purchased from Dollar Tree Gift tissue paper (snowflake pattern) Acrylic paint (white) One paintbrush Faux winter foliage/greenery One bow (optional) Mod podge Hot glue Scissors Applying Acrylic paint to metal pumpkin To begin decorating your metal pumpkin, remove any labels or decorations that came with it. Then, apply a coat of acrylic paint using a paintbrush. I recommend applying two coats of paint and using a blow dryer to help with the drying process between each coat. Applying Mod Podge Next, cut a section of your tissue paper using scissors. If the metal pumpkin has lettering, consider using two sections of tissue paper to cover the letters as much as possible. Apply a layer of Mod Podge to the metal pumpkin using a paintbrush. Place o...

Cute Spring Decor: DIY Dollar Tree Frame

  Hi everyone! Today, I'm excited to share a simple frame craft using Dollar Tree materials. We'll create an easy Spring frame design with one of their frames. I'll provide a complete materials list, and for those who prefer visual guidance, there will be a video tutorial to follow along with.  Video tutorial Materials: -4x4 plywood frame (I'm using the frame with the bead design around the front) -One mini bunny wood decoration (I found a pack at Dollar Tree a few years ago) -Acrylic paint for painting the bunny (I'm using brown acrylic paint), and light blue  paint for the frame -Spring embellishments - I'm using spring buttons and other decorations for my frame -Peel-and-stick decorative wallpaper - I found a few new designs at Dollar Tree -Hot glue -Paintbrush or spongebrush Removing the backing from the frame: Before you begin, remove the backing and the glass. Set the back of the frame aside. Preparing the peel-and-stick paper: Flip the peel-and-stick pap...

Search This Blog

All content Copyright

Copyright 2021-2025 I ask that you do not take or use my photos or words without permission. If you have any questions, please feel free and contact me. Also, for more information on this blog, check out the disclosure policy tab above. Thank you