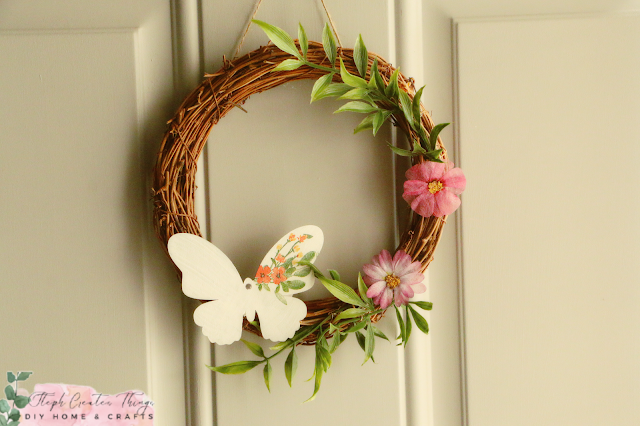
Are you ready to create something beautiful? Let’s dive into a quick and easy wreath project that will brighten up your space! Join me in decorating a charming grapevine wreath! I love the simplicity of the wreath design. We’ll use just a few materials, including Mod Podge, one decorative napkin, and a few other decorations. If you're ready, let's get started!
- One grapevine wreath I am using is 6 inches in size
- Wire
- Faux foliage
- Mod Podge
- Decorative napkin or rub-on transfer design
- Flower embellishments
- Scissors
- Paintbrush
- Hot glue
- Acrylic paint
Step 1: Applying Paint to the Butterfly
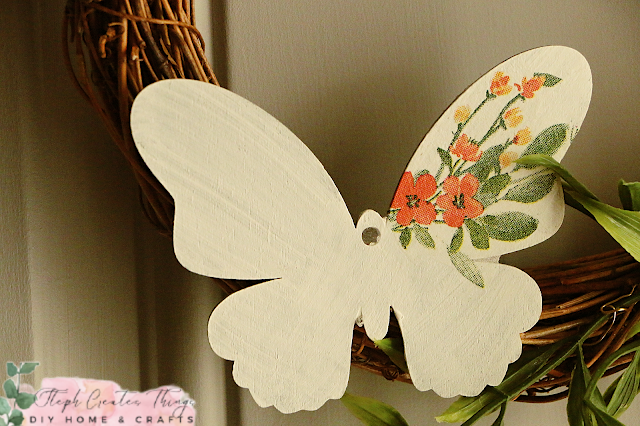
Begin by using a paintbrush to apply paint to the butterfly. The butterfly I am using is made of chalkboard material, and you can find these at Dollar Tree. I applied two coats of white acrylic paint to the butterfly and dried it with a heating tool.
Step 2: Adding Mod Podge and Decorative Napkin
Next, I used scissors to cut out the decorative section from my napkin before applying it to the butterfly. I removed the second layer of the napkin and used my paintbrush to apply Mod Podge to both the butterfly and the napkin. I decided to add a small section of flowers to one of the butterfly's wings.
Step 3: Adding Foliage to the Wreath
I found some precut foliage in my flower container. I used my floral cutters to cut a few strands of thin wire, as I prefer using wire to attach my foliage to the wreath. I placed the foliage where I wanted it displayed on the wreath, pulled the wire through various areas, and then twisted it off to secure the foliage.
Step 4: Adding Embellished Flowers and Butterfly
Before adding the flowers and butterfly to the wreath, I cut three strands of wire and attached them to both the flowers and the butterfly. I flipped each flower over and secured the wire with hot glue, repeating the same process for the butterfly. Then, I pulled the wire through the wreath and twisted it off for both the flowers and the butterfly. This method is great for attaching decorations, and they can be easily removed for seasonal wreath decorating.
Final Touches:
Since I am reusing my wreath, I had already tied a section of twine for hanging it. You could use other methods for hanging your wreath as well, such as looping the ribbon, attaching the ends, and hanging it using the ribbon. I love how simple it was to decorate my wreath. It makes the perfect addition to a front door or living space.


.png)


What a beautiful wreath! I love the butterfly. It gives me hope for spring!
ReplyDeleteAmy, thank you. I can't wait for spring.
DeleteSo very pretty! Thank you for sharing how you made it.
ReplyDeleteVisiting from Tuesday Turn About.
Lisa, thank you. I'm happy you enjoyed it. 😊
DeleteOh, that little touch on the butterfly wing is so lovely! What a beautiful wreath. Thanks for sharing this post with us at the Will Blog for Comments #56 linkup! We'd love to see more at #57, too. Have a great week.
ReplyDeleteJennifer, thank you very much. I'm happy you enjoyed it.
DeleteSteph,
ReplyDeleteWhat a cute spring wreath. Congratulations, you are being featured on YFY / I hope you stop by.
https://eclecticredbarn.blogspot.com/2025/02/spring-decorating-on-tft.html
Hugs,
Bev
Bev, thank you! It's wonderful to hear that the wreath was enjoyed. I'm happy to be featured at YFY. :)
DeleteI have had a grapevine wreath form for over a year now. I had no idea what to do with it. This simple beautiful creation has given me some much-needed inspiration. Thank you so much for sharing! #THEHAPPYNOW
ReplyDeleteKristen, oh that's wonderful to hear! I'm happy that I was able to give you that inspiration. Yes, there are so many possibilities for grapevine wreaths. Enjoy decorating yours! Thank you for visiting.
DeleteThat's so pretty Steph, I love the butterfly
ReplyDeleteThank you! I'm happy to hear you enjoyed this wreath design.
Delete