Today, I want to share a simple DIY project that will help you create an enchanting winter display using wooden houses. This craft is perfect for adding a festive touch to your home during winter. With this step-by-step guide, you can learn how to make your own wooden house village decoration.
Hello everyone, I hope you are doing well. During the weekend, I went Christmas shopping and visited Joanne's craft store. They always have amazing deals going on. While I was there, I found a display of laser wood village houses. I wasn't sure what to do with it, but I pictured it along with a long wooden board that I had at home. I also found a faux Cypress mini wreath. I wanted to use some of the foliage from the wreath in my design.
Materials needed for this project
Wooden houses (The product I am using is 11.5 IN X 4.7 IN)
Wooden board (The size I am using is 1/4 X 4 X 2')
Faux foliage (I am using foliage from the mini wreath I purchased)
Acrylic paint (I'm using white and an Espresso color)
Paintbrush
Hot glue or any adhesive
Two reindeer decorations (I purchased them at Dollar Tree)
Floral cutters (Used for cutting any faux foliage)
Applying Paint To Wooden House Village and Board
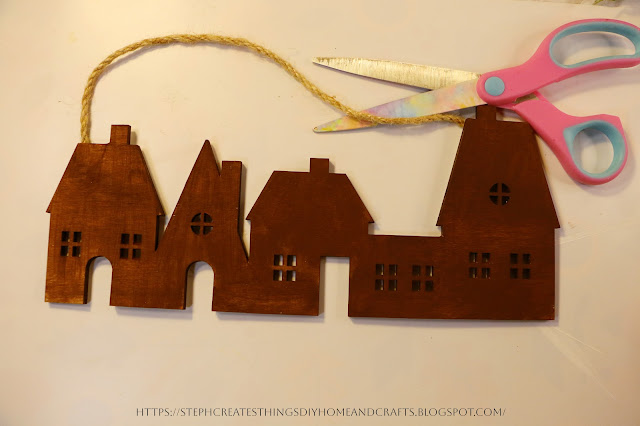
To start, apply a coat of white acrylic paint to your wooden board. I recommend applying two coats of paint and using a blow dryer to dry the paint between each coat. Once you're done, set the board aside. Next, take your wooden house village and apply an espresso color to the houses. Make sure to dry between coats.
Decorating The Wooden Houses
When decorating wooden houses, it's important to remove any ropes attached to the back of the decoration using scissors. Then, use a smaller paintbrush to start decorating the wooden houses. You can add white paint around the trim of the roofs and windows and also paint some evergreens, and add a few dots.
Attaching Painted Wooden Houses to Wooden Board
When attaching the wooden houses to the board, you can use either hot glue or wood glue. I used hot glue to attach the wooden houses to the board.
Adding Foliage and Other Decorations
To start, trim your foliage to the desired size and attach it to the board using hot glue. Once you've added your foliage, you can add any other decorations you want to display on your decoration.
Thank you all so much for crafting with me. If you decide to create your own gingerbread house display, be sure to let me know. See you soon!
You may also enjoy
Pin Share Save


.jpg)


No way! This is so, so cute--I can't believe how simple it is. I have a little gingerbread village I display every Christmas, and I have a few "faux" gingerbread houses, trees, etc., there as well. This would be perfect. Pinning. :) Visiting from Crazy Little Lovebirds linkup.
ReplyDeleteJennifer, thank you! Yes, this was so easy to create. :) I'm happy to hear you enjoyed this craft. Thank you for visiting.
DeleteHow cute and you NEVER seem to run out of craft ideas!! Thanks so much for linking up at the #UnlimitedLinkParty 142. Pinned.
ReplyDeleteDee, thank you so much. 😊 I wish I never ran out if things to create. I've actually just been reusing a lot of the items from previous crafts. It makes it easier on me. Thank you for visiting.
DeleteCONGRATS Stephanie! Your post is FEATURED at the #UnlimitedLinkParty 143!
ReplyDeleteDee, thank you so much. 😊
DeleteI love the look of a community of homes without the need of lots of little houses. Folks in small spaces can use it for the nod to a Christmas village.
ReplyDeleteCarol, thank you. 😊
DeleteSteph, this is absolutely gorgeous!
ReplyDeleteThanks bunches for sharing this diy with Sweet Tea & Friends this month.
That is absolutely adorable!!
ReplyDeleteJoanne, thank you! :)
DeleteHi Steph - This is such a clever idea and I love how it looks like gingerbread. Thanks for sharing on the Home Imagined Link Party.
ReplyDeleteThank you so much! I am so happy you enjoyed this craft.
DeleteSo very cute! If I can find the houses, I'm doing this! Love Christmas villages.
ReplyDeleteThank you! Yes, give it a try. It's such a fun project.
DeleteI WANT ONE! :) I really love this, Steph! Beautiful job. Visiting from the Wednesdays in the Studio link party.
ReplyDeleteJennifer, aw, thank you! You are always so kind, and I appreciate it.
Delete