Hello everyone! I hope you are all doing well. Today, we will be creating a simple heart garland. For this design, we will be using burlap hearts, but you can use any fabric or material for your hearts. Let's get started!
Video tutorial
Materials
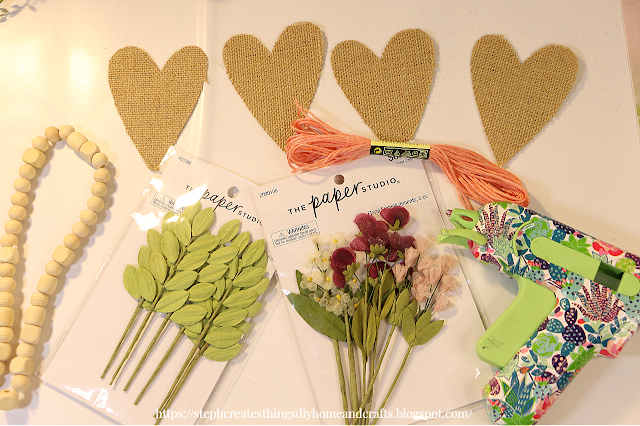
Burlap hearts- or you can use any fabric or material for your hearts
Faux pressed flowers
Craft string
Wooden beads
Hot glue
E6000
Wooden letters
Scissors
Floral cutters
Step 1: Cutting the flowers and leaves
Begin by taking your pressed flowers and leaves. Next, use your floral cutters and begin to cut them to size. I cut the stems of my flowers and leaves off on some.
Step 2: Arranging the flowers and leaves
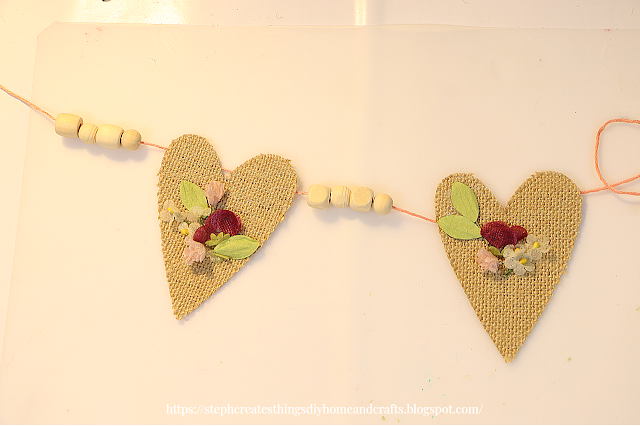
After, take your cut flowers and leaves, and begin to add them to your hearts. I added them using my hot glue.
Step 3: Cutting the string, adding beads and fabric hearts
To start working with your beads and string, use your scissors to cut a strand of string. If you plan to add your garland to a wooden board, make sure that the string is cut to the size of the board.
First, thread the beads onto the string and place the burlap hearts between each section of beads. Then, use hot glue to attach each heart to the string. Once you have the heart garland ready, place it on top of your wooden board. Make any necessary adjustments to the garland before you glue it down onto the board. To glue it, wrap the ends of the string around the back of the board and glue them down securely.
Step 4: Adding wooden letters
Take your wooden letters and using E6000 or any other heavy-duty adhesive, add your wooden letters to your wood board. I decided to add my letters to a corner of my board.
Your heart garland is complete. Let me know if you create your own. Thanks for crafting with me!
Pin Save Share


.png)

Oh, how pretty, I really like that!! Do you use all the things you create or do you sell some of them? Thanks so much for linking up at the Unlimited Link Party 96. Shared.
ReplyDeleteDee, thank you! 😊 I use most of my creations, but I either give them away. I also enjoy participating in craft fairs!
DeleteLucky recipients :)
Delete:) You are always so kind!
Delete:)
DeleteThat is just darling!!
ReplyDeleteJoanne, thank you so much!
DeleteCONGRATS Stephanie! Your post is FEATURED at the Unlimited Link Party 97!
ReplyDeleteDee, thank you so much!
DeleteI love this Steph. I really appreciate the tutorial and video.
ReplyDeleteThank you bunches for sharing this with Sweet Tea & Friends this month.
Paula, thank you so much! Aw, you're very welcome. I am always so happy to hear when you all enjoy the tutorials. Thank you for stopping by.
DeleteSteph, your heart wall hanger is adorable, and your tutorial is so helpful. Visiting from Simply Coffee and Jesus. I also cohost a link party on my blog. We’d love to see your links at myweeabode.com!
ReplyDeleteJulie, thank you. I always appreciate feedback. I'm so happy to hear that you found my tutorial helpful. I will be sure to stop by your link party! Thanks so much for stopping by.
DeleteThis is beautiful Steph, it'll be a feature at Handmade Monday this coming week :-)
ReplyDeleteThank you so much. I'm so happy to hear this. :)
DeleteBeautiful. Elegant and rustic. Featuring when my link party opens!
ReplyDeleteCarol, thank you so much! So happy to hear that you enjoyed it. :)
DeleteYour Valentine decor is so pretty! I'm featuring you tonight at the #HomeMattersParty. Thanks for sharing.
ReplyDeleteAllyson, thank you so much! Always happy to share. :) I will be sure to come by the link party!
DeleteHi Stephanie, one of my features for SSPS 394!
ReplyDeleteMelynda, thank you 😊.
DeleteOh, I just love this, Steph. There's something about the burlap and the wood and the flowers. Beautiful job. Visiting from the Busy Monday linkup.
ReplyDeleteJennifer, thank you so much. I'm glad that you enjoyed it. 😊
Delete