Create a festive and charming atmosphere with this DIY Christmas mini faux window decoration. Learn how to make a beautiful and unique holiday display for your home using simple materials and step-by-step instructions. Perfect for adding a touch of warmth and holiday spirit to any room.
Hello everyone, I would like to say thank you for joining me today to create some Christmas crafts. Today's project involves making mini faux window decorations. We'll be using faux berries, greenery, lights, and other materials to make them look beautiful. Thank you for being a part of this.
Step-by-step video tutorial ↓↓
Materials
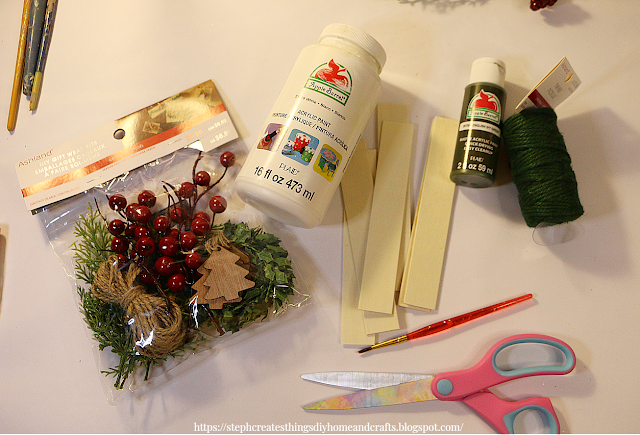
Wooden craft sticks
I purchased a pack of 50 at Joann's
You will need
Holiday decoration assortments
I am using two wooden Christmas trees, winter berries, and greenery out of my pack
Paint
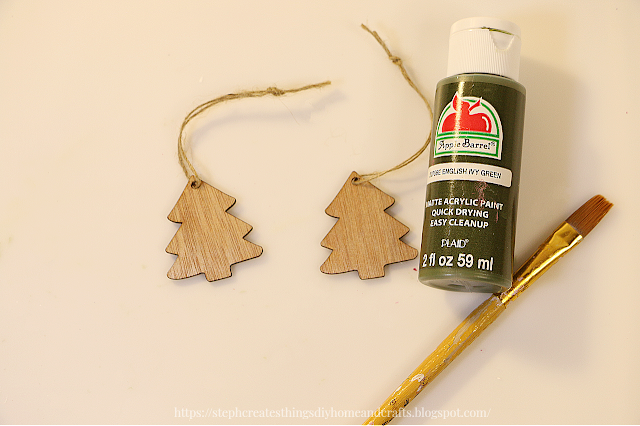
I'm using white for the faux window and English Ivy green on my wooden trees
Scissors
Twine- I'm using a green color twine
Hot glue
Paintbrush
Start by painting only the front section of your wooden craft sticks with white paint.
To get started, take some hot glue and use it to attach your sticks together. First, create a square box by gluing all four sticks together. Then, take a craft stick and glue it in the center of the square box. Next, take your last stick and glue it across the middle stick to create a T-shape in the middle of the box. Once you're done, your decoration will have four sections in the middle of the box.
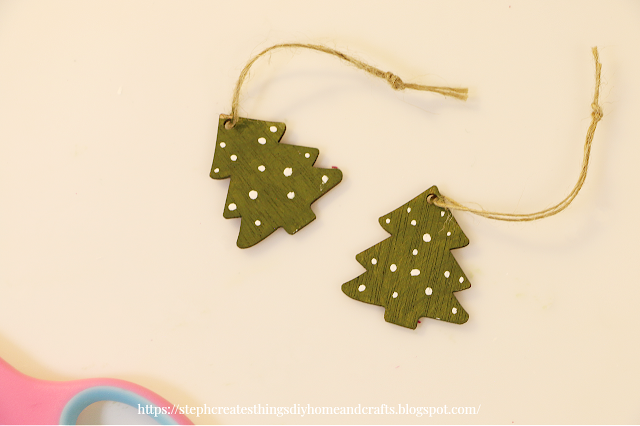
For my Christmas decorations, I chose mini wooden trees. I painted them with English Ivy, and after letting them dry completely, I added dots to them using white paint.
After completing the front of your faux window decoration, flip it over so that the back is facing up. Cut a section of twine using scissors, and then glue the ends of the twine down on either side of the window design using hot glue. This will create a loop that can be used for hanging your decorations.
Start by adding your decorations to your window design. In my case, the wooden trees I used came with attached strings. I glued these strings to the back of the window, to allow for movement of the trees. Afterward, I trimmed any excess string to ensure a clean look.
I chose to enhance my window display with artificial berries and greenery. I placed them on the lower part of the design. You have the option to include a bow as well. For my display, I added a bow at the center of the berries and greenery.
Your Christmas mini faux window decoration is now complete. I added some snowflake lights to my decorations. Let me know if you decide to create your very own, and be sure to say hi! I love hearing from all of you. I'll see you soon.
Pin Save Share


.png)


How cute and I love that it has lights! Thanks so much for linking up at A Themed Linkup 127 for Winter Crafts and Décor. Shared.
ReplyDeleteDee, thank you so much!
DeleteYour window is adorable. I pinned it!
ReplyDeleteKristie, thank you so much!
DeleteWow, these are so darling!! Pinning. Visiting from Pam's Party and Practical Tips linkup.
ReplyDeleteJennifer, thank you so much!
DeleteVisiting again to say thanks so much for linking up at the #UnlimitedLinkParty 137. Pinned.
ReplyDeleteDee, thank you! :)
DeleteVisiting again to say thanks so much for linking up at #AThemedLinkup 174 for All Things Christmas. Pinned.
ReplyDeleteI appreciate you visiting again. Thank you.
DeleteGreat idea for making a window ornament.
ReplyDeleteThank you. 🙂
DeleteThis is so cute! I love how simple it is!
ReplyDeleteMichelle, thank you! I appreciate you visiting.
DeleteSo, so cute! I think the snowflake lights add just the right touch, too. Pinning! Thank you for sharing this post at the Will Blog for Comments #17 linkup. Hope to see you next week as well.
ReplyDeleteJennifer, thank you. You are so kind. I appreciate it.
DeleteDear Stephanie
ReplyDeleteCongratulations, your post will be featured at SSPS 389, see you Monday. Thanks for sharing.
Esme, thank you! 😊
DeleteSo pretty, what a lovely ornament
ReplyDelete