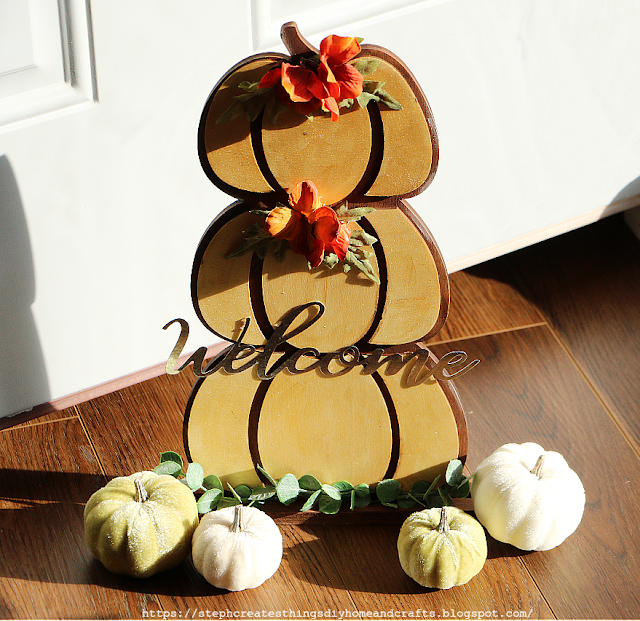
Today let's paint and decorate one stacked wood pumpkin design. This is a simple craft and takes just a few materials.
Video tutorial
One wood-stacked pumpkin decoration
Paint
One metal welcome sign
Faux floral
Paintbrush
Hot glue
Start by applying your first color to the inner sections of your pumpkin. I decided to use a darker color. I am using a color called Espresso.
Next, take your second paint color and add that to the unpainted areas on your decoration. I went with a gold color.
After, take your faux floral and begin to add it to your wooden pumpkin.
I added a few of my leaves and flowers below the stem, and just below the first stacked pumpkin.
This is optional, but I chose to add one metal welcome sign to my design. I purchased a pack of these signs at my local Dollar Tree. I added my sign just above my last pumpkin.
After, take your cut greenery and begin to glue it onto the bottom stand of your decoration. I cut three sections of my greenery and ended up gluing them in a line across the bottom section of my stacked pumpkins
Your decoration is complete. I love how simple this was. I purchased the wood pumpkin decoration at my local Hobby Lobby store during a fall sale that took place.
I hope you enjoyed this simple project. Thank you for stopping by and creating with me!


I love stacked pumpkin décor items, they always look nice. Yours does too. Thanks so much for linking up at #AThemedLinkup 163 for Fall Crafts and Décor. Pinned.
ReplyDeleteThank you! 😊
DeleteStephanie, CONGRATS! Your post is FEATURED at #AThemedLinkup 164 for Cleaning and Organizing from the previous linkup for Fall Crafts and Décor.
ReplyDeleteThank you, Dee. 😊
DeleteLovely. Featuring when my link party opens.
ReplyDeleteCarol, thank you. 😊
Delete