Get into the Halloween spirit with this adorable DIY hanging decoration. With just a few simple materials and a little creativity, you can create a cute and festive decoration that will brighten up any space. Learn how to make this craft and add a touch of cuteness to your Halloween decor.
Hi there! I'm so happy that you decided to stop by. I hope that all is going well. Today I am going to show you how to take a small round wood plaque and create a cute Halloween hanging decoration.
Video tutorial
Materials
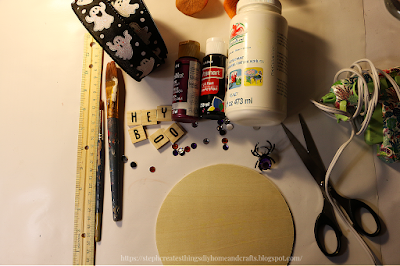
For this craft, you'll need the following materials:
One round wood plaque, which can be purchased at Michael's Craft store
Black and Metallic Berry paint by DecoArt
Wood tile letters
Halloween decorative ribbon
Hot glue or E6000
Twine
A paintbrush
A ruler
Scissors
Assorted craft gems
A pencil for tracing.
Additionally, you may want to include an optional Halloween decoration to add to your hanging decoration. For example, I'm using one spider ring.
Adding a line to the middle of the circle decoration
To begin, place your ruler onto your wood plaque and use your pencil to draw a line across the middle section of your round wood plaque. Do not worry if your line is not exactly in the middle. The purpose of the line is to create two sections on the board.
Applying paint to the wooden circle
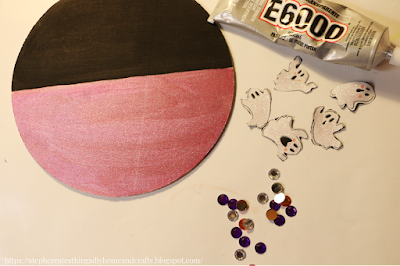
First, use your paintbrush to start applying the black paint along the line you drew. You can paint one section with black paint and the other with a berry color. After painting each section, allow it to dry completely.

Adding ribbon and Mod Podge
Grab your ribbon and start cutting out the designs that you want to use. I personally chose to cut out some ghosts from my ribbon. Alternatively, you can use a Halloween-themed napkin and apply Mod Podge instead of using ribbon. Once you have your decorations prepared, set them aside.
Adding craft gems
Adding wood letter tiles and decorations
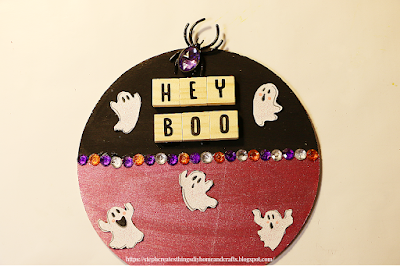
You are now ready to add the wooden letter tiles and decorations that you had previously cut out. I suggest using E6000 to attach the ribbon cutouts, gems, and tiles to your design. Apply a small amount of E6000 to each tile, then place it onto your wood plaque.
Adding extra Halloween decorations to your design is an optional step, but if you have any, now is the time to add them. As an example, you could add a spider ring as I did in my previous craft - Quick and Easy Dollar Tree Halloween Art Display Memo Board. You can find spider rings at your local Dollar Tree and simply remove the ring section of the spider.
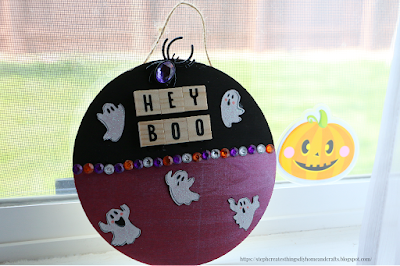
To hang your decoration, take a small section of twine and cut it with scissors. Flip your wooden plaque over and apply a small amount of hot glue to the ends of your twine. This will create a simple loop for hanging your decoration.
Your adorable Halloween hanging decoration is complete. I hope you enjoyed this easy craft. Thank you for joining me and happy Halloween!
Pin |share |Save


How cute and not too scary :) Thanks so much for linking up at the Unlimited Link Party 85. Shared.
ReplyDeleteDee, thank you! I'm so happy to hear that it is not too scary ;) Thanks so much for stopping by.
DeleteThis is cute. You do lovely work.
ReplyDeleteVisiting today from Unlimited Linky Party 85 #23&24
Paula, thank you so much. I appreciate your kind words.
DeleteI love things that say, "Hey Boo."
ReplyDeleteKristie, me too! 😊
DeleteThis is super cute! Thank you for visiting Tell It To Me Tuesday. I hope to see you again this week!
ReplyDeleteVisiting again to say say thanks so much for linking up at #AThemedLinkup 168 for All Things Halloween. Shared again by pinning.
ReplyDeleteSo cute! Featuring when my link party opens!
ReplyDeleteCarol, thank you. 😊
Delete