
Upcycled Fall Metal Wagon Decoration

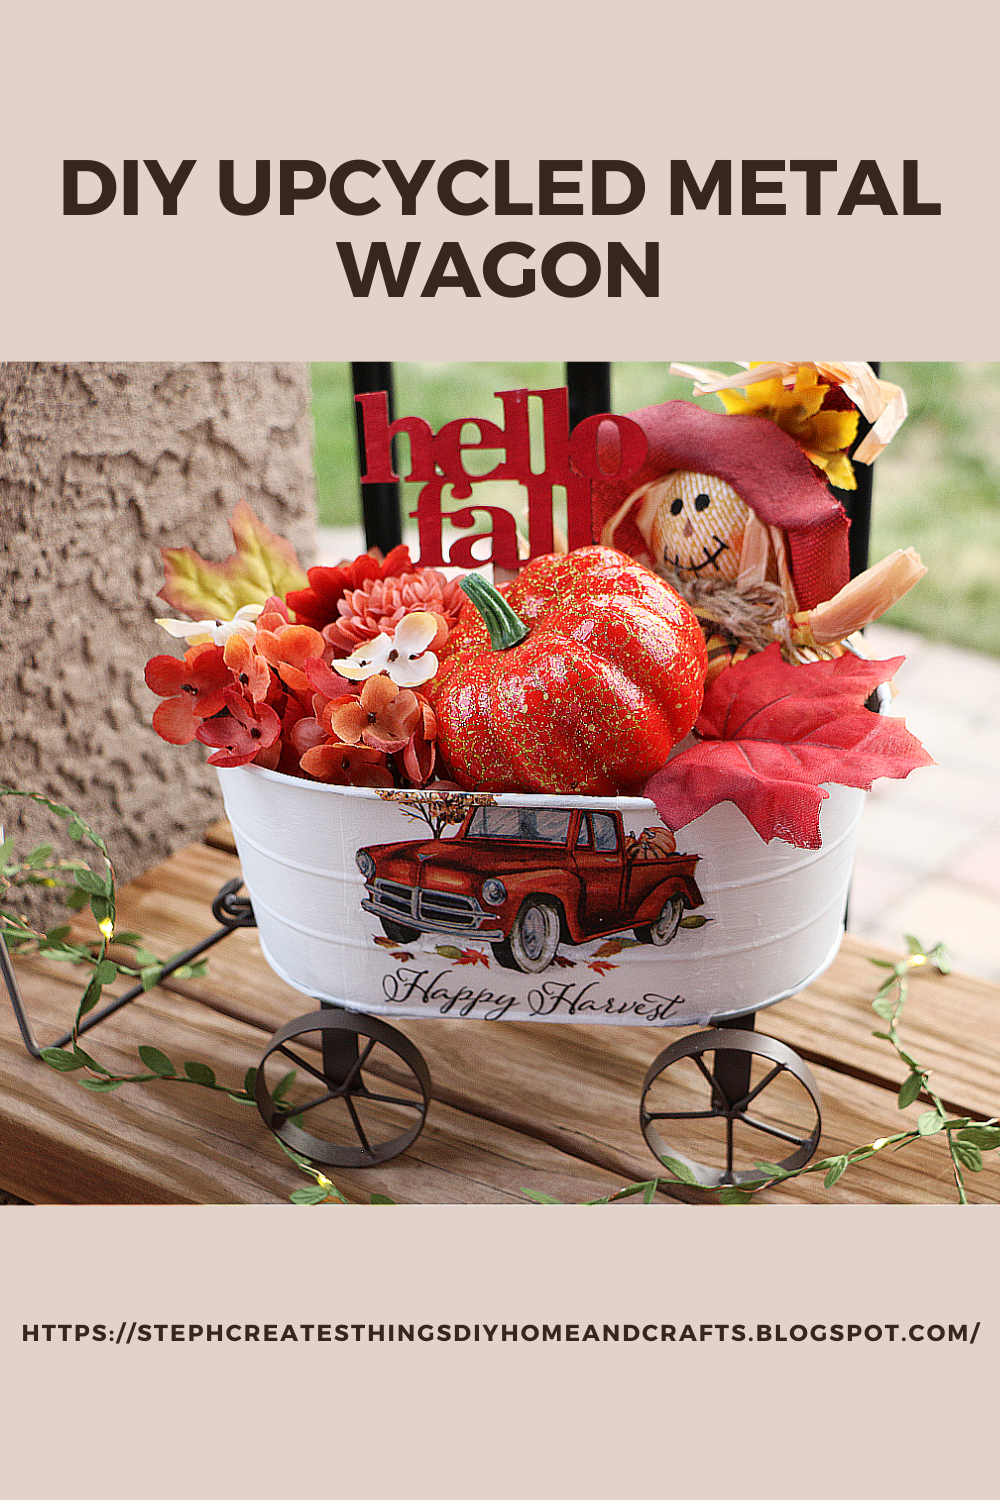
 Hi everyone. I did a little craft supply shopping a few weekends ago. I couldn't resist all of the sales that were taking place. If you haven't gone to Michaels, you should definitely go soon. They have marked down quite a bit in their store. While I was there I picked up a metal wagon. I wasn't sure what I was going to do with it. Soon after, I was able to come up with a few ideas. I decided I'll create a new look for it and it would be added to my other fall decorations. I'll take you through what I did to upcycle my metal wagon. 


Video tutorial


Materials needed

One metal wagon--Purchased at Michaels during their fall sale
One fall decorative napkin
Acrylic paint-white
Mod podge
Hello fall sign
One popsicle stick
Hot glue
Paintbrush
Scissors
Faux fall floral
Floral Cutters
Foam craft blocks
Optional--foam pumpkin, scarecrow, fall leaves


Begin with using your paintbrush to apply your white paint onto your metal wagon. I applied two coats of paint to my wagon. I also used my blow dryer between coats to help dry the paint.


Next, take your decorative napkin and cut out the section that you are going to want to display on your wagon. Take your paintbrush, and apply a thin layer of mod podge onto the section on your wagon. Place your napkin over your mod podge, and gently smooth it out. You can take your blow dryer, and smooth it out while drying it. After, take your mod podge, and add a thin layer on top of your decorative napkin.  Repeat the step with your blow dryer.


Next, take your foam blocks and add them to your wagon. I decided to add just a little hot glue on the bottom side of each foam block. 


After, use your floral cutters and cut your floral to size.


I decided to add my hello fall wood sign. I took a popsicle stick and added some hot glue onto the back of my hello fall sign.  I figured by doing this, I could stick the sign into my foam block, and my sign would be a little more visible on the inside of my wagon.

I decided to add in my pumpkin and scarecrow. You can add any decoration of your choice. This upcycle project was simple. I hope that you have enjoyed this project. Thank you so much for stopping by and creating with me. I'll see you soon! 


Pin/Save/Share


Comments

  1. How cute is that? Love it! Thanks so much for linking up at the Unlimited Link Party 82. Shared.

    ReplyDelete
    Replies
    1. I'm so happy to hear that you enjoyed this. Thank you for stopping by. =)

      Delete
  2. Adorable! Great tutorial and such a pretty end result. Pinned!

    ReplyDelete
    Replies
    1. Denise, thank you so much! I'm so happy to hear you enjoyed it.

      Delete
  3. Such a cute arrangement, perfect for welcoming the autumn. Thanks for sharing with us at Handmade Monday :-)

    ReplyDelete
  4. CONGRATS Stephanie! Your post is FEATURED at the Unlimited Link Party 83!

    ReplyDelete
    Replies
    1. Thank you so much for the feature! 😊 I'll be sure to stop by.

      Delete
  5. This is darling! Visiting from Grammy's Grid (and also from Colorado!) :)

    ReplyDelete
    Replies
    1. Jennifer, thank you! :) I love hearing from other people here in Colorado. Thank you for stopping by.

      Delete
  6. That's really adorable! Great job!

    ReplyDelete
  7. I need to find these word signs stat, these are so cute. Napkin projects are my favorite to work on, I just have not worked on one in a while. I need to get out so I can find some for fall. If you are not selling crafts, you should be Stephanie, you have such adorable ideas!

    ReplyDelete
    Replies
    1. Cara, aw you are too kind. I appreciate that. You can find these word signs at either Dollar Tree or Michael's. I believe I've seen them at Hobby Lobby as well. 🥰

      Delete
  8. Your little fall wagon is even more precious now! Adore those fall vibes! And that scarecrow sure is a cutie!

    ReplyDelete
    Replies
    1. You are always so kind, and I truly appreciate it. -Thank you! I am happy that you enjoyed my fall wagon design. :)

      Delete

Post a Comment

I love hearing from you! Your comments and creative ideas truly brighten my day. I do my best to respond to everyone, so if you have a question or just want to say hello, please leave a note below. To keep our community a positive and inspiring space, spam or off-topic comments will be removed. Happy crafting!

Popular posts from this blog

Simple DIY Autumn Floral And Bead Wreath

  Create a beautiful autumn wreath with this simple DIY tutorial. Learn how to incorporate floral elements and beads to make a stunning seasonal decoration for your home. Hello! I am delighted to have you here with me today. For this DIY project, I have a simple idea that I think you'll love. We will be creating an Autumn floral and bead wreath using just a few materials. If you're viewing this project, I'm sure you love Fall as much as I do. It is my favorite season, and I have been busy creating new crafts to share with all of you. Video tutorial How to create an Autumn floral and bead wreath Materials One wreath  $4.99  (I'm using a grapevine wreath, and I purchased it at Michael's. It is a 14'' wreath) Faux fall floral  (My flowers were purchased at Michael's, and it was actually a stem bundle)  $9.99 , but they are having a sale. I paid $4.99 Beads  $1.60  (Purchased at Michael's) Stretch cord  $2.88  (Purchased at Walmart) You will also...

Transforming Oui Yogurt Jars: Creating a Window Hanging Flower Display

Transforming Oui Yogurt jars into a hanging flower display is a simple way to add charm to any space. In this post, you'll learn how to customize and hang these jars with flowers. Get ready to create a beautiful, eco-friendly display that brightens up your home or garden. Whether you're new to upcycling or just itching for a quick creative fix, this easy and budget-friendly project will brighten up any window in your home with elegance and charm. Video tutorial What You’ll Need: 3 Oui yogurt jars (or any small glass jars you have on hand) Transfer stickers of your choice — I used cold transfer stickers I snagged on sale at my local Michaels Artificial flowers Scissors Floral cutters Twine Spring tension rod (or clear sturdy command hooks) 1. Prep Your Jars and Add a Personal Touch Begin with clean, dry jars. These little glass containers serve as the perfect blank canvas. Select your transfer stickers—I opted for a floral theme because who doesn’t love more blooms? I trimmed th...

Three Easy Candle Jar Ideas for Cozy Porch Décor

I've always thought there was something so comforting about soft candlelight, especially when it’s paired with a few simple faux florals and greenery. Today, I’m sharing a sweet little project in which I decorated a glass jar in three different ways. Each jar has its own personality, glow, and gentle charm. These pieces are perfect for porch décor, but they work beautifully anywhere you want to add a touch of warmth. I love projects like this—simple materials, quiet moments, and a finished piece that feels peaceful and handmade. Video tutorial  Materials I Used Clear glass jar Battery‑operated candle Faux string of pearls Faux succulents Faux vine Bright pink faux flowers (tops removed from stems) Yellow faux flowers Faux foliage Optional: woven mat or tray for display Jar 1: Succulents & String of Pearls For the first jar, I wanted something earthy and calming. I placed a faux string of pearls inside the jar and let it settle naturally. Around it, I tucked in a few faux succul...

Design your very own organizer using Dollar Tree Items

  Learn how to design and create your own personalized organizer using affordable Dollar Tree items. Get creative with materials and follow these easy DIY steps to make a unique and functional organizer for your home or office space. Hi everyone! I hope that you are doing well. Recently I took a trip to my local Dollar Tree and found these stackable plastic organizers.  Today we're going to design our very own organizer. To create your organizer you will only need a few materials. Most of my materials were purchased at my local Dollar Tree store. You will need three of the plastic organizing drawers.  Be sure to check out my YouTube channel for more DIY tutorials-- For more DIY Tutorials Click here! And I would love it if you subscribed to the channel DIY Organizer video tutorial below Materials THREE STACKABLE ORGANIZING DRAWERS 5X5X1.75 IN ASSORTED FAUX PEARL BEADS SMALL WOOD BEADS PEEL AND STICK FLORAL DECALS PEEL AND STICK DECORATIVE PAPER HOT GLUE PAINT- I'M USING AC...

Easy DIY Metal Tea Container Redesign

 Hello everyone! I hope you are all doing well. I'm excited to share a quick upcycled DIY project with you today. I will be transforming a tea container that I recently finished and reusing it to store tea bags. I wanted to give it a fresh new look. This project requires Mod Podge, paint, and other materials. Video tutorial Materials: - One tea container - Decorative tissue paper, wrapping paper, or napkin - Acrylic paint - Paintbrush - Mod Podge - Embellishments (e.g., wooden bead, hot glue)   Adding Decorative Paper and Mod Podge: For this project, I chose to use floral wrapping paper. I started by applying Mod Podge to the tin can with my paintbrush. Then, I placed the wrapping paper over the Mod Podge, working my way around the container. I used a heating tool to dry the Mod Podge as I went along. Decorating the Lid: After that, I painted the metal lid with acrylic paint, applying around three coats to achieve good coverage. I used cut-outs from the decorative wrapping pap...

Search This Blog

All content Copyright

Copyright 2021-2026 I ask that you do not take or use my photos or words without permission. If you have any questions, please feel free and contact me. Also, for more information on this blog, check out the disclosure policy tab above. Thank you