Materials Needed
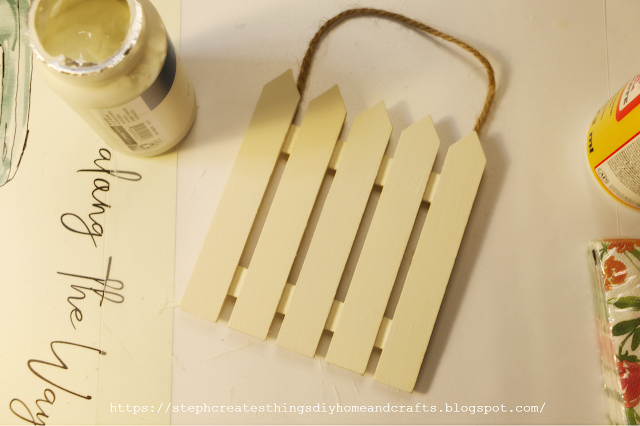
One wooden fence decoration- purchased at Dollar Tree
Mod Podge
One decorative napkin-purchased one pack at Dollar Tree
Paint- I'm using chalk paint.-White and Misty pink
One mini watering can decoration-I found this in the gardening section at Dollar Tree
One paint brush
Floral
Hot glue
Scissors
One pencil for tracing
Floral snips
Optional- butterfly sticker
Start off by, applying a layer of white chalk paint onto your picket fence. You can also apply the white chalk paint to the spaces between the pickets using a smaller paintbrush. Set it aside, and allow it to dry.
Step 2: Tracing, cutting, and adding the decorative napkin
Take your napkin, and remove the second layer. For this project, you will only want the top layer of your napkin. Once you have done so, take your napkin, and lay it out flat. Next, take your picket fence, and lay it on top of your napkin. Using your pencil begin to trace out each picket.
After you have traced out your pickets, take your scissors, and begin to cut the traced pickets out. Cut each picket out, and set it aside.
Using your Mod Podge, begin to apply some Mod Podge over each picket.
Next, take the napkin pieces you had previously cut, and start to add them on top of the Mod Podge. Using your fingers, gently press them down, and remove any wrinkles, and lines.
Take your Mod Podge, apply a thin layer over each napkin piece, and picket. Once you have done this step, you can use a heat gun, or blow dryer to help with the drying. Using a smaller paint brush, take a little Mod Podge, go between each picket, and apply it to sections that may need it.
Step 3: Adding paint to the mini watering can
After, take your watering can decoration and apply your paint onto it. If you want to keep the original color on the watering can, you can skip this step.
Using your hot glue, apply a small amount onto the back of your watering can decoration, and add it to the right side of your picket fence.
Next, take your floral, and begin to cut them to size using your floral snips.
Once you have cut your floral, take each piece and glue them onto the left side of your picket fence decoration.
The last step is optional, but you can add a little butterfly sticker onto the corner of your watering can decoration.
Your simple mini picket fence decoration is now complete! Did you enjoy this simple craft? Would you like to see more Mod Podge crafts? I'd love to hear from you all. Please feel free, to leave me a comment, and let me know what you think of this craft. Thank you for creating with me! I'll see you soon!
Pin/Share/Save


.png)
.jpg)


.png)

This is so pretty, thank you for sharing it with us at Handmade Monday, it'll be a feature this coming week :-)
ReplyDeleteThank you so much. :)
DeleteHow cute is that? Looks so cheerful! Thanks so much for linking up at the Unlimited Link Party 77. Pinned.
ReplyDeleteAw, thank you so much! :)
DeleteHi Stephanie, I will be sharing this with Whimsy Home Wednesday tomorrow. Love your simple, yet so cute crafts. I find it difficult to keep with the million step crafts, but this? I can do! Thank you again for sharing!
ReplyDeleteAw, you just made my day! I'm so happy to hear that my craft tutorials are easy to follow along. That really puts a smile on my face. Thank you so much for the feature. I will definitely come by for a visit. 😊
DeleteHi, Stephanie! The hosts and I couldn’t stop thinking about this cute project! I’m excited to tell you this post is being featured in Whimsy Home Wednesday Link party this week! Thanks for joining us and I hope to see you at the party this week! Pinning!
ReplyDeletehttps://fifthsparrownomore.com/whimsy-home-wednesday-blog-link-party-no-23/
Kristin, thank you so much! I am so happy to hear you all enjoyed it. I always love sharing my projects with all of you. Thanks so much for stopping by.
DeleteFound you at InLinkz 297 Senior Salon Pit Stop - this is so refreshing. I blog over at www.awandafulthing.com and love projects like this :)
ReplyDeleteThank you for visiting 😊. I'm happy to hear you enjoyed this craft
Deleteso cute. Now thinking about napkins I have......
ReplyDeleteThank you! 😊
DeleteOh my...this is way too cute. Im going to make this for my Moms room for Spring. Im goung to make one for myself as well. Thank you for your creativity...😍
ReplyDeleteLorri, you're very welcome. I think your mother will love that. ❤️ Thank you for visiting. 😊
DeleteOh so cute!
ReplyDeleteJoanne, thank you! :)
DeleteI just commented on the bird house post and then saw this one. I again love the use of the floral napkin. Whoever figured out that napkins could be used as easy backgrounds for crafts is my favorite person. There are so many floral and patterned napkins! It is a never ending crafters dream :)
ReplyDeleteKristen, thank you so much. I love how we can use napkins to create decorations. I appreciate you visiting. :)
Delete