
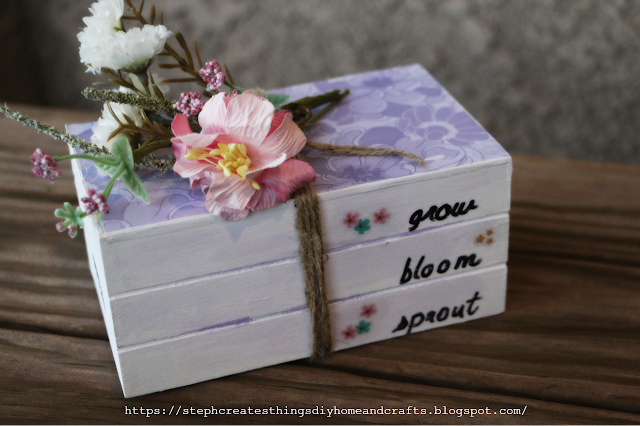
Hello, and welcome to my blogging space! I'm excited about the warmer weather that we are being told we will experience next week. This will be nice since it has been low temps and snowy weather. I've been creating a few Spring crafts, and this DIY project was a fun one. I created a Spring decorative wood book stack, and I'll admit it did not take much time to create, and my material list was simple. If you're ready, let's begin creating your very own wooden stacked books.


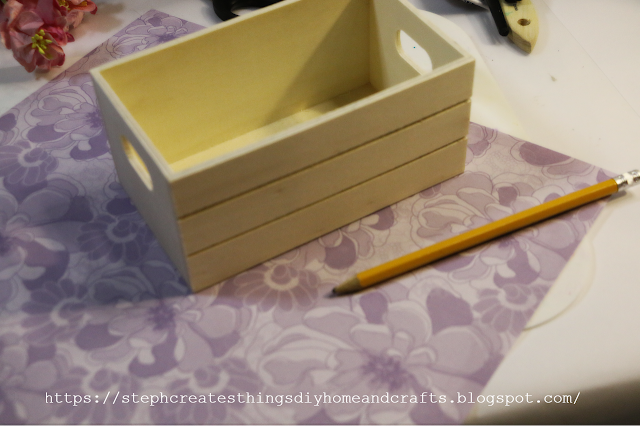

Next, use your scissors to cut out the traced shape. Once you have done this set your traced craft paper aside.

Take your wood crate, and using your paintbrush, add some of your Mod Podge onto the flat surface (which when flipped is the bottom side of the wood crate). Spread a thin layer of Mod Podge until that surface is completely covered.
Once you have applied the Mod Podge, take the craft paper that you have cut to shape, and add that to the wood crate on top of the Mod Podge. Be sure to smooth out the craft paper. Once you have done that, take some mod podge, and add that to the craft paper. Be sure to spread it evenly, and remove any bubbles or wrinkles.
I used a heat gun to help speed up the drying process.

Next, take your white paint, and paint around the sides, and front of the wood crate. I applied around three coats of white paint.
Once you have applied your white paint, take your purple paint, and add just a little in with the white paint.


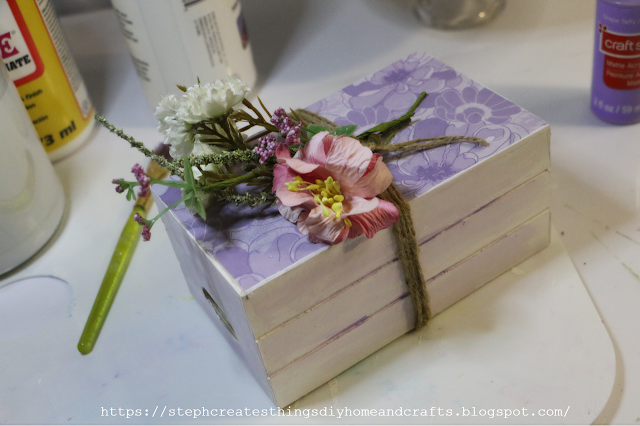
Next, take your assorted flowers, cut them to size, and add them on top of your book under the twine.

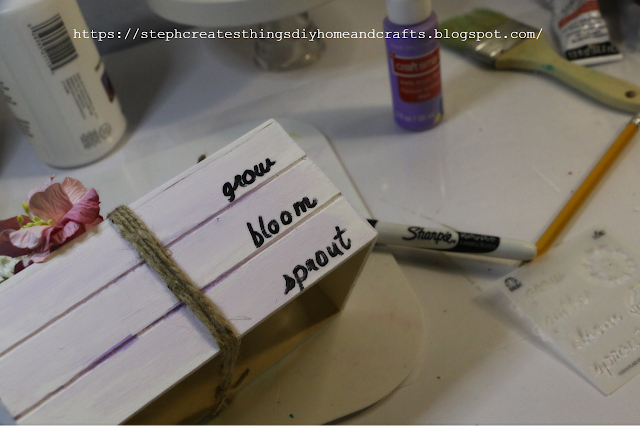
If you have a stencil on hand, take your stencil, and use your pencil to trace any letters or words on the front side of your box. I chose to add words on the right lower side of my box. After, I used a permanent marker to trace my words.

This last step is optional, but if you have any stickers you can add them to your wood books as well. I added a few that I had on hand.
And that's it. Your Spring wooden stacked books are complete. This looks adorable on a tiered tray, added along with other Spring home decor items.


Be sure to check out my other Spring crafts here--- List of spring crafts. Happy crafting! I'll see you soon.
Also, be sure to check out my YouTube channel for more DIY and craft tutorials---Steph Creates-DIY Home & Crafts

This is adorable. Can't wait to do this with my granddaughter. Thanks for sharing.
ReplyDeleteThank you so very much. I hope you and your granddaughter enjoy creating this. Thank you so much for stopping by.
DeleteThis is adorable. Much easier than using the actual wood blocks like I do. I love the spring look. Great DIY. Thanks for sharing at OMHGWW. See you next week. Tweeted & Pinned.
ReplyDeleteClearissa, thank you so much. I agree, this is much easier than using wood blocks. Thank you so much for stopping by.
DeleteWhat a pretty craft! I admire your ability to see how to transform a crate into a popular decorative item. Thanks for sharing with us at Creatively Crafty #ccbg :)
ReplyDeleteLydia, thank you so much!
DeleteWhat a great project! That turned out so cute. Thanks so much for sharing at the TFT party. :)
ReplyDeletePam, thank you! And thank you for stopping by. :)
DeleteWhat a great idea and tutorial! Looks nice! Thanks so much for linking up at A Themed Linkup 100 for Spring Crafts and Décor. Pinned.
ReplyDeleteDee, thank you!
DeleteThis is a cute craft for spring decor. I would love it if you would share this at my Friday With Friends link party: https://myhubbardhome.com/friday-with-friends-advancing-into-spring-link-party/
ReplyDeleteThanks,
Rachelle
Thank you for stopping by, and letting me know about the link party too! =)
DeleteCONGRATS Stephanie! Your post is FEATURED at A Themed Linkup 101 for Tablescapes from the previous linkup for Spring Crafts and Décor.
ReplyDeleteDee, thank you so very much! =)
DeleteThanks for sharing at the Friday with Friends link party, Stephanie.
ReplyDeleteYour craft will be one of the features this week!
hugs,
Rachelle
Rachelle, thank you so very much!
DeleteThat is such a creative way to use a small crate, so pretty and so clever.
ReplyDeleteThank you so much. I love how easy it was to create!
Delete