
DIY $8 Holiday Wood Risers. Build And Decorate

Learn how to create stylish and affordable holiday wood risers for just $8. This DIY project will guide you through the process of building and decorating these festive and versatile decor pieces. Get ready to add a touch of charm and elevate your holiday decorations.

Hello everyone! I hope you are all doing well. I am excited to share with you another simple DIY project that you can try at home. This project is very easy and affordable, and I only spent around $8 to build my wooden risers. So if you're ready, let's get started and create something beautiful!


Video tutorial

Be sure to check out the video tutorial. 


Material list 

Two 6.5'' wood circles

One bag of wooden doll heads (These are used for the legs) You will need 8. 

Gold wire (Optional)

White paint, and black paint

Adhesive (I used E6000 for gluing the legs onto the wood circles)

Hot glue (This will be used for attaching the gold wire)

Wire cutters/scissors (Depending on how thick your wire is)

Paint brushes

Creating your risers

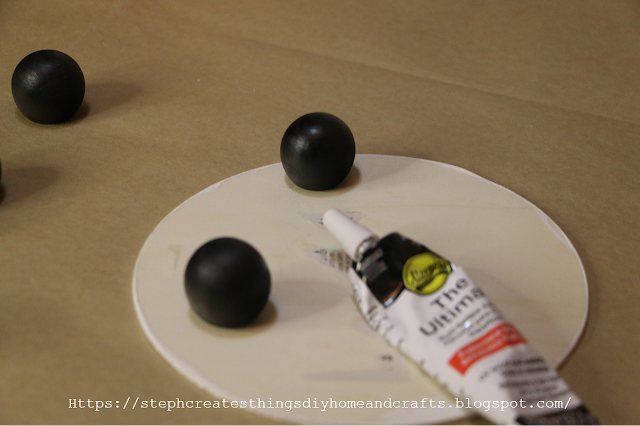
To make your risers, apply white paint to both wood circles. You'll need about three coats to cover them completely and give them a smooth appearance. Set the circles aside to dry. I didn't paint the bottom side of my circles, but you can do so if you prefer.

Next, take your wooden doll heads and apply black paint to each one. Set them aside and allow them to dry.


Once they have completely dried, you can now take your adhesive and add it to the bottom side of your wood circles. Each wood circle will have four added to the bottom.


Take your gold wire, and cut three medium sections out. Once you have cut three sections, take the ends and twist them. You will do this on the two ends. 

Once you have completed that step, take your gold wire, and use hot glue to add them on the top of your wood circles.

 You will form a circle with your wire on the top, and glue them down.  This is optional, but I love working with gold wire and just wanted that look on my risers. 


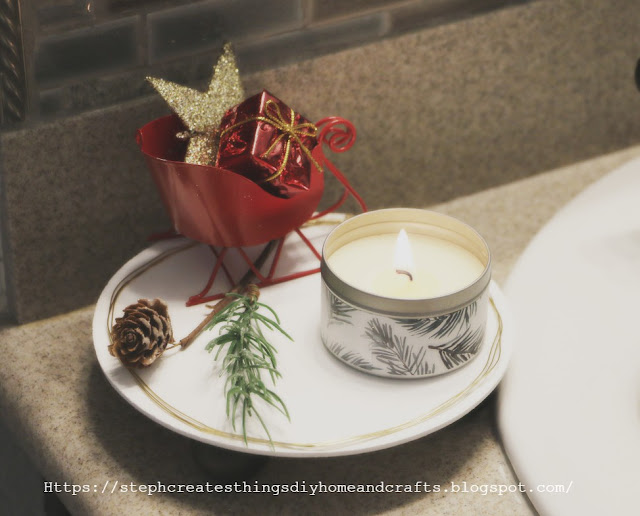
Decorating your risers

Once you have finished building your wood risers, it's time to decorate them. You can find most of the decorations at a discounted price. Add a candle, some holiday greenery, or a cute ornament to make your risers look festive. You may use any decoration that you like; mini LED lights, a glass candle design with twine, and cinnamon sticks can also be added to your risers to enhance their appearance. 

You can use dried oranges and greenery to create a small glass jar and add a mini wreath to it. Don't forget to personalize your decoration and have fun with it. 

Choose an appropriate spot to display your decorated wood risers and you're all set! I hope you find this simple DIY project enjoyable. Check out more of my crafts and feel free to share your thoughts in the comments below. I would love to hear from you.


I'll see you soon!


Pin/save/share


Comments

  1. How pretty. It amazes me how many creative ideas you come up with!! Thanks so much for linking up at #IMadeItMondayLinkParty 33. Pinned.

    ReplyDelete
    Replies
    1. Dee, aw thank you. 😊 I appreciate you! I hope that you have a wonderful Thanksgiving.

      Delete
  2. Brilliant! I love how this gives depth to displays. Getting an early start on features for next week's party since we'll be away.

    ReplyDelete
    Replies
    1. Carol, thank you so much! I'm glad you enjoyed the DIY project. Enjoy your trip! 😊

      Delete

Post a Comment

I love hearing from you! Your comments and creative ideas truly brighten my day. I do my best to respond to everyone, so if you have a question or just want to say hello, please leave a note below. To keep our community a positive and inspiring space, spam or off-topic comments will be removed. Happy crafting!

Popular posts from this blog

DIY Budget-Friendly Succulent Plant Hanger Design

 Hi everyone! I hope that you are doing well. Today I am sharing an easy DIY craft that is budget-friendly, and easy to create. A material list will be provided, along with step-by-step instructions on creating your very own. Be sure to check out the video tutorial below. Video tutorial Materials One 4x4 framed art Acrylic paint Faux succulents Hot glue and any other heavy-duty adhesive Twine Scissors  Floral cutters Paintbrush You can find most of these materials at your local Dollar Tree This project costs under five dollars If your frame comes with beads as shown in the picture above, take your scissors and remove the beads. You will actually reuse the beads later on in this craft. Take the inner section of your out and set it aside. Next, take your acrylic paint and paintbrush, and begin to apply your paint to your frame. I applied three coats of my paint to my frame. Next, use your paintbrush you apply paint over the inner section of the frame we removed earlier. I applie...

Summer Craft: DIY Paper Plate Watermelon Flower Hanger

Hey everyone! I'm excited to show you a fun and easy craft. Today, we will be making a summer watermelon floral hanging design using a paper plate. This DIY project is easy to create and fun to welcome the summer season. You'll make this watermelon floral hanging design to display your artificial flowers creatively. It's also a great way to use any extra paper plates you may have lying around and aren't sure what to do with. You may have extras from a birthday party or a BBQ. If you're ready, let's get started creating your floral hanging design! Video tutorial Summer Craft: DIY Paper Plate Watermelon Flower Hanger Materials: - Paintbrush - Artificial flowers - Paper plate (any size you prefer) - String or craft twine - Scissors - Hot glue Optional-Hole Puncher Start by cutting the paper plate in half. Use a darker green paint to cover the bottom area of the plate. Let it dry between each coat of paint. Continue applying paint to each area of the plate. Then, ad...

Easy DIY Summer Serving Tray

Hello everyone! How's everyone doing? I hope all is well. Today I am bringing you a quick and easy design. We're going to create a summer serving tray. You could also use this tray as a decor element as well. I am reusing a wooden crate I purchased a few years back for $3 at my local Target store. I figured it would be perfect to repaint and add a few other embellishments. If you're ready, let's create a cute summer tray. Video tutorial Materials One wooden crate I am reusing an old wooden crate I purchased at Target for $3.  Acrylic paint Optional mod podge-If you decide to seal your paint One paintbrush Scissors Fruit stickers or other summer embellishments  I found a pack of clear fruit stickers at Dollar Tree One wooden summer word sign E6000 or hot glue Begin by applying your acrylic paint to your wooden tray. I am using multisurface acrylic paint for the main tray. Be sure to allow your tray to fully dry. Between each coat of paint, I used my blow dryer to help wi...

Upcycled Plastic Bowl Hanging Planter

  Hi everyone! I hope that you are doing well. I had a few microwavable noodle bowls that I washed out and put away. I took a few days to think about what I could create using these bowls. It finally came to me, and I decided I would take one of the plastic bowls, and upcycle it. We will take this plastic bowl, and create a hanging planter. I will take you through each step, and as always I will provide a video tutorial. If you're ready, create with me! Hanging planter video tutorial Materials One Plastic Bowl  I'm reusing a plastic noodle bowl One hole puncher Twine You will need four sections of twine, of the same length. River pebbles, or craft rocks  I purchased river pebbles at my local Dollar Tree. Medium size wood beads (optional) Paint I'm using Acrylic chalk paint. Color is called mineral.l Hot glue Faux succulents, and vines Craft foam blocks Paintbrush or sponge brush Scissors Floral snips Begin by taking your hole puncher, and punching out four holes in your ...

Decoupaged Glass Jar Candle Holders with Faux Leaves and Gold Wire

  Learn how to create beautiful decoupaged glass jar candle holders using leaves and gold wire. This DIY project is a perfect way to upcycle old glass jars and create unique candle holders for your home decor.  I hope you're all doing well. The weather has cooled down, and we're enjoying the change. I'd like to share a quick upcycling decoupage project with you all today.  I had some extra glass yogurt jars and bought two taper candle holders from Target's dollar section. I wasn't sure what to do with them at first. In today's project, I will show you how to decorate small glass jars using faux fall leaves and gold wire. Video tutorial Materials Needed: - Two taper candle holders - A paintbrush - Mod Podge - Faux fall leaves or a decorative napkin - Hot glue - Two battery-operated tealight candles - Gold wire Applying Mod Podge and faux leaves to glass jars To start with, grab a paintbrush and use it to apply Mod Podge on your glass jar. Apply a small amount of ...

Search This Blog

All content Copyright

Copyright 2021-2026 I ask that you do not take or use my photos or words without permission. If you have any questions, please feel free and contact me. Also, for more information on this blog, check out the disclosure policy tab above. Thank you