
Christmas Camper Shadow Box

 Get in the holiday spirit with a delightful Christmas Camper Shadow Box! This DIY craft project combines the warmth of Christmas and the appeal of a camper distinctly and imaginatively. Discover how to create your own unique Christmas Camper Shadow Box with this comprehensive guide. Ideal for adorning your home during the holiday season or as a thoughtful gift idea.
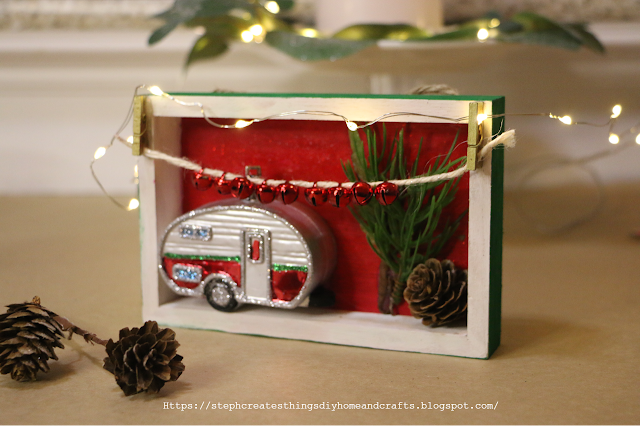
Shadow box displayed with mini lights and mini camper with foliage

Video tutorial


Hi everyone! I am so excited to share this simple Christmas DIY shadow box craft. This craft can be completed within 10 minutes and only takes a few materials. 
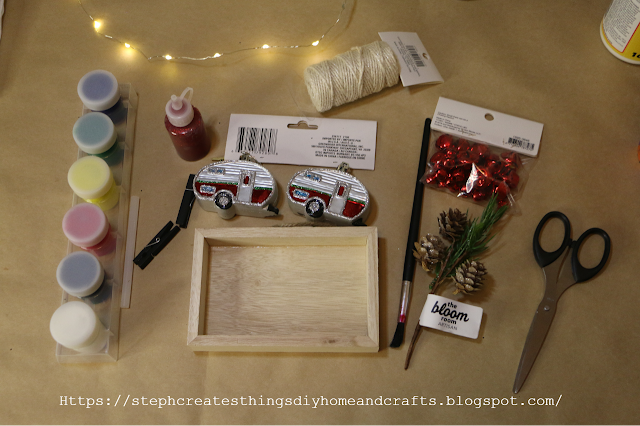

Materials such as mini campers, glitter, paint, and mini craft clothespins.

Materials Needed

- One Wood Shadow Box
Purchased at Michael's

-One set of Camper Ornaments 
I picked this up at my local Dollar Tree craft store

-Red bells

-Paint
Red, white, and green

-Greenery/pinecones

-Twine, or String

-Hot glue

-Scissors

-Red glitter
This is optional for the inside of your box

-Craft clothespins 
I used gold for my box


Creating your Shadow Box design

Start by painting the inside of your box red. The sides, top, and bottom of the inside will be painted white. Once you have painted the inside of your box, you can now paint the outside of your box. Start with painting the front outer section white. 

Painted wooden shadow box

Painted wooden shadow box


Begin to paint the outside of your box green. The top, sides, and bottom of the outer sections of your box will be painted green. 
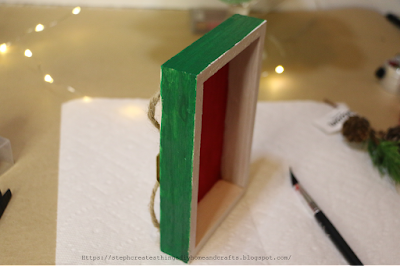
Painted wooden shadow box


Set your box aside, and allow it to completely dry. 

This step is completely optional, but once you have allowed your box to dry, you can add some red glitter to the back section that you have painted red. 
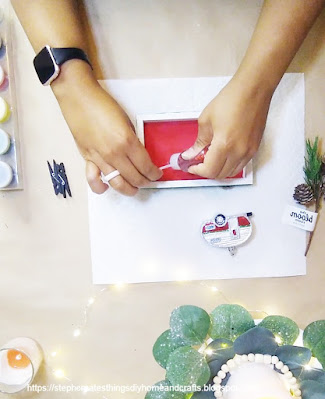
Hands applying red glitter to painted wooden shadow box


Next, take your hot glue, and attach your camper to the inside of your box.  
After doing this, you can add your greenery and pinecone. 
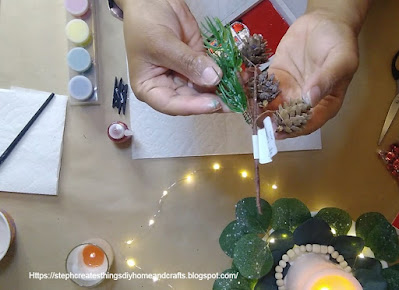
Hands holding faux foliage


Take your craft clothespins, and add them to the front, top section of your box. One clothespin on each side of your box. Use some hot glue to add them.

Next, take your scissors, and cut off a strand of twine. You will want your strand of twine to be long enough to go from one clothespin to the other. 
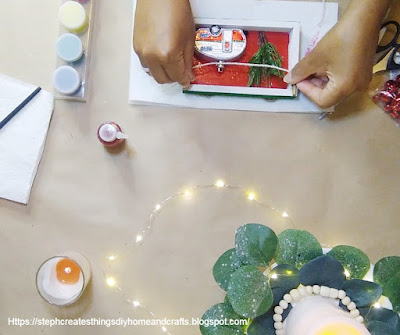
Hands attaching twine to top of shadow box


Take some of your bells, and string them along the twine. Once you have done this, take the ends of your twine, gently open up the clothespins, and add the ends of the twine on both sides.

Once you have added on your bells your project is now complete. This was such a fun, and easy craft to create. I think this will look great added to a tray with other Christmas decorations. Let me know what you think in the comment section. Also if you have any questions about this craft, please let me know.
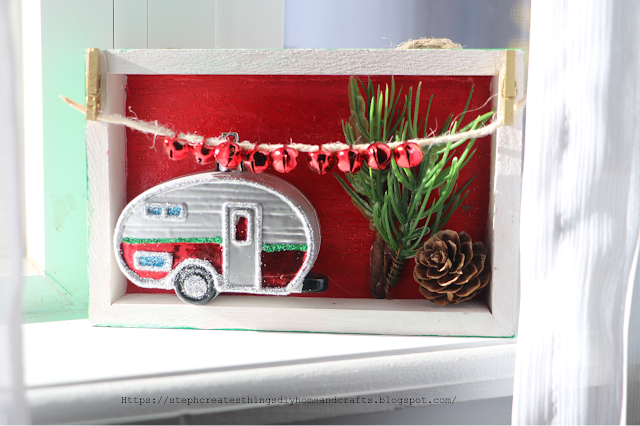

Completed Christmas shadow box displaying mini camper, mini red bells, and foliage

I'll see you soon! 

You may also enjoy

Pin/Share/Save

Completed Christmas Shadow box with text description


Comments

  1. Es un adorno navideño precioso. Saludos

    ReplyDelete
  2. This is absolutely adorable! Thank you for sharing at Party In Your PJ's - you are being featured on my blog Tuesday evening.

    ReplyDelete
  3. This is the cutest thing. It'll be a feature at Handmade Monday later today, thank you for joining and sharing it with us :-)

    ReplyDelete
  4. This is so adorable! I love the details.Thanks for sharing at the TFT party!

    ReplyDelete
  5. Very cute, love it, the lights too! Thanks so much for linking up at the Unlimited Link Party 91. Shared.

    ReplyDelete
  6. I can't believe the campervans are Christmas tree ornaments, they are super cute! What a lovely idea for Christmas! Sim x #UnlimitedLinkParty

    ReplyDelete
    Replies
    1. Sim, I couldn't believe it too! I saw them at the store, and I knew I had to purchase them. This was a fun creation. Thanks so much for stopping by.

      Delete
  7. CONGRATS! Your post is FEATURED at the Unlimited Link Party 92!

    ReplyDelete
    Replies
    1. Dee, thank you! I'm so happy to hear that. I'll be sure to visit.

      Delete
  8. This is so cute. You could replicate this with any ornament that suits you too! Great idea!

    ReplyDelete
    Replies
    1. Thank you! Yes, you certainly can do that. 😊

      Delete
  9. Beautiful, beautiful, beautiful beyond words! Now you've finally convinced me to make this cute 3D vision board. It will include the old VW camper (the one with round lights), rosemary and sage from Greece and a small fireplace. I'll let you know when the magic happens haha, maybe next new year we'll spend the new year baking potatoes on a small deserted beach in south Crete :)

    ReplyDelete
    Replies
    1. Mariama, oh please do! I would love to hear all about how it turns out. It sounds lovely, and I'm glad that I could help inspire you to create one. Thank you so much for visiting and making me smile. You're the best!

      Delete
  10. This is so cute! One of my features for this week's SSPS, thanks so much for sharing with us!

    ReplyDelete
  11. Love this! Featuring when my link party opens.

    ReplyDelete
  12. what a fun vintage look. Thanks for sharing with Create-it Link Party. https://tryit-likeit.com/link-party-it/

    ReplyDelete

Post a Comment

I love hearing from you! Your comments and creative ideas truly brighten my day. I do my best to respond to everyone, so if you have a question or just want to say hello, please leave a note below. To keep our community a positive and inspiring space, spam or off-topic comments will be removed. Happy crafting!

Popular posts from this blog

Simple DIY Autumn Floral And Bead Wreath

  Create a beautiful autumn wreath with this simple DIY tutorial. Learn how to incorporate floral elements and beads to make a stunning seasonal decoration for your home. Hello! I am delighted to have you here with me today. For this DIY project, I have a simple idea that I think you'll love. We will be creating an Autumn floral and bead wreath using just a few materials. If you're viewing this project, I'm sure you love Fall as much as I do. It is my favorite season, and I have been busy creating new crafts to share with all of you. Video tutorial How to create an Autumn floral and bead wreath Materials One wreath  $4.99  (I'm using a grapevine wreath, and I purchased it at Michael's. It is a 14'' wreath) Faux fall floral  (My flowers were purchased at Michael's, and it was actually a stem bundle)  $9.99 , but they are having a sale. I paid $4.99 Beads  $1.60  (Purchased at Michael's) Stretch cord  $2.88  (Purchased at Walmart) You will also...

Easy Dollar Tree Christmas Wooden Tree Decorations

  Create festive and budget-friendly Christmas wooden tree decorations with these easy DIY ideas using supplies from Dollar Tree. Get inspired to add personalized touches to your holiday decor without breaking the bank. Hello everyone! I hope all is well. Today we got a little snow over here in Colorado. How's the weather where you live? Today I'm sharing my latest creation. I created these decorative Christmas trees using the wood ones from Dollar Tree.  Video tutorial Here is a list of materials you will need to decorate your two wooden Christmas trees: Two wooden Christmas trees were purchased at Dollar Tree Two sheets of decorative craft paper Twine Mod Podge Faux craft gems and pearls Scissors Hot glue One paintbrush Acrylic paint Marker or pencil for tracing Start by taking your pencil or marker and tracing out your Christmas tree. Flip your paper over set your tree over the paper and trace it out. Once you have traced out your tree, use scissors to cut out your traced s...

Three Easy Candle Jar Ideas for Cozy Porch Décor

I've always thought there was something so comforting about soft candlelight, especially when it’s paired with a few simple faux florals and greenery. Today, I’m sharing a sweet little project in which I decorated a glass jar in three different ways. Each jar has its own personality, glow, and gentle charm. These pieces are perfect for porch décor, but they work beautifully anywhere you want to add a touch of warmth. I love projects like this—simple materials, quiet moments, and a finished piece that feels peaceful and handmade. Video tutorial  Materials I Used Clear glass jar Battery‑operated candle Faux string of pearls Faux succulents Faux vine Bright pink faux flowers (tops removed from stems) Yellow faux flowers Faux foliage Optional: woven mat or tray for display Jar 1: Succulents & String of Pearls For the first jar, I wanted something earthy and calming. I placed a faux string of pearls inside the jar and let it settle naturally. Around it, I tucked in a few faux succul...

DIY Magnetic Faux Succulent & Floral Lids — Upcycled Fridge Accent

I created these magnetic faux succulent and floral lids using some metal jar tops that I had saved. With a little creativity, they transformed into charming, lightweight accents that add a pop of color and personality to the fridge. Each lid features its own tiny arrangement—part succulent and part floral—all crafted with intention and charm. This project is easy and budget-friendly, allowing you to use items you already have while adding a lovely touch to your home. Quick Video Tutorial Materials Metal jar lids (one large, one small) Letter beads (to spell LOVE ) Faux moss Faux succulents Faux vines Faux flowers (pink, green foliage, white accents) Hot glue gun and glue sticks Magnets I began with the larger metal lid, attaching small letter beads to spell out LOVE . This created a meaningful little focal point and set the tone for the rest of the design. Next, I glued a layer of faux moss along the bottom of the lid. The moss added softness and helped anchor the colorful...

Mini Wood Fall Bench

 Happy Wednesday! I hope you're all doing well. I've been organizing a lot lately and found some extra fence wood pieces my husband had cut for other projects. I wanted to make something simple, so I decided to create a mini fall wood bench.  I love how it turned out! You'll only need a few materials and a smile on your face. Video tutorial Materials Two wood sections, 6¼ inches -I'm using wood pickets that I cut down to size Eight tumbling wood blocks-You can find a box at Dollar Tree Paint-white and brown Paintbrush Wood glue Optional-Mod Podge/Decorative napkin Scissors to cut your napkin design to size Start by applying paint to your two wood sections. I decided I wanted a white bench.  Next, take your tumbling blocks and paint each one. You don't need to worry about the top and bottom sections of your blocks. After that, take your blocks and glue them together. You will glue both pieces together. When you are finished, you will have a total of four legs. Next, ...

Search This Blog

All content Copyright

Copyright 2021-2026 I ask that you do not take or use my photos or words without permission. If you have any questions, please feel free and contact me. Also, for more information on this blog, check out the disclosure policy tab above. Thank you