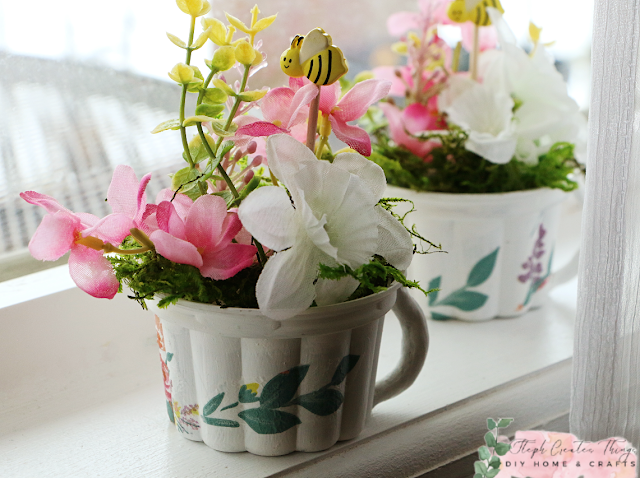
Today, we'll explore a fun and easy DIY project involving repurposing plastic mini ice cream cups into beautiful spring tea cup floral arrangements. This project is a great way to add a touch of spring to your home decor.
Before throwing away those plastic cups, consider the many possibilities in creating something new.
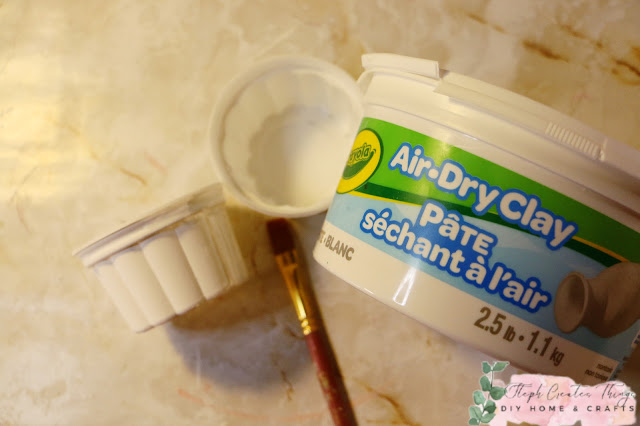
For this project, you will only need a few materials. Our main materials for creating the faux tea cup will be the ice cream cup and air-dry clay. So, if you're ready to create this adorable and creative springtime tea cup floral decoration, let's begin!
VIDEO TUTORIAL
- Plastic ice cream cups (I am reusing two plastic ice cream cups)
- Spanish moss
- Floral
- Mod Podge
- Decorative floral napkin
- Artificial spring flowers
- Acrylic paint (I'm using white)
- Paintbrush
- Optional- Bumblebee button and small dowel rod- Dimensions: 0.1 inches x 6 inches.
- Air dry clay
- Scissors
- Foam block
Preparing your cups
After washing your ice cream cups and drying them completely, take a paintbrush and apply a layer of white acrylic paint to each cup. After the first coat of paint, use a blow dryer to assist with the drying. Repeat this process and add a total of three coats of paint to each cup.
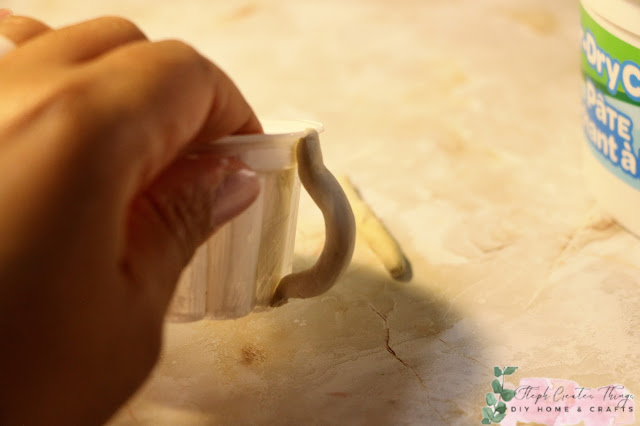
To work with the clay, take two small sections of clay and roll them out. Create the size of the handle according to how wide you want your handle to be for your cup. This will also depend on the size of the ice cream cup you are using.
Roll the clay out creating two longer sections. Attach the clay by pressing one end down on the top of the cup and the other end on the bottom of the cup. When you do this, it will create an opening in the middle. Firmly press the ends so that it stays in place. Allow the handle to dry for one to two days. You can also use a heating tool to help with the drying process. Once the clay has completely dried, you can proceed to apply acrylic paint to it.
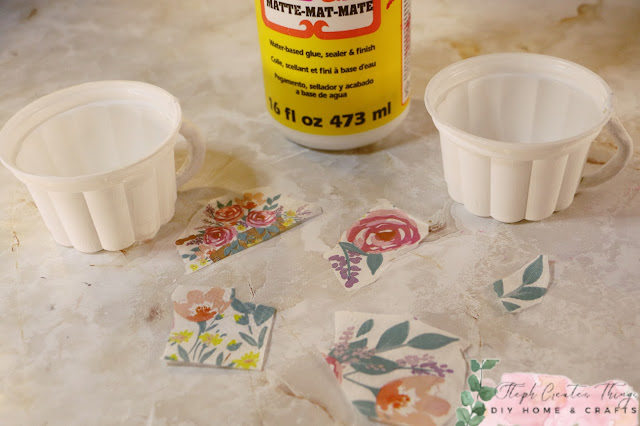
Working with the decorative napkinNext, take a decorative napkin and remove the second layer. Then, use scissors to cut out the designs you want to use in your decoration.
Using a smaller paintbrush, apply Mod Podge in sections, along with the decorative napkin pieces you previously cut out.
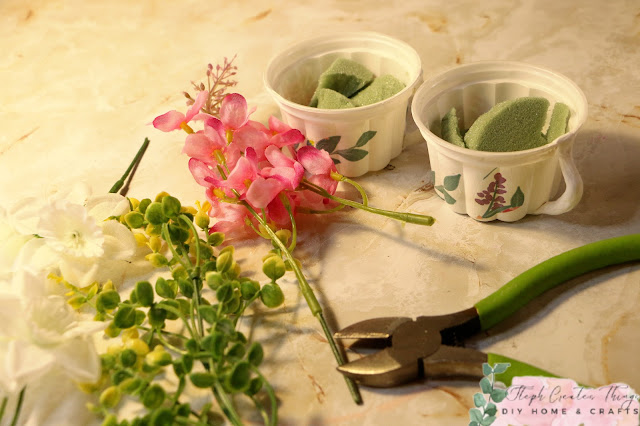
Next, add foam blocks to each cup. If your foam blocks do not fit inside your ice cream cups, take a craft knife and cut them into smaller sections before inserting them into each cup.
Adding the floral and moss Once you have done that, use floral cutters to cut each flower to the size of your liking before inserting it into the foam block.
Take Spanish moss and begin to place it over the top of the foam block. If you would like, you can add hot glue to the top of the foam block before adding in your moss. Add the moss without gluing it down if you think you may want to change out the flowers.
Adding the bumblebee button
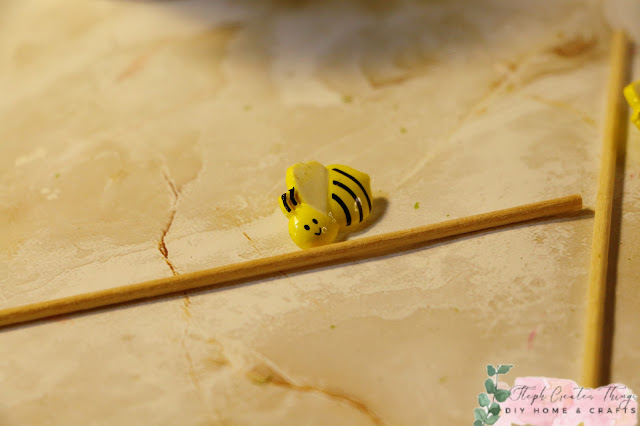
Lastly, take a small wooden dowel and add a bumblebee button at the top of the dowel by pressing it down. The button should have an opening on the back which makes it the perfect fit for the size dowel used in this project. Use floral cutters to make adjustments to the dowel rod so that it fits perfectly in the center of the floral display.
That's it for creating your spring tea cup floral arrangements. These mini spring tea cup floral arrangements are wonderful additions to tiered trays and can be added to existing spring decor. They can also be used as centerpieces during tea parties. There are so many great ways to decorate with them. Let me know what you think.
Thank you for creating your spring tea cup floral arrangements. See you soon!
Pin Share Save
This post was featured at:








.png)



So cute Stephanie! Very creative!
ReplyDeleteJenna
Jenna, thank you so much. 😊 I appreciate you visiting.
DeleteWOW, just wow, so beautiful and creative. Love it
ReplyDeleteI visited you via Pieced Pastimes: Saturday Sparks Link Party 610
My links this week are 89+90. We will be so happy if you share your blog post links M-S with us at SSPS. Link under BLOGGING.
Esme, you're so kind. Thank you. 😊 I'm so happy to enjoyed this craft.
DeleteSuch a creative project! Love your little ice cream cups transformation.
ReplyDeleteJudy, thank you! I really enjoyed working on this craft. I appreciate you taking the time to visit. :)
DeleteI would never have guessed these were plastic ice cream cups! Amazing! So pretty!
ReplyDeleteAmy, thank you. It was such a fun project.
DeleteWhat a fantastic idea and so pretty too!
ReplyDeleteKim, thank you. I appreciate you visiting.
DeleteI can't believe this is from ice cream cups. This is SO cute! Thanks for sharing at the Will Blog for Comments #31 linkup. Hope to see you next time, too.
ReplyDeleteJennifer, thank you. It was a fun project.
DeleteThis is such a lovely idea for an Easter table. I love the addition of the bumble bee!
ReplyDelete#MMBC
Thank you! I agree with you- I think it would be lovely displayed on an Easter table. :)
DeleteThese are so cute. You would never guess how they started life!
ReplyDeleteThank you! It's so wonderful how you can take an item and upcycle it into something new. I appreciate you visiting.
DeleteThey look amazing and you would never believe they started out as ice cream pots
ReplyDeleteAnne, thank you. I appreciate you visiting. :)
DeleteMy jaw dropped as soon as I saw how you made these adorable pots! You are so creative and that would brighten anyone's day! I love it! Thank you for sharing it on Farmhouse Friday. I'll be featuring it this weekend. pinned
ReplyDeleteCindy, thank you so much for your feedback. Your support means a lot to me, and it's great to hear that it could bring joy to someone's day. Thank you for including me in the list of featured posts! :)
DeleteVery sweet idea Steph. Love how they turned out, so clever too. I am happy to feature your project at Love Your Creativity. Happy Easter.
ReplyDeleteLinda, thank you so much. I'm happy to hear that you enjoyed this project. I appreciate it and I'm happy to be part of your link party features.
DeletePrecious! I would have never guessed this to be a plastic container anything... you made the cups look like fine china! Such an adorable way to showcase flowers...
ReplyDeleteThank you so much. Your comments are always so sweet.
DeleteThose are just adorable and I love recycle bin crafts!
ReplyDeleteTania, thank you! 😊
DeleteAbsolutely love this,
ReplyDeleteAw, thank you so much. 😊 I'm happy to hear that you enjoyed this craft.
DeleteIce cream cups, who knew? That is such a creative idea Steph. They turned out so cute.
ReplyDeleteI appreciate you sharing this cute tutorial with Sweet Tea & Friends this month sweet friend.
Paula, thank you! 😊 It's amazing what we can do with everyday items. Completely transforming them into something new. Thank you for visiting.
DeleteI can't believe those are ice cream cups. I am so glad that you shared them. Makes me wish my kids were little again so I would have a good excuse to buy those cups! Have a wonderful week!
ReplyDeleteJennifer, thank you! Isn't it amazing what you can do with some paint?! I surprised myself at how well it turned out. Thank you for visiting. I hope that you have a great week. :)
DeleteYou come up with such lovely creations, Steph. These are so cute!
ReplyDeleteLisa, thank you! I appreciate it. Always happy to hear from you.
Delete