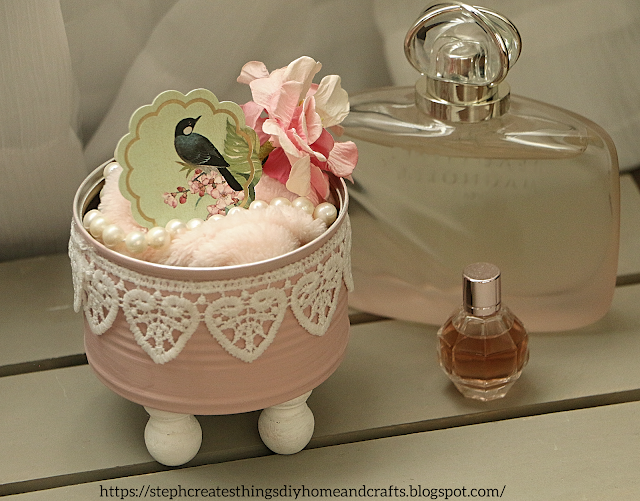
Hello everyone, I am excited to share this easy DIY project with you. We will be transforming a metal can into a charming shabby chic keepsake decor using a fabric heart garland, paint, and a few other materials. You will love the end result of this project. Let's turn your trash into treasure with this simple DIY project. I will provide a detailed list of materials below. If you're ready, let's start creating our keepsake decor.
Shabby Chic Keepsake Decor Video tutorial
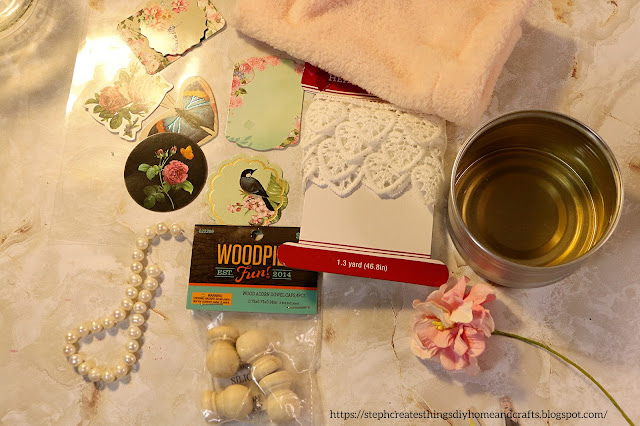
- One metal can
- Acrylic paint in Ballet Slipper by Waverly and white
- Four acorn wooden dowels with a 1’’ 3/8’’ hole purchased from Hobby Lobby
- Paintbrush
- Fabric heart garland from Dollar Tree
- Repurposed fabric from an old vest
- Decorative sticker pack from Dollar Tree
- Faux pearls
- Faux paper flower
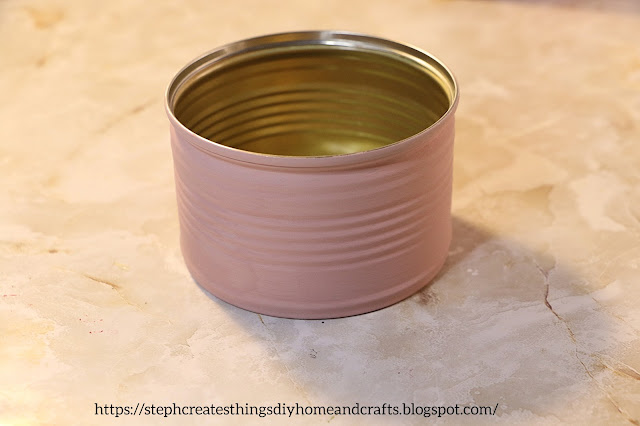
Applying paint to a metal can
Begin by taking a metal can and applying acrylic paint to it. Use a heating tool between each coat of paint. I recommend using acrylic paint with a matte finish and applying around two coats of paint.
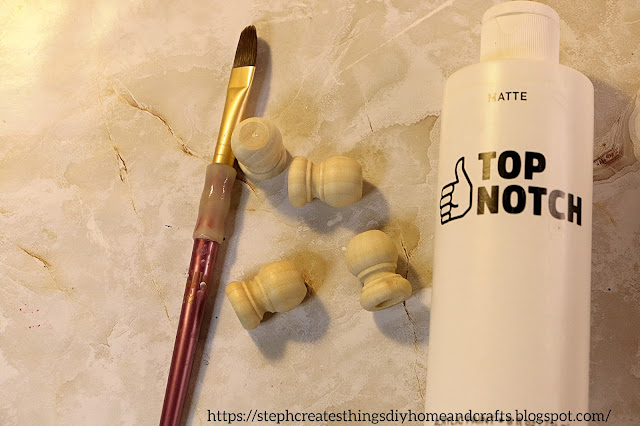
Applying paint to wooden dowels
After painting the can, take some wooden dowels and paint them with acrylic paint. I painted mine white as they will be used as the legs of the metal can.
Attaching the heart garland to a metal can
Next, take your metal can and use hot glue to attach the heart garland around the top section of the can. When wrapping the garland around, use scissors to cut the end of the garland as it meets up with the other end. You can either overlap the last two hearts or meet directly with the end heart and glue it off there.
Attaching wooden dowels to metal can
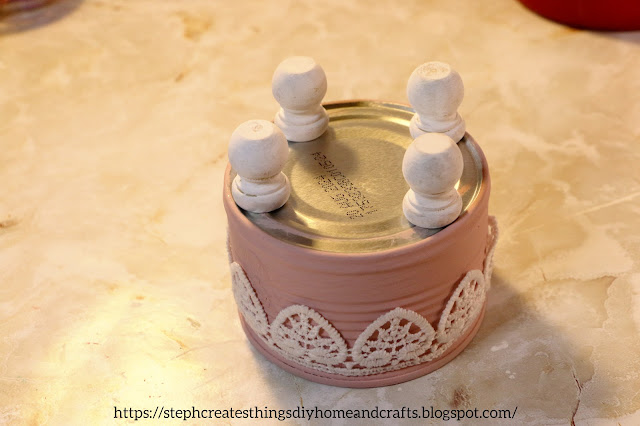
Now, attach the wooden dowels to the bottom of the can using hot glue. Flip the can over and apply the glue to the bottom before attaching the wooden dowels.
Decorating your keepsake decor
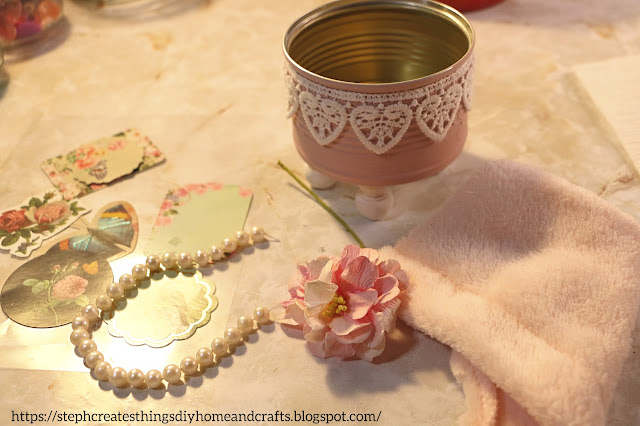
To decorate the inside of the can, I repurposed an old cotton vest. Cut a small section of the vest and fluff it out before adding it inside the metal can. You can also add items that you can easily change out if you want to change the decorations for a new look. I added a decorative sticker that I simply pressed against the cotton vest. Next, I took a paper flower and added it inside along with a strand of faux pearls.
That completes your keepsake decor. This project is simple, yet beautiful and perfect for displaying near jewelry or perfume or adding to a tiered tray with a similar style. It's also great for adding to a Valentine-themed tray. Thank you for visiting and creating this craft with me. I hope you enjoyed transforming an ordinary metal can into a shabby chic keepsake decor.
Wishing you all an amazing year!
You may also enjoy
Pin Share Save



.jpg)
.jpg)


super cute and useful thanks for sharing with Create-it!
ReplyDeleteJanet, thank you so much for visiting. :)
DeleteThis is so darling! Those little feet are killing me. I love the shabby chic look. Pinning to save and share. :) Visiting from the Crazy Little Lovebirds linkup.
ReplyDeleteJennifer, aw thank you. Aren't those little wooden feet the cutest, haha. I had to add them. I thought they were perfect. Thanks so much for sharing.
DeleteI'm glad you shared this post at the Will Blog for Comments #20 linkup! :) Hope to see you there again next week, too, sharing more posts (old or new!). Have a great week.
DeleteJennifer, thank you for hosting such a wonderful linkup. Happy to share at your linkup. 😊
DeleteThis is a real neat idea. The decorated cans can be used to store bathroom items, hair ties, q-tips and all sorts of small things!!
ReplyDeleteThanks for sharing!
Take care and best wishes.
Debra, thank you! Yes, those are all wonderful ideas. A great way to store items. Thank you for visiting. 😊
DeleteExquisite, as always and perfect for Valentine's or Galentine's!
ReplyDeleteCarol, thank you so much. 😊
DeleteSo cute Stephanie! I love the idea of filling it with goodies and giving this to your valentine. Thank you for linking up with the Home Imagined Link Party.
ReplyDeleteThank you! This was a fun craft to work on. I love a good upcycled craft.
DeleteThis is so pretty! I appreciate you sharing this tutorial and video with Sweet Tea & Friends this month dear friend.
ReplyDeletePaula, thank you. And you're very welcome.
Deletelove it, just the sweetest! thanks so much for sharing on craft schooling sunday!
ReplyDeleteThank you! 🙂 I'm happy to hear you enjoyed this.
DeleteHello, this such a sweet and very pretty craft you have made! And useful too! Would make a nice Valentine gift!
ReplyDeleteAw, that is very kind of you. I appreciate you visiting and sharing your thoughts on my craft. You're right, it would make a nice Valentine's gift as well.
DeleteHi Stephanie - I just wanted to stop by and let you know that your post will be featured in our Home Imagined Link Party tomorrow.
ReplyDeleteThank you! I appreciate you visiting to let me know. I'll be by tomorrow. :) I appreciate the feature.
DeleteVery cute and original. Saw it at Happiness is Homemade #523. My shares this time are #5,8,10. Enjoy the weekend and be well. Nancy Andres @ Colors 4 Health.
ReplyDeleteNancy, thank you so much. 😊
DeleteLovely little project. I love your use of the lace. I'm here from Vintage Charm...Sandi
ReplyDeleteSandi, thank you so much. I really enjoyed working on this project. Thank you for taking the time to visit. :)
DeleteLove this, so sweet.
ReplyDeleteClaire, thank you so much.
DeleteLove the repurposed can, visiting you from Saturday Sparks! I'm starting my own link party Tuesday, Jan 14 called Wednesdays in the Studio. I'd love to have you join! https://studio27byjenniferadams.blogspot.com/
ReplyDeleteJennifer, thank you! I'm glad you enjoyed the craft.
DeleteLove this upcycle, Steph! That lace is so pretty, I'll have to keep my eyes open for it at Dollar Tree!
ReplyDeleteBeth, thank you! Yes, definitely keep an eye out for it.
DeleteStephanie what an adorable piece! This is one of my features for this week's SSPS, thank you for joining us! Melynda @scratchmadefood!
ReplyDeleteMelynda, thank you very much! I'm happy to hear you enjoyed it.
DeleteI don't know if I'd believe it was "just a can" if I didn't know better. It's SO beautiful! I love that lace. Lovely, Steph! Thank you for sharing this post with us at the Will Blog for Comments #53 linkup--we hope to see you next week at #54, too! :)
ReplyDeleteAw, Jennifer you are always so kind. I appreciate that! Thank you. :)
DeleteWell, it's true. :D I'm stopping in again with congratulations! :) This post was one of the most popular at the Will Blog for Comments #53 linkup, so it will be in the spotlight for the next 2 weeks (starting today) and has been Pinned to Pinterest, too. There's a "This Blog Post Was a Featured Favorite" image there that you can save to share here with your readers to celebrate, if you like. Thanks so much for sharing this wonderful post with the readers at WBFC. We'd love to see you again next week, too!
DeleteJennifer, oh my! That makes me very happy. I'm happy it was enjoyed. Such a fun little craft. Thank you very much.
DeleteWhat a sweet little trinket box! The Valentine's vibe is especially darling and would be such a unique way to gift a valentine!
ReplyDeleteThank you! It was such a fun project to work on.
Delete