Create a beautiful floral arrangement in a wood crate from Dollar Tree! With this DIY tutorial, you'll learn how to design stunning floral creations using affordable supplies from Dollar Tree. Perfect for home decor or special occasions.
Video tutorial
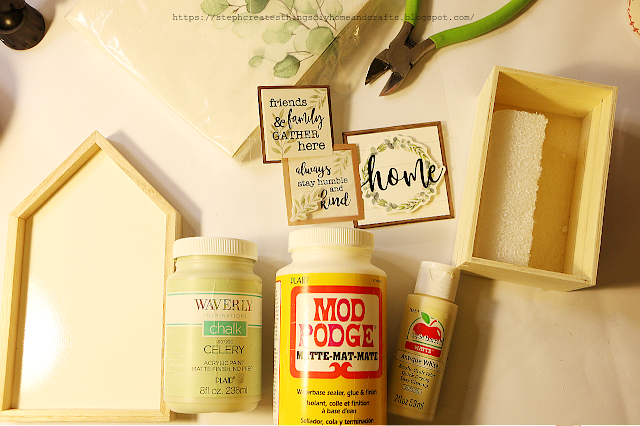
Materials
One wood house decoration
One wood crate
Paint
Faux floral
Mod Podge
Decorative napkin
Floral cutters
Scissors
Hot glue
Paintbrush
One pop-up sticker
One craft block
One craft knife
(Most of my materials listed can be purchased at Dollar Tree)
Start by applying paint to your wooden house decoration. I only applied my paint on the outer and inside surfaces of the wood.
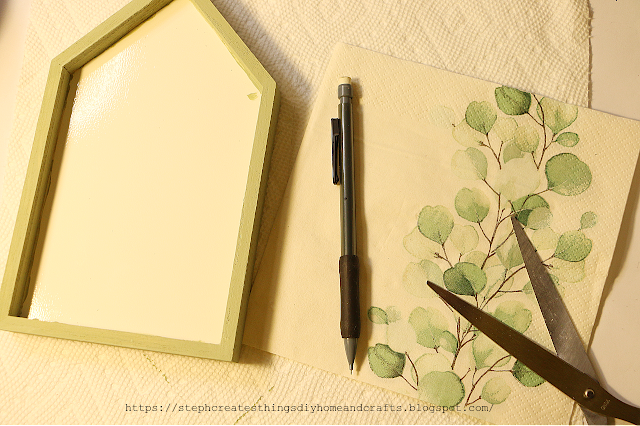
Next, take your decorative napkin, and use a pencil to trace the shape of your wood house onto the napkin. Be sure to remove the second layer of your napkin.
Once you have traced out the shape, take your scissors, and cut out the shape.
Afterward, take your Mod Podge, and apply a thin layer onto the inner surface of your wooden house.
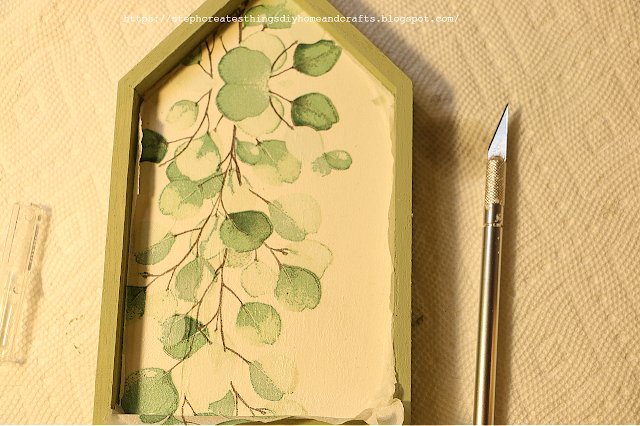
Place your napkin onto the inside of your wooden house, and apply Mod Podge over it. I used a blow dryer to help with drying. Using a craft knife, remove any remaining napkin around the edges.
Next, take your paint and apply it to your wood crate. I combined two of my paint colors and then applied around two coats of paint to my wood crate.
Take some hot glue, and glue your wood house on the inside of your wood crate.
Once you have done this, take your foam block, add just a little glue onto the bottom of the foam block, and add it to the bottom of your crate.
Next, take your floral cutters, and begin to cut your floral to size.
After, take your floral, and begin to gently press each floral stem through your foam block.
Once you have placed your floral, take your pop-up sticker, and add it to the front of your wood crate. I used just a little glue on the back of my sticker before I added it.
Your wood crate floral design is now complete! I hope that you have enjoyed this simple project. Be sure to let me know if you decide to create your very own. Thank you for creating with me. I'll see you soon!


Love this! It's absolutely adorable. I also really appreciate the step-by-step instructions for those who are a little craft-challenged like myself. :)
ReplyDeletePenny, thank you so much. I'm so happy to hear that you enjoyed the step-by-step instructions. I really hope to inspire more people to create no matter their skill level. Thanks so much for stopping by!
DeleteOh my gosh you found the perfect craft for these two Dollar Tree items! I've seen both many times but never put two and two together. It's precious. Thanks for sharing at Vintage Charm. xo Kathleen
ReplyDeleteKathleen,
Deletenow you can create one too using those two items!
I actually had to think long, and hard on this craft.
When it finally came to me, I was so excited.
Thank you so much.for stopping by.
I hope you have a wonderful week.
--steph
How cute, looks nice. Thanks so much for linking up at the Unlimited Link Party 78. Pinned.
ReplyDelete:) Thank you!
DeleteHi Steph! Welcome to the Share Your Style/French Ethereal family!! <3 I was really happy to feature your fun craft idea at this week's Share Your Style #354 for you. Super cute and I love that you could change the flowers for the seasons (I do this a lot nowadays).
ReplyDeleteThank you for linking up and I hope you have a great weekend,
Hugs,
Barb :)
Hello Barb!
DeleteThank you so much for the very warm welcome. I'm so happy that I found your page, and I really enjoying sharing my creations with all of you. Thank you so much for the feature. --I also love that the flowers can easily be changed out during a new season. Thank you so much for stopping by.
Very pretty Steph. So romantic. The directions are precise. I am happy to feature your DIY Wood crate floral design at Love Your Creativity. Happy Sunday.
ReplyDeleteLinda, thank you so much. I appreciate it so much. Happy Sunday!
DeleteOh, I love this Steph! So cute and clever!
ReplyDeleteThank you so much! I'm always happy to hear that. :)
DeleteThat is so adorable!
ReplyDeleteJoanne, thank you so much. 😊
DeleteSo cute and creative! Great tutorial too~ visiting from My Wee Abode
ReplyDeleteJenna
Thank you so much. 😊 I appreciate you visiting. I'm happy to hear you enjoyed the tutorial as well.
Deleteit is pretty! I love the idea <3 PINned :)
ReplyDeleteThank you so much. 😊
DeleteThis is adorable!!!!
ReplyDeleteStacy, thank you.
DeleteStephanie,
ReplyDeleteThis is so cute. You are so creative. Congratulations, you are being featured on TFT. I hope you stop by. https://eclecticredbarn.blogspot.com/2025/04/more-spring-flowers-on-tft.html
Hugs,
Bev
Bev, aw you're so kind. I appreciate it! I'll be sure to visit tomorrow. Thank you for letting me know.
DeleteOh, so pretty!! Thanks for joining in on Home Matters Linky Party! I will be featuring your post this week! #HomeMattersParty xx
ReplyDeleteJoy, thank you very much. 😊
Delete