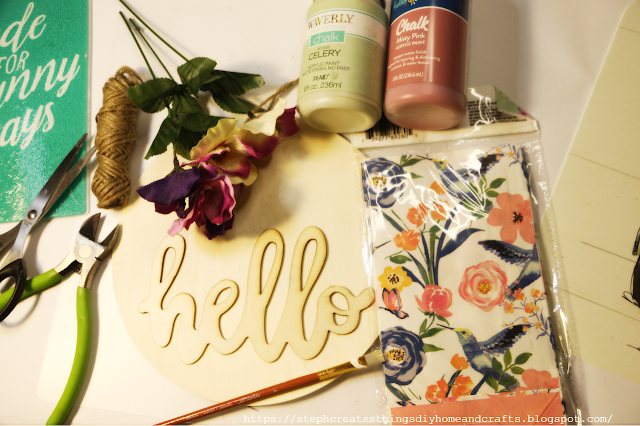
Hi everyone! If you're new to my blog, I'd like to say welcome. I'm so happy to have you here. Today we are decorating a hello wooden sign from the Dollar Tree.
Video tutorial
Materials
- One round hello sign, purchased at Dollar Tree
- Faux floral, purchased at Dollar Tree
- Paint (Misty Pink and Celery, I'm using chalk paint)
- One decorative treat bag - I purchased a pack of ten from Dollar Tree
- Scissors
- Floral snips
- Mod Podge
- Paintbrush
- Twine
- Hot glue
First, take your round "hello" sign and apply your paint. I am using chalk paint called "celery." I gave it around two coats of paint and used my heat gun to help dry it a little quicker.
First, take some paint and start painting your letters. I'm using a paint called Misty Pink and a smaller paintbrush for this step. Apply about two coats of paint and then set it aside to allow it to dry.
Using scissors, begin to cut out any decorative designs on your paper treat bag. I found the hummingbird design at my local Dollar Tree. Cut out the designs and set them aside.
Now, you are ready to apply some Mod Podge to your cut-out designs. Use a paintbrush to apply a small amount of Mod Podge to the back of each cutout design you decide to use. After applying it to the back side, flip your cut-out designs over and place them onto your wood sign. Gently press each one down and smooth them out.
Using your paintbrush, apply some Mod Podge over each cutout design once you have added it to your wood sign. You can use a heat gun or a blow dryer to help dry your Mod Podge.
Next, use floral snips to cut the flowers, removing the stems from each one. Then, use hot glue to attach the flowers to the sign.
Your hello wooden sign has been completed! I enjoyed how quick and easy it was to decorate this sign. Let me know if you decide to create your very own design. I'll see you soon.
Pin/Save/Share


Looks nice. Thanks so much for linking up at the #UnlimitedLinkParty 102. Shared.
ReplyDeleteThank you! 😊
Delete