Fun Halloween Canvas Art With Mini Lights

 Get into the Halloween spirit with these fun and kid-friendly canvas art projects using mini lights. Discover easy and creative ways to create spooky and festive decorations for the season.

Two canvas art decorations painted purple with hallow decorations and LED lights

Video tutorial

Hey there!  Since Halloween is just around the corner, I thought it would be fun to create some canvas art together. My girls love painting and expressing their creativity, so I think they'll enjoy this. This craft is great for parents to work on with their children, or you can make it on your own. 

You won't need many materials for this project. Just make sure to supervise your children when using scissors and adhesive. And if you're using hot glue, be sure to handle it yourself since it can get very hot.

Materials such as, canvas, craft branches, paint, sponge brush, and halloween decor


Materials needed for your canvas Halloween art

  • Glitter Branches -Purchased at Michaels: We are using orange, and purple for this craft
  • Paint-You can use any color
  • Mini LED wire lights-We are using orange and green lights
  • Any Halloween Decorations-We used a witch hat, a glitter black cat, a wooden pumpkin, and a wooden cat/All of our decorations came from our local Michael's store
  • A pack of craft googly eyes
  • Two Canvases-I was able to find a 2-pack that was discounted Purchased at Michaels 
  • You will need: sponge brushes, paint brushes, and adhesive- you can use any adhesive.
  • Optional hot glue 

As mentioned above (If you do use hot glue for this project, and children are present during this craft, parents be sure that you are the one using the hot glue since it can be very hot)


Applying paint to canvas

Start by painting your canvas using two colors. Try combining them to create new shades. For example, my oldest used a mix of blue and pink, while my youngest used blue and purple.

Canvas being painted purple

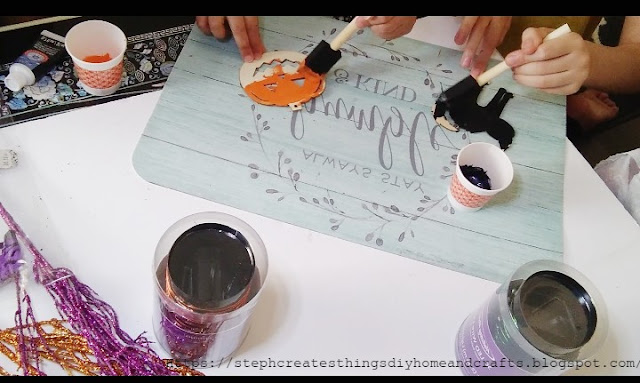
To start, apply paint to the front, top, bottom, and sides of your canvas. Once you're done painting, set it aside and let it dry completely. While your canvas is drying, you can paint any decorations that need it and wait for them to dry as well.

Craft pumpkin and cat being painted

Attaching decorations to canvas

Once everything is dry, you can start gluing on your decorations. Take some adhesive, and glue them onto your canvas. For this, you can use any all-purpose craft adhesive. 

Using some scissors, clip your glitter branches to the size that you want on your canvas. Get creative with your branches, and add them onto your canvas. 

Hand showing craft branches being cut with scissors. Canvas art on table with decorations

Next, take your googly eyes, and add them to your canvas. 

Hand adding craft googly eyes to painted canvas

Attaching LED wire lights and branches

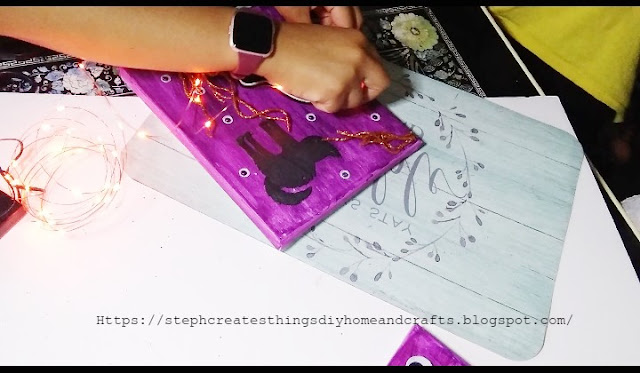
Now that we have prepared our LED wire lights, it's time to add them to our canvas. You can use a small amount of hot glue to secure the lights in place, but please exercise caution if you're working around children.

Be creative with your light placement, weaving them around the branches and other decorations on your canvas. Your Halloween canvas art is now complete! You can display it in any room of your choice. We're thrilled with how it turned out, and my girls love turning on the LED lights in their room. We hope you've enjoyed creating this fun and hands-on craft.

Completed craft showing painted canvas with craft googly eyes, black cat, branches and LED lights

Completed canvas art with LED lights, craft googly eyes, branches and glittery black cat decoration

Collage showing canvas art displayed with lights on

Pin/Save/Share

Pinterest pin showing Halloween canvas art with text


Comments

  1. Those are so cool and creative! ❤ I would love to "attempt" (LOL) to do something as cool with my nieces. I'll give it a try and let you know how it things turn out. Thank you for sharing, Stephanie!

    ReplyDelete
    Replies
    1. Tai, I would love to know how it turns out if you do go through with creating them with your nieces. I am sure you will all have so much fun with it. :) Thanks so much for stopping by.

      Delete
  2. Ok, you already know what I'm going to say, right? Love the artwork first of all but the fact that these light up makes them even better!! Thanks so much for linking up at #AThemedLinkup 168 for All Things Halloween. Pinned.

    ReplyDelete
    Replies
    1. Hi Dee, yes I knew that you would love those lights! --haha. Thank you so much for visiting and pinning. :)

      Delete
  3. CONGRATS Stephanie! Your post is FEATURED at #AThemedLinkup 169 for Denim, Burlap, or Lace Crafts and Décor from the previous linkup for All Things Halloween.

    ReplyDelete

Post a Comment

Thank you so much for taking the time to leave a comment. Your comments brighten my day. I hope you know it is appreciated. I do my best to respond to every comment. If you have a question, please feel free to ask!

Popular posts from this blog

Winter Floral Tray: Easy Steps Using Dollar Tree Cutting Board

 Hello everyone! I’m excited to share my latest craft with you all. Today, we will be creating a floral winter tray using a bamboo cutting board from Dollar Tree. I often come across these bamboo cutting boards at my local Dollar Tree, and this time, I decided to pick one up. This craft is simple and budget-friendly. Join me as we make a winter floral tray using just a few materials! Video tutorial Materials One bamboo cutting board Winter faux foliage Paintbrush Hot glue Four wooden beads Acrylic paint Optional faux mini trees Begin by applying acrylic paint to the wooden cutting board. I decided to mix two colors together: white and English ivy green. Next, take four wooden beads and use hot glue to attach them to the underside of the board. I had a few extra beads from a previous project. After that, attach the faux foliage to the wooden board using hot glue. Depending on how you want to display the items on your board, arrange the foliage around the edges. This will ensure enou...

Upcycled glass jar design with paper floral embellishments

 Hello everyone! How are you all doing? I hope you are doing well. If you're anything like me, I have a few glass jars that I have washed and set aside, waiting for the perfect opportunity to use them in a craft. Today I am going to share a simple upcycled project with you. We're decorating a glass jar and adding paint, Mod Podge, and floral embellishments. Video tutorial Materials One glass jar- I am reusing a pickle jar Floral embellishments- I am using the paper craft flowers Mod podge Acrylic paint- I am using Waverly no prep Matte finish Scissors Paintbrushes Optional-Twine Applying paint to the glass jar Begin by taking your paintbrush and applying a thin layer of your paint to your jar. Add a lighter paint application if you want to add a battery-operated candle to your jar. This way you will still be able to see light through your jar. Adding Mod Podge and paper flowers to a glass jar Next,  after applying your paint, take your flowers and begin to add them using your ...

Fall Floral Display Using Glass Yogurt Jars

 Hi everyone. I hope that you are all doing well. I am patiently waiting for Fall to arrive. Fall is my favorite season of them all. I love the golden leaves, hot apple cider by the fire pit, sitting out in the evenings roasting marshmallows. It is simply the best for me. Do you have a favorite season? What do you enjoy about it?  Today I am sharing a quick upcycle craft. I decided to use my glass Oui yogurt jars. I love these little jars and what a perfect way to reuse them. I will show you how to decorate these jars using mod podge, and acrylic paint. We will add faux flowers to each glass jar as well. Video tutorial Materials  Three small glass jars I'm reusing my Oui glass yogurt jars Twine Acrylic paint Paintbrushes Mod podge Decorative napkin Faux floral and foliage Decorative tape/Washi tape Scissors Applying paint to glass yogurt jars Begin by applying your paint to two of your glass jars. Each jar needed around three coats of paint.  I used acrylic chalk pai...