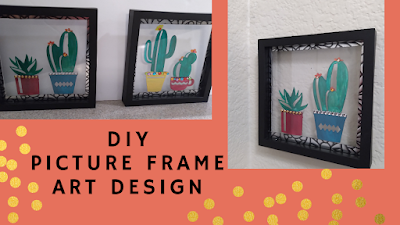
Materials needed
wall art creations art
Two picture frames
Paint
Scissors
Tile decal
craft gems
Ruler
Total cost $8
Video tutorial
Start off with your tile decal, and ruler. Using your ruler, create straight lines on your tile decal. If you have two frames, you will want to create eight sections in total. Each tile decal will be for your picture frame glass.
Now that you have made the lines for each section, you can begin cutting each section out.
Once all sections are cut out you can now place them on the four sections of your picture frame glass.
(If you are making two frames, apply the tile decal on both).
There should now be a border around your glass.
You're ready to start painting your wall art. I picked my wall art up at my local Dollar Tree store. The backing is sticky, and it was just what I was looking for.
When applying the paint, you will probably end up having to apply around four coats of paint.
Allow your art to completely dry. Once it is all dry, you can now place them onto your picture frame glass, and place it into the frame. If you have craft gems you can apply them to your art.
All done! Yes, it is really that simple. I hope that you have all enjoyed this simple frame art design.
I'd love it if you created it with me! Be sure to look through some of my other hands-on crafts, and see if there is something you would like to create!


Comments
Post a Comment
Thank you so much for taking the time to leave a comment! Your feedback truly brightens my day, and I appreciate it. I always strive to respond to every comment. If you have a question, please don’t hesitate to ask! Please note that spam or comments that do not provide value will be automatically removed. Thank you!